MemberPress HelpScout add-on will import your members' data directly into tickets they open in your HelpScout.
This document will show you how to integrate HelpScout with MemberPress and explain how the integration works.
How to Set Up The Integration?
Setting up the integration requires an active MemberPress HelpScout add-on on your site and a custom HelpScout app.
Install MemberPress HelpScout Add-on
To start, install and activate the add-on by following these steps:
- Navigate to Dashboard > MemberPress > Settings > Add-ons.
- Browse add-ons or search for HelpScout using the search tool.
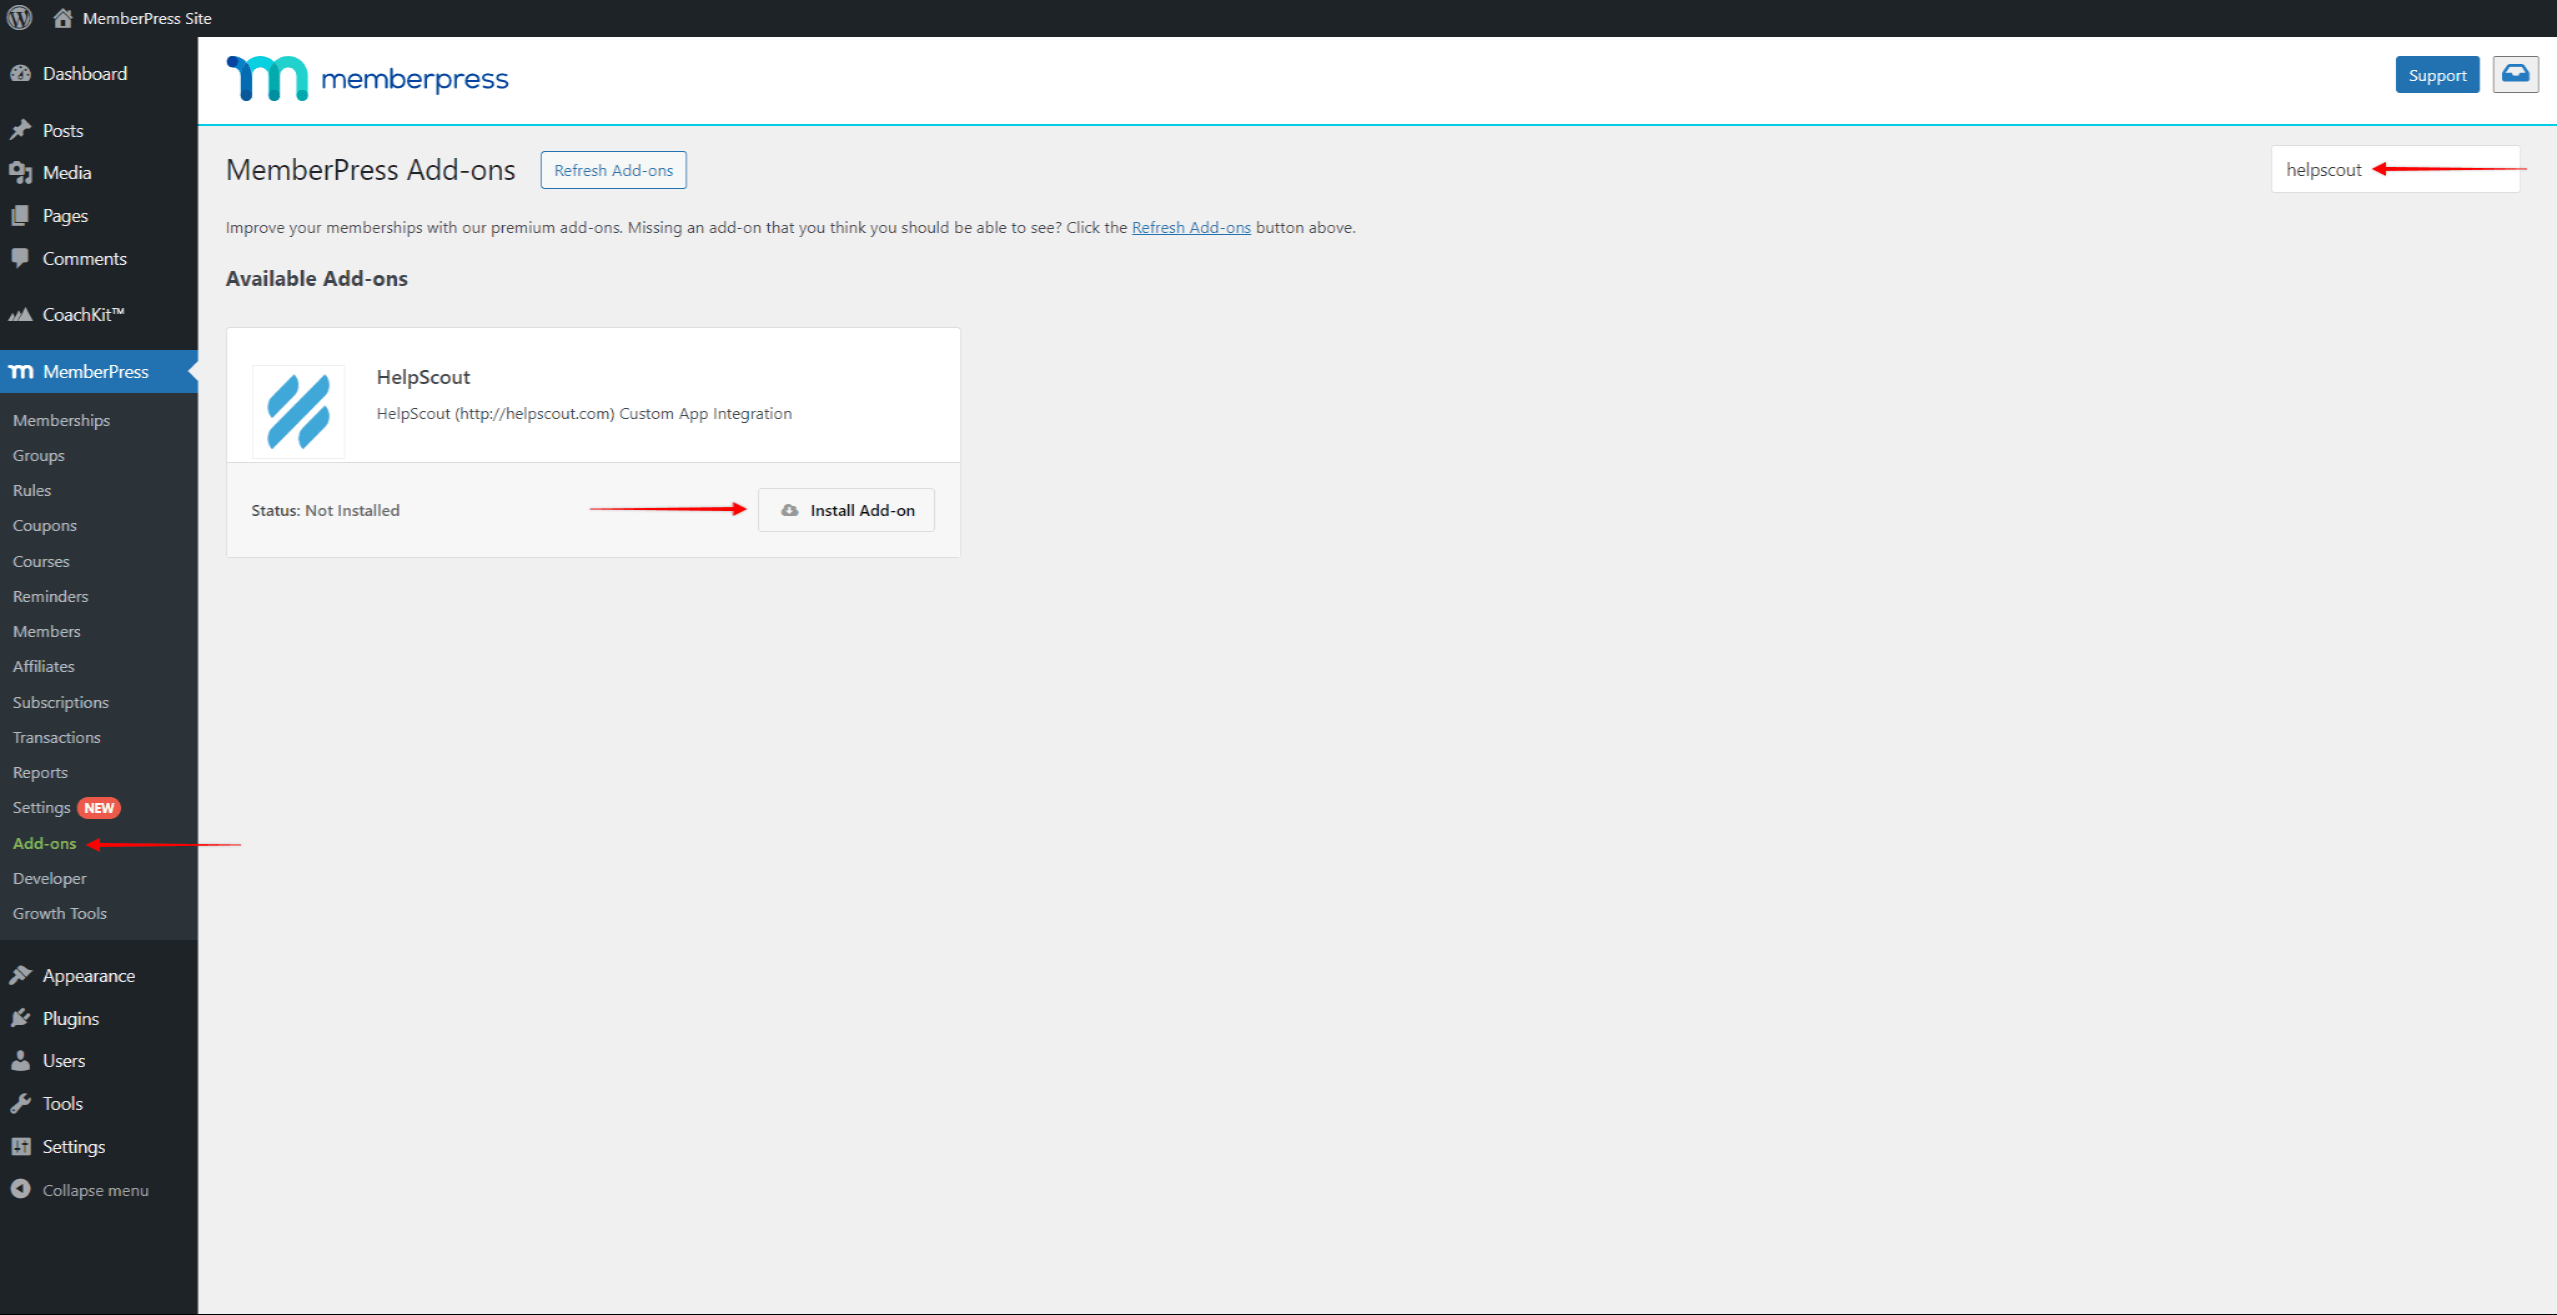
- Once you find the add-on, click the Install Add-on button. This will automatically install and activate the add-on.
HelpScout Custom App Details in MemberPress
Now that you activated the add-on on your site, you will need your integration details:
- Navigate to Dashboard > MemberPress > Settings > General tab, and scroll down to the HelpScout section.
- Check the Enable HelpScout App option. This will show you the custom app details you will need for the integration.
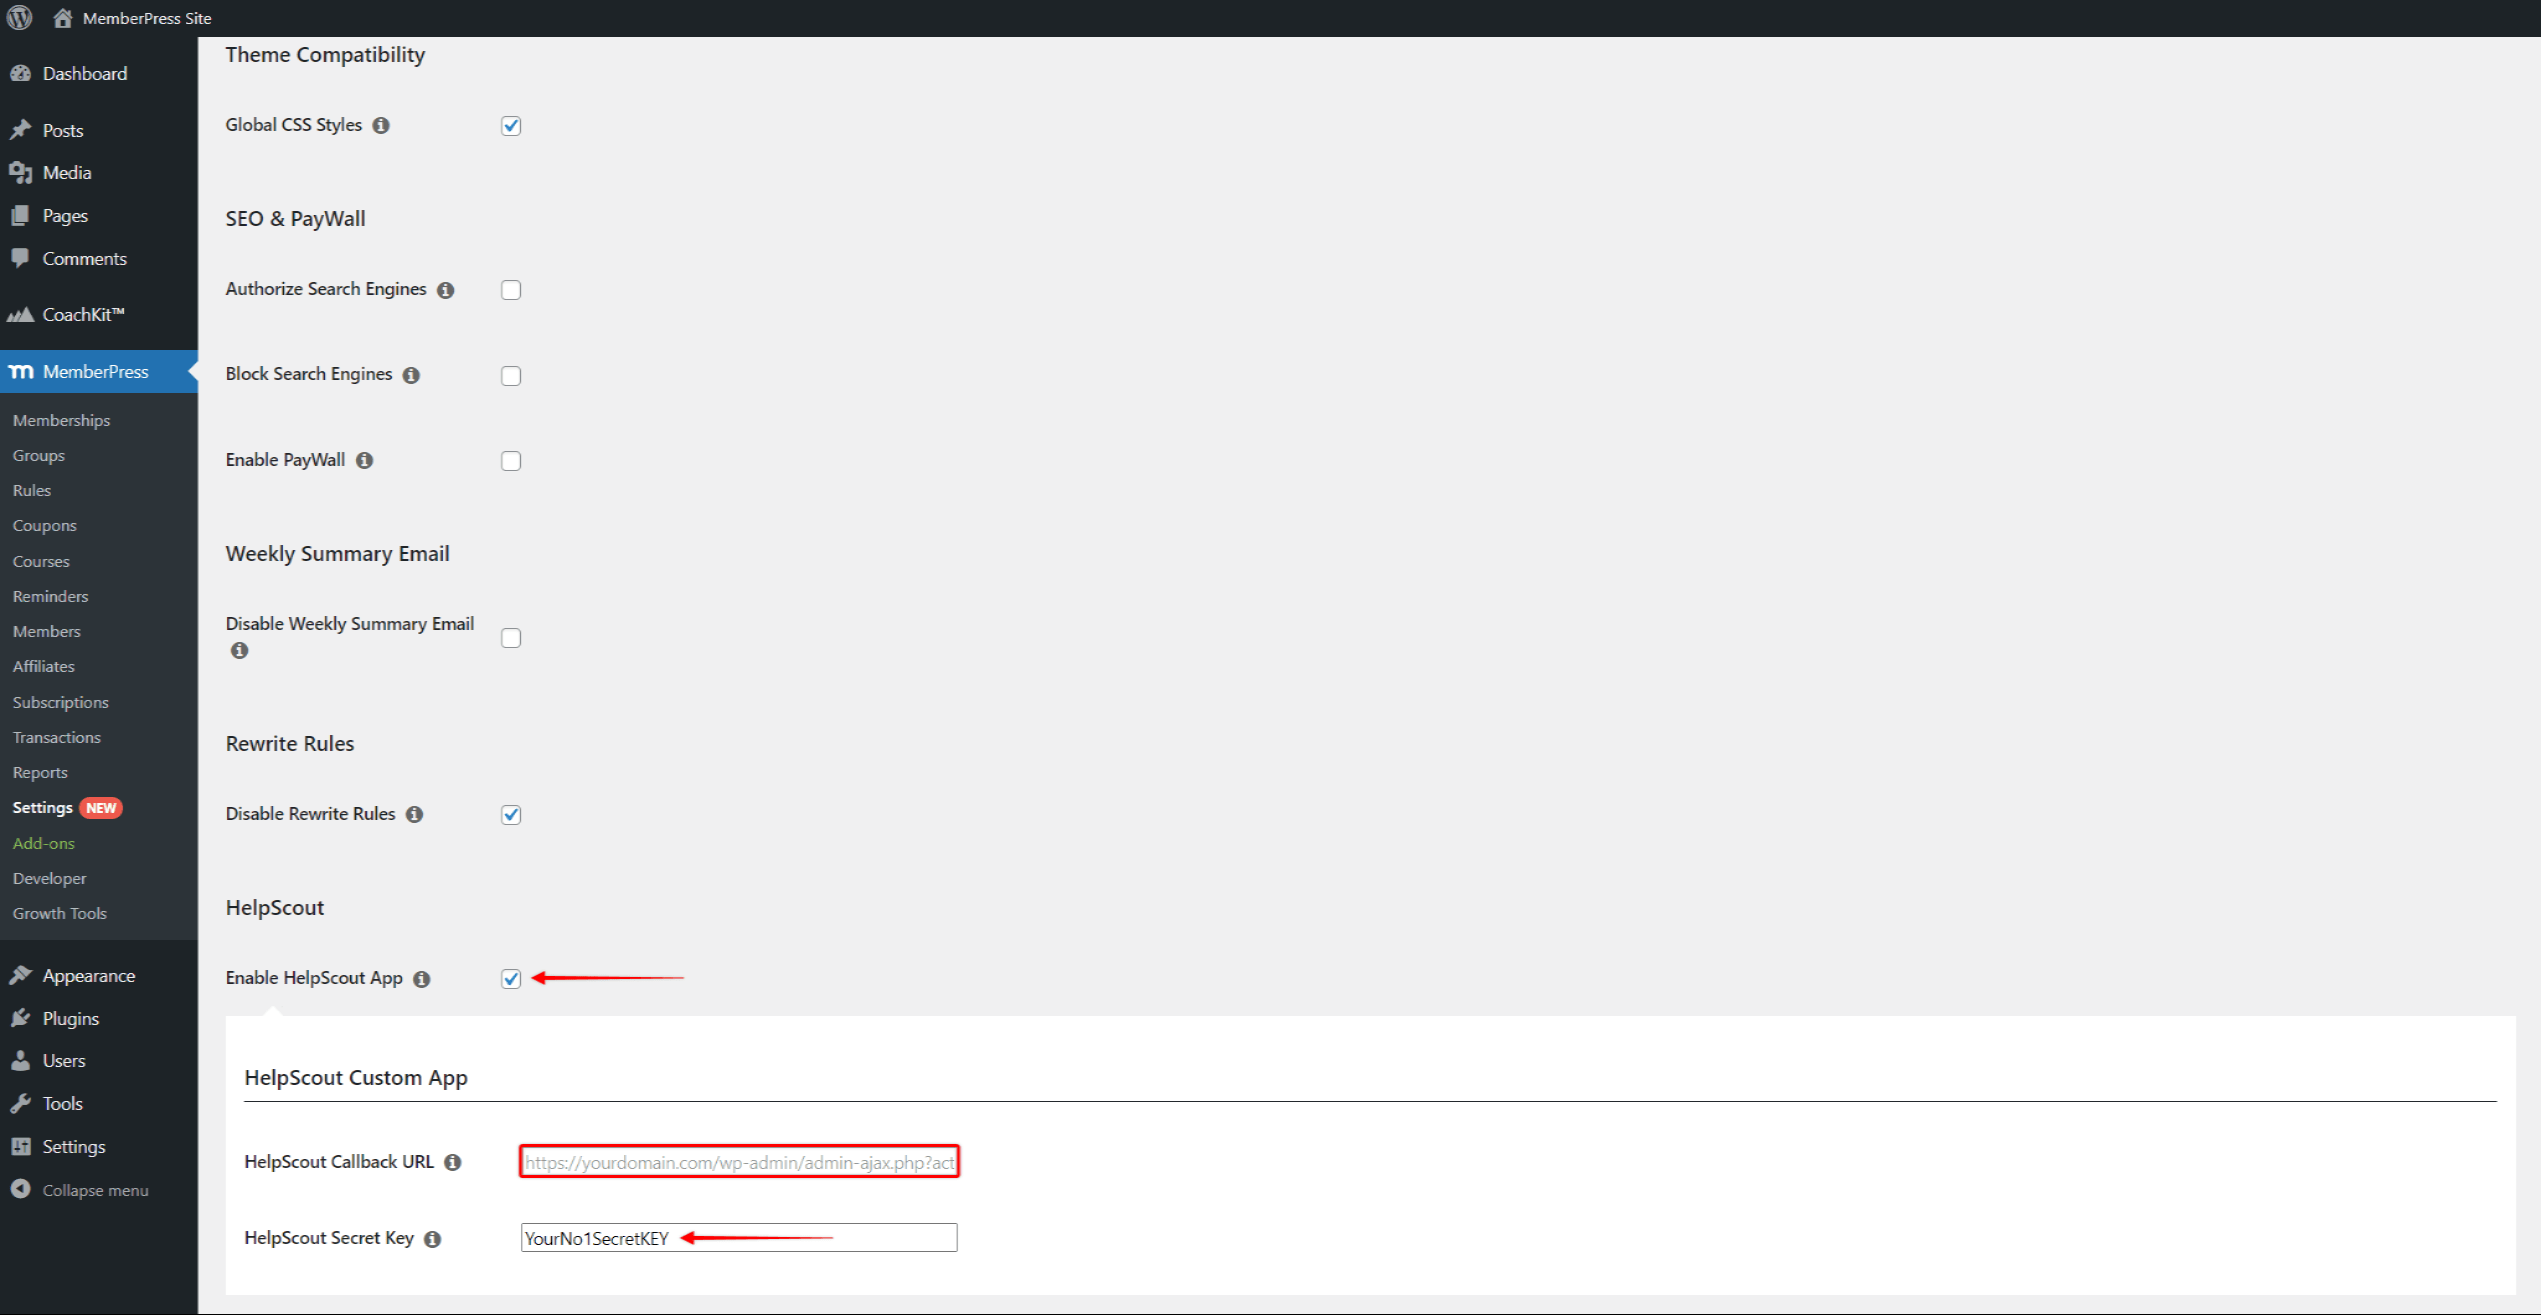
- Here, you'll find your HelpScout Callback URL which will be automatically generated.
- Also, you will need to set your HelpScout Secret Key. You can type in any key you want.
- Scroll down and click Update Options to save your HelpScout add-on settings.
You will need your HelpScout Callback URL and the HelpScout Secret Key to create a custom app in HelpScout.
Create A Custom App in HelpScout
To integrate MemberPress with HelpScout, you'll need to create a custom app in the HelpScout account.
- Log in to your HelpScout account as an administrator (or the account owner).
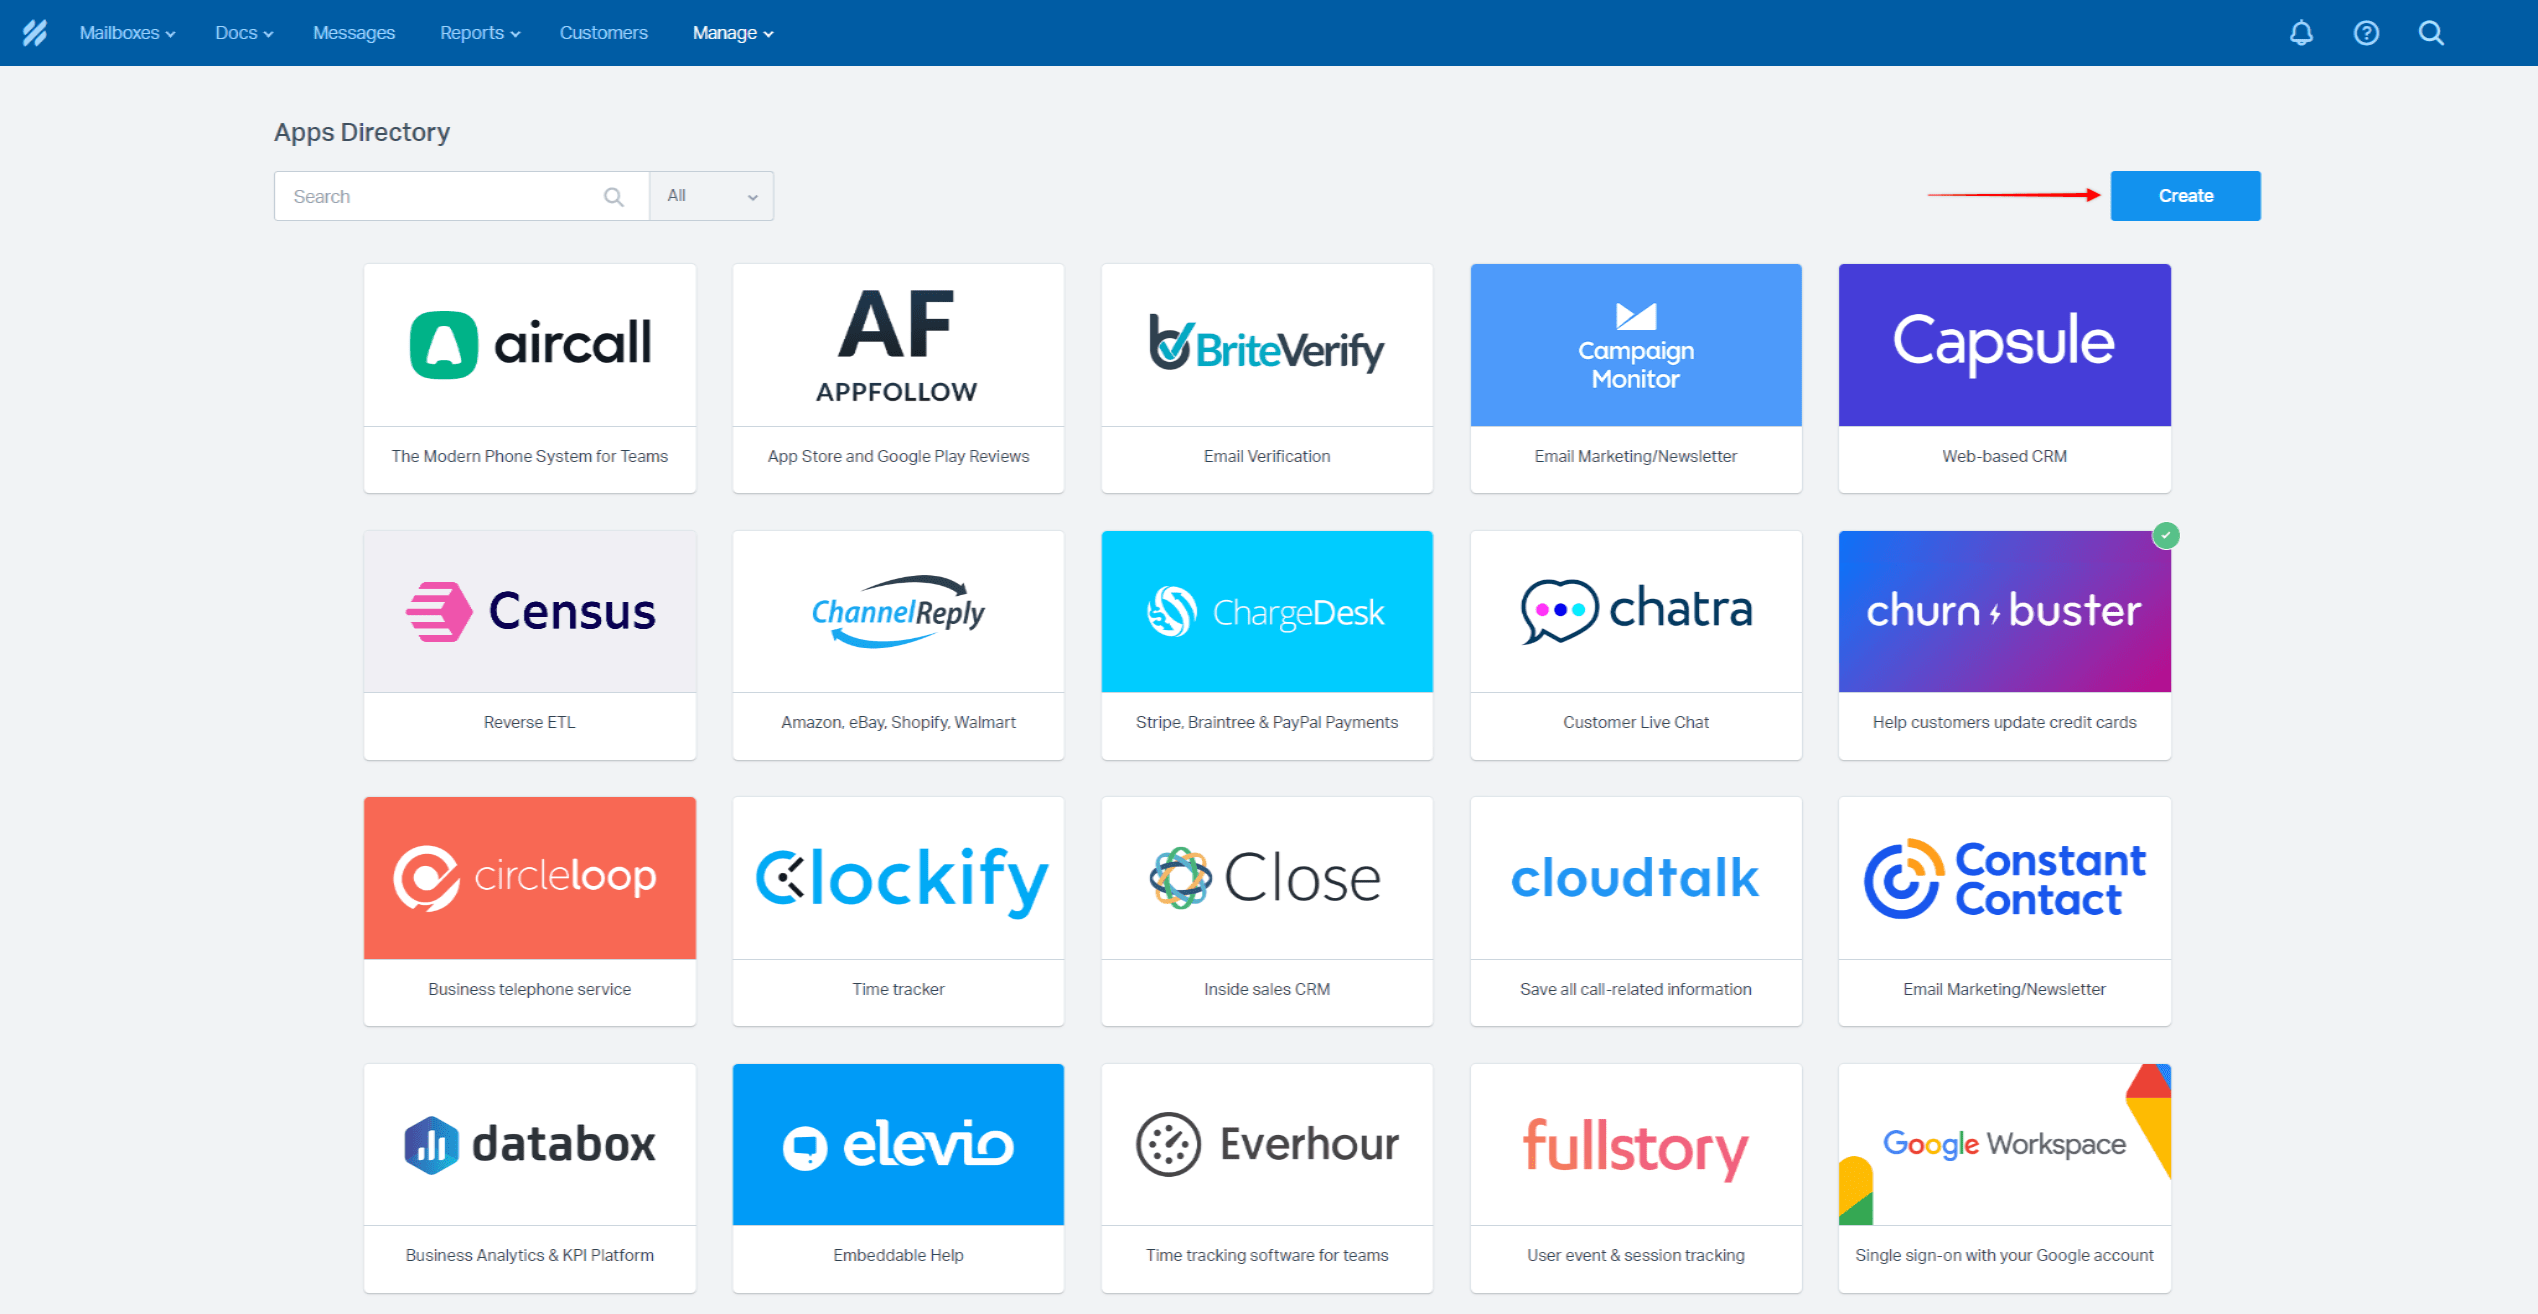
- Navigate to Manage > Apps, and click the Create button in the top-right corner.
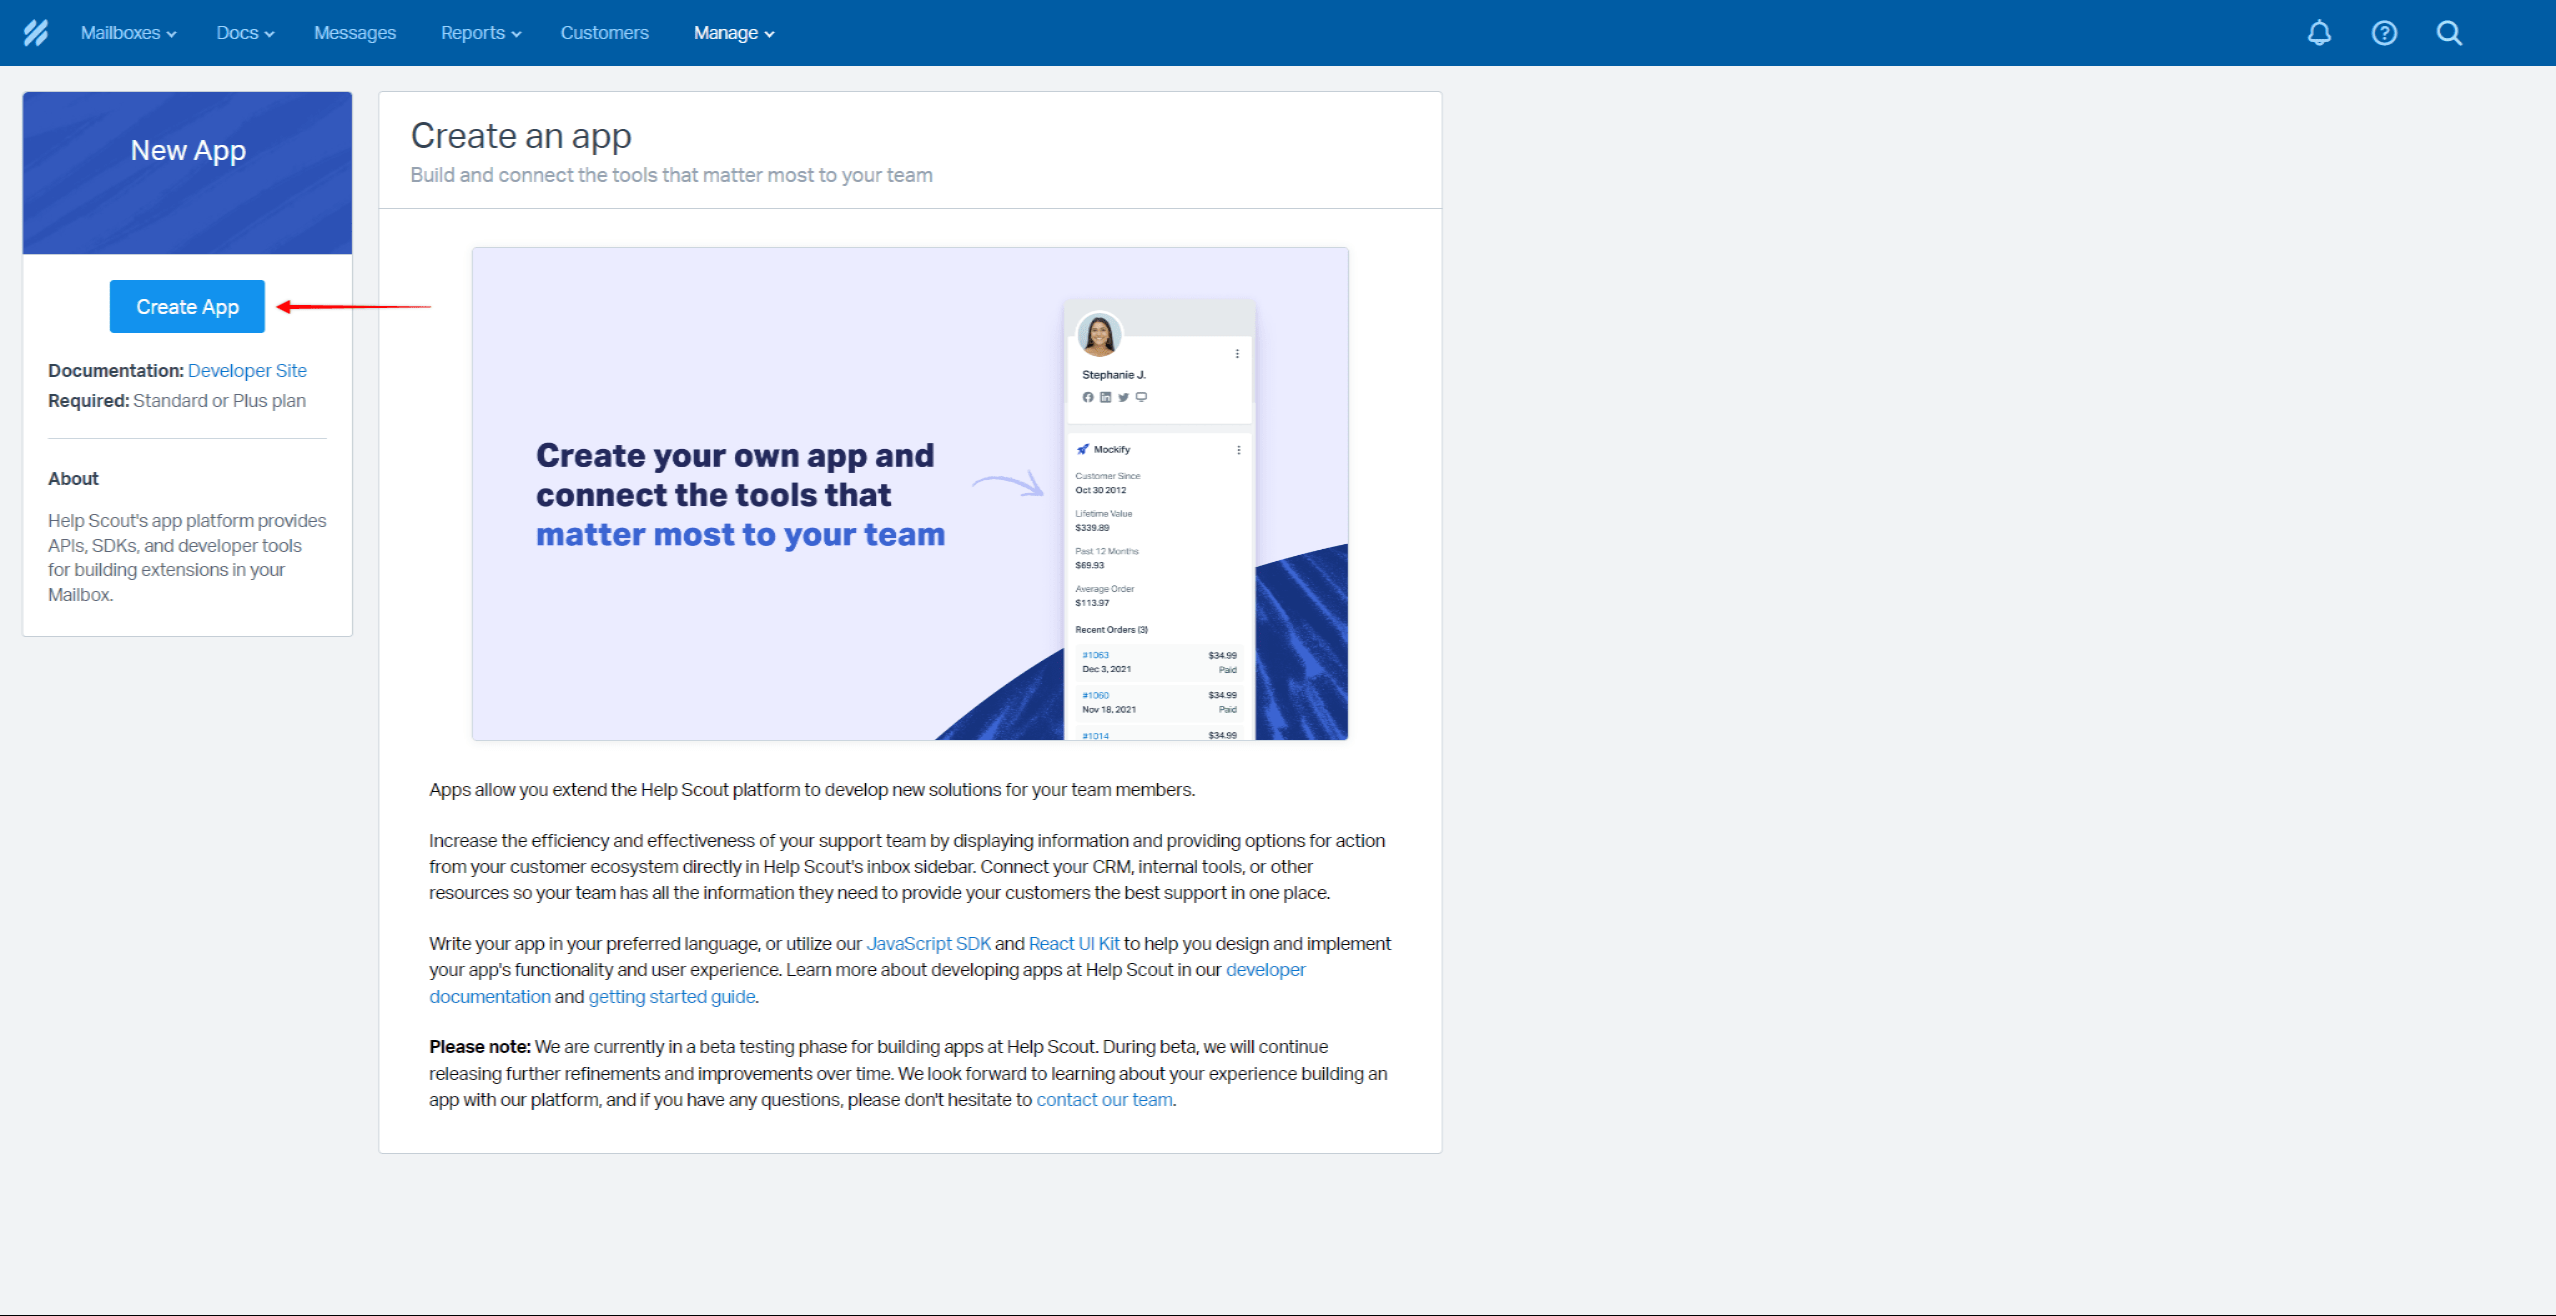
Next, click Create App on the left side to start the app setup.
- To create a custom app, fill in the details in the form:
- App Name: give your custom app a name. You can choose any name here;
- Callback URL: copy the HelpScout Callback URL from your MemberPress settings and paste the URL here.
- Secret Key: copy the HelpScout Secret Key you added to MemberPress settings, and paste it here.
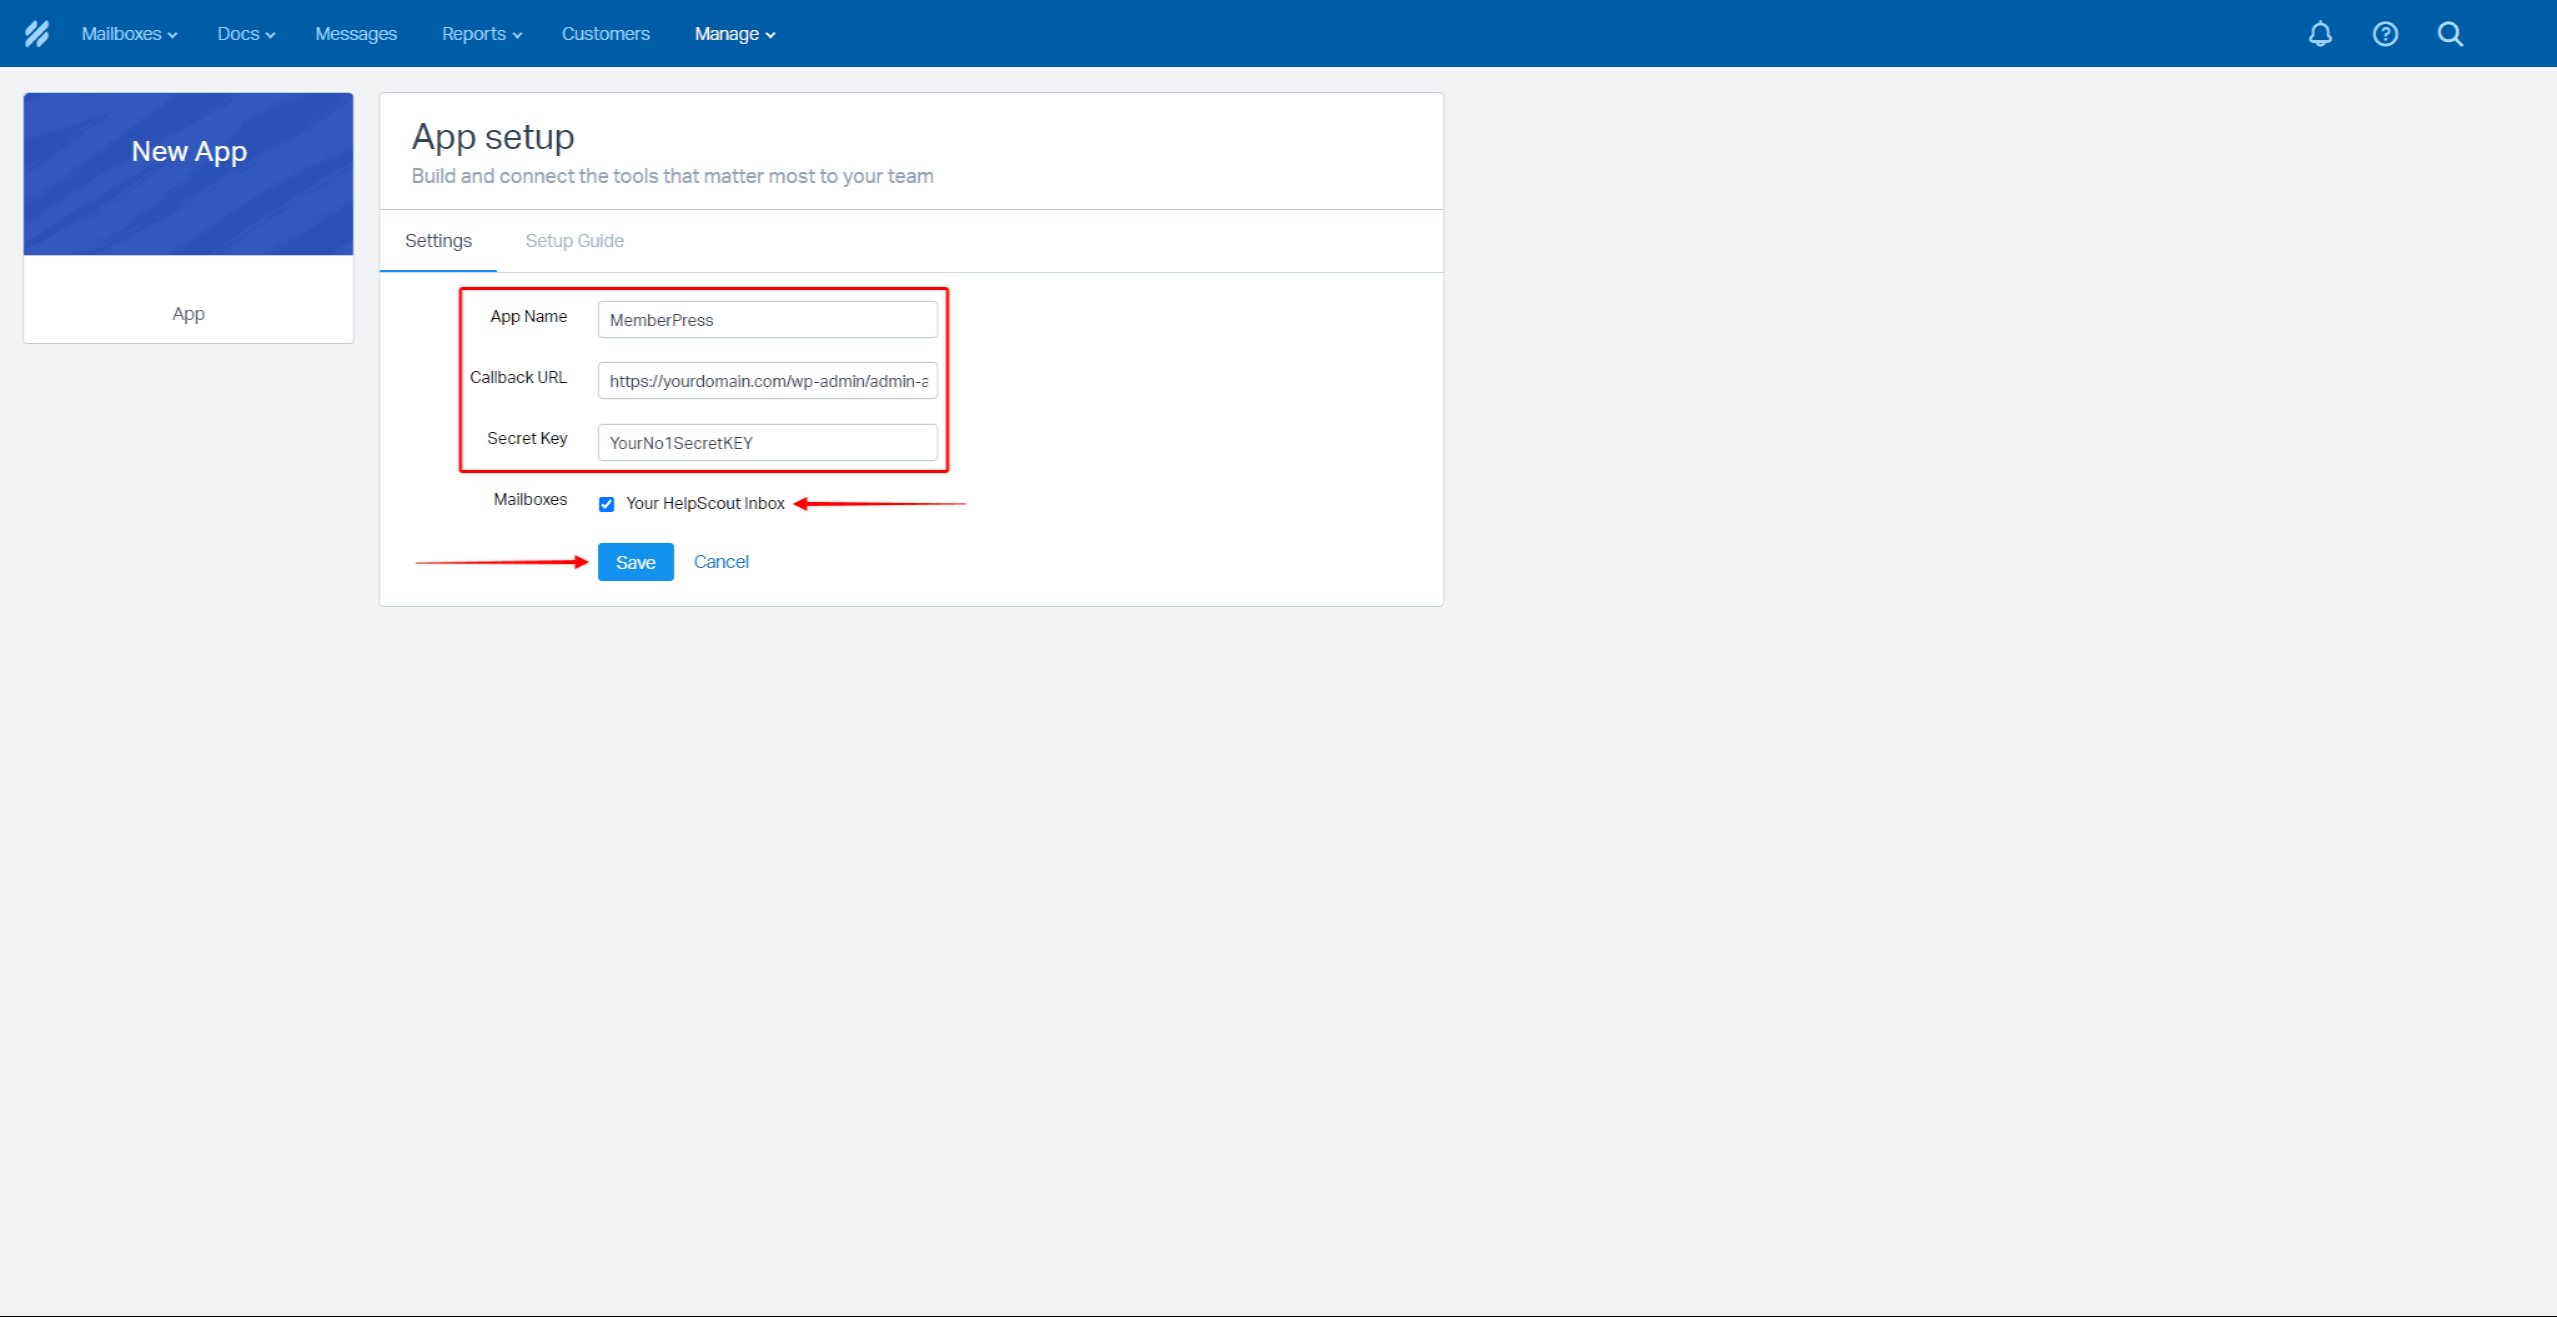
- Choose which MailBoxes should MemberPress be connected to.
- Click Save, to create the app.
You completed the integration process by creating the HelpScout app.
Using The Integration
With the integration all set, your tickets will now contain the users' membership-related data.
Therefore, whenever any user submits a ticket, HelpScout will display MemberPress data for that user in the right-hand sidebar.
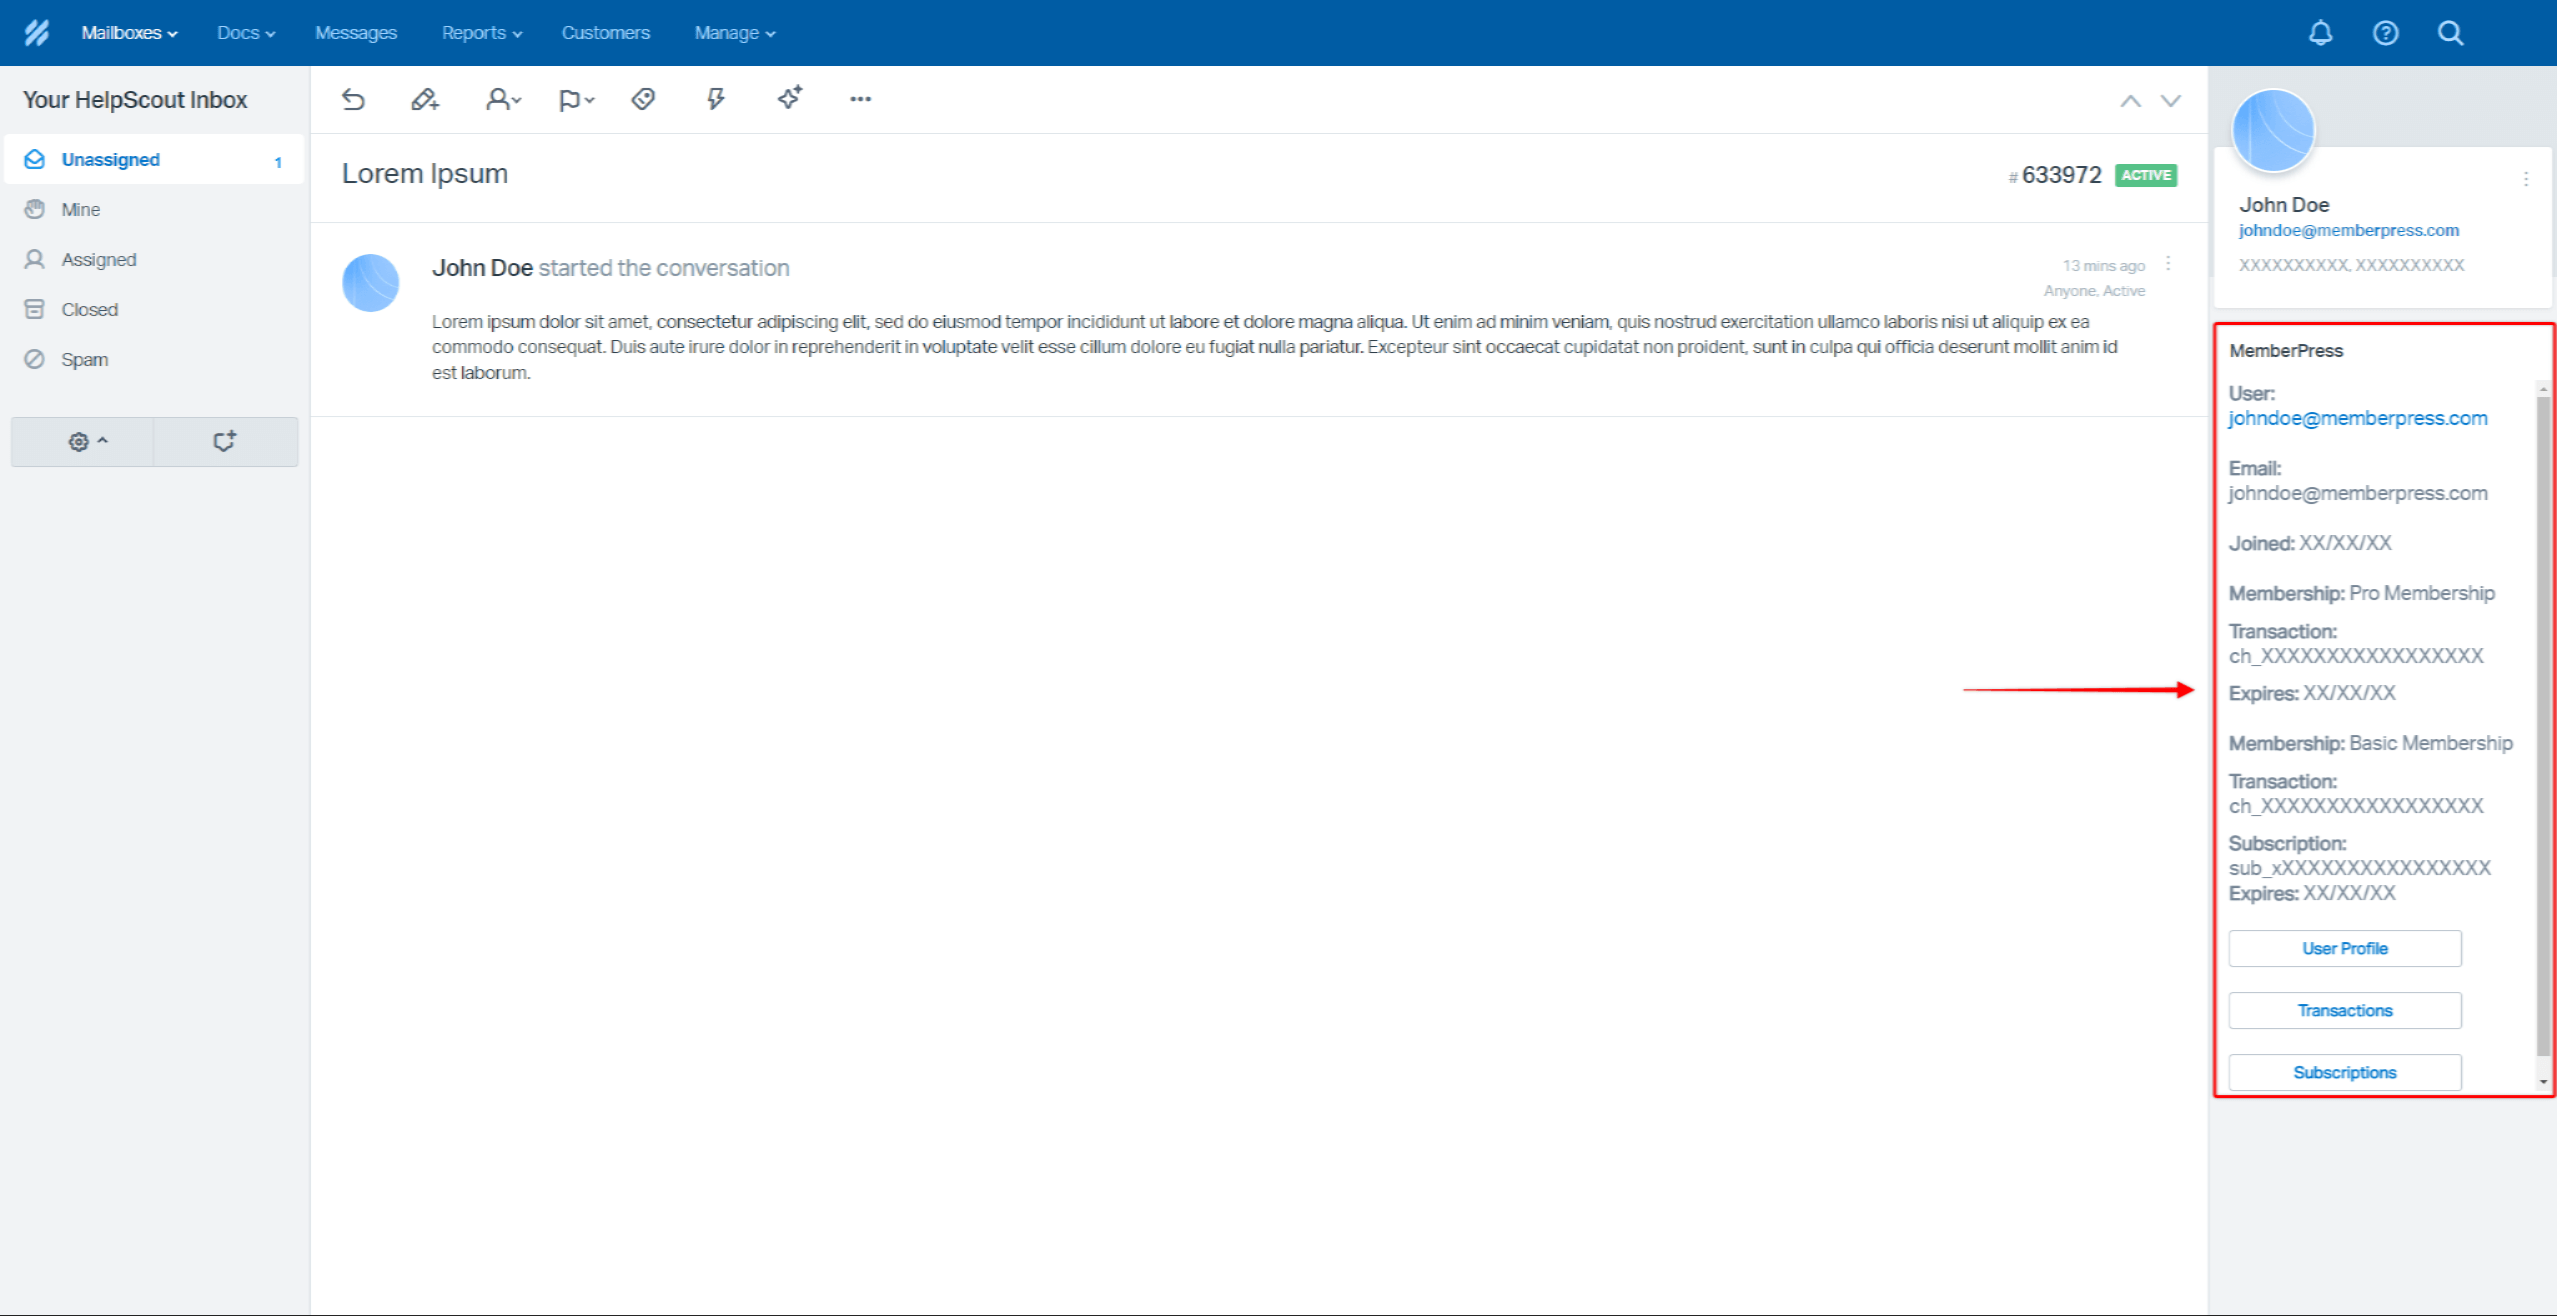
The user data transferred from your MemberPress site to HelpScout will include:
- User: the WordPress username related to the user;
- Email: the email related to the user in MemberPress;
- Joined: the date on which the user was created on your site;
- Membership: the name of the membership the user is subscribed to;
- Transaction: the transaction related to the user's membership;
- Subscription: the subscription related to the user's membership.
In addition, the integration will display three buttons:
- User Profile: direct link to the user's WordPress profile on your site;
- Transactions: direct link to the list of all user's transactions in MemberPress;
- Subscriptions: direct link to the list of all user's transactions in MemberPress.


