Overview
Groups are a unique feature of MemberPress. Groups allow you to quickly and painlessly set up a nice features comparison page for users to get a quick snapshot of the various Memberships you offer. Setting up a Group in MemberPress also allows your users to upgrade or downgrade with our convenient Change Plan popup explained below. Groups show up on your site just like a WordPress page would. You should give the Group page a title. The content is optional as the page will display the Membership pricing tables by default. Anything you add as content on the group page will be shown above the membership pricing table. Below is a screenshot of what a Group pricing page can look like.

Video Tutorials
Basic Overview: How to Create a Group in MemberPress
Basic Overview: How to Modify Price Boxes in MemberPress
In-Depth: How to Create a Group and Pricing Page in MemberPress
Group Options
Upgrade Path – When this is set, members can only subscribe to one Membership in the group at a time. If this is unset, members can subscribe to each Membership in the group simultaneously.
Reset billing period – Shown only after enabling the Upgrade Path option, this option will force the billing period to be reset to the day the user purchased. For example, if the subscription is monthly, and was originally purchased on the 1st of the month, but upgraded on the 15th of the month, the next billing date would be the 15th instead of the 1st.
Downgrade Path – Use the drop-down to select the membership you would like a user to default back to should their subscription to any membership in the group become inactive (from a lapsed payment, failed payment, subscription expires). For this option to work, you must have the Upgrade Path option set. If set to ‘default', then the user will NOT be placed into another membership automatically. Note: this automatic downgrade will always be free – even if the membership has a price. So it's recommended that your downgrade path Membership is a free Membership level.
Memberships – This is where you can set which Memberships should be displayed on this group pricing page. Use your mouse to drag and drop the Memberships in the order you want them to appear on the Group page. A Membership can only belong to one group at a time. If you attempt to assign a Membership to multiple groups you will get an error.
NOTE: The order of your Memberships is IMPORTANT here. The Biggest Upgrade should be your HIGHEST Number, and the Downgrade should be your LOWEST number l with all other memberships in order in between.
For example: moving from 1, (Bronze) to 2 (Silver) is an upgrade while moving from 4.(Platinum) to 3 (Gold) is a downgrade.

Disable Change Plan Pop-Up – Enable this option if you plan on using the normal Group Pricing Page or if you are planning to set your own (with the Disable Pricing Page option). This will take the user to the Group pricing page when they click on the Change Plan instead of showing them the quick selection pop-up.
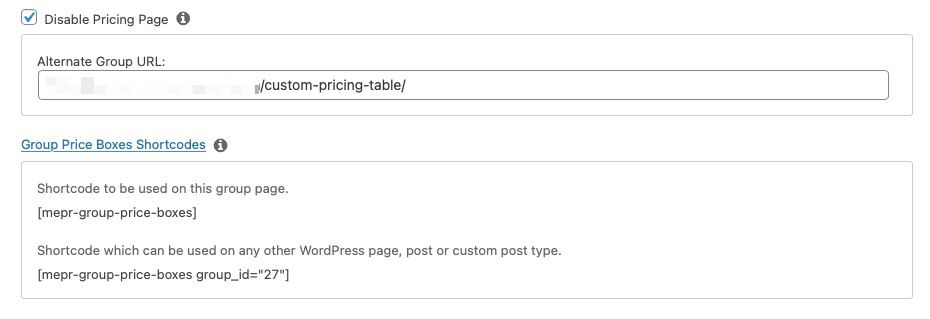
Disable Pricing Page – If you check this box, it will disable the front-end pricing page from being seen by users. If they try to access it, they will be shown a 404 message. You can use this if you want to create an upgrade path without having a front-end pricing page to display the Memberships on. When enabling this option, it will also reveal a box to enter an alternate URL for a group pricing page if you want to create your own. Just be sure to use the Group Price boxes Shortcode found here:
Pricing Page Theme– Use this to set the appearance of the pricing page to one of our pre-set designs. Or choose custom, to use your own custom CSS.
Group Price Boxes Shortcodes – Click this link to reveal the shortcodes used to display the group price boxes.
- Shortcode to display the price boxes on your group page. This can be used to enter content above and below the price boxes in relation to where you enter the shortcode on the page:
[mepr-group-price-boxes]- Use this shortcode on any other WordPress page, post, or custom post type to display your price boxes. The 123 ID should be replaced with your group's unique ID:
[mepr-group-price-boxes_id="123"]Change Plan Popup
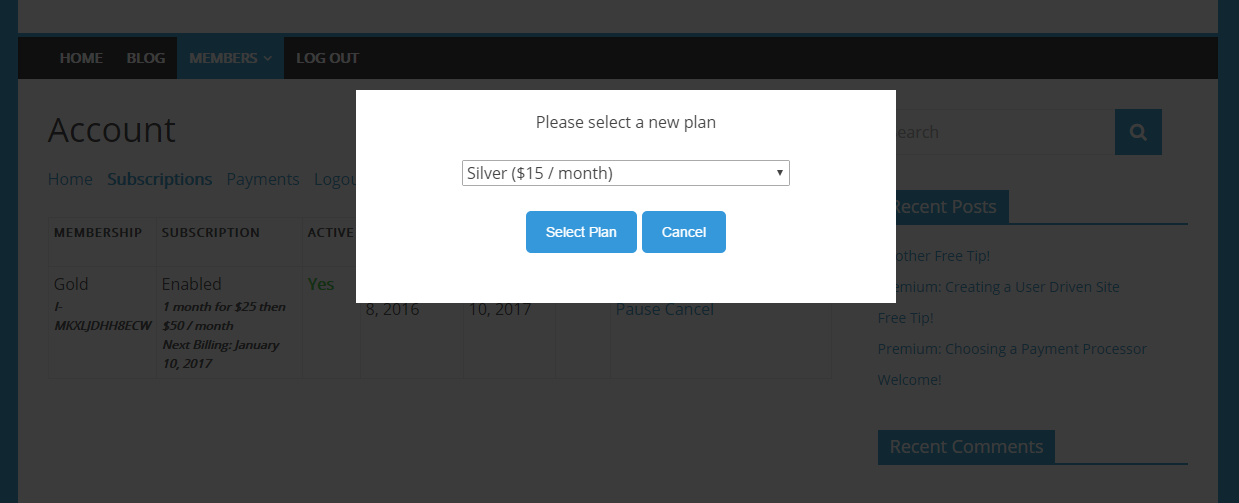
When you create a Group in MemberPress and add memberships to it, your MemberPress subscribers will now see this link on their Account Page under the Subscriptions tab:

When users click on that link, they will see a popup that includes the potential upgrades or downgrades they can do based on their membership. If you have enabled prorations and this Group is an Upgrade Path Group, then prorations will also be calculated. Prorations are enabled in the MemberPress > Settings > Account tab > Registration section > by clicking the checkbox next to the Pro-rate subscription prices when a member upgrades setting. Here is an example of what this may look like: