Configuring your membership site to collect taxes can seem a complex and tedious task. Thus, we've worked hard to ensure that MemberPress comes with great out-of-the-box options and make this as easy as possible.
This document will show you how to configure your tax settings and start collecting taxes with your sales in MemberPress.
Video Overview
Setting Up Taxes For Your Memberships
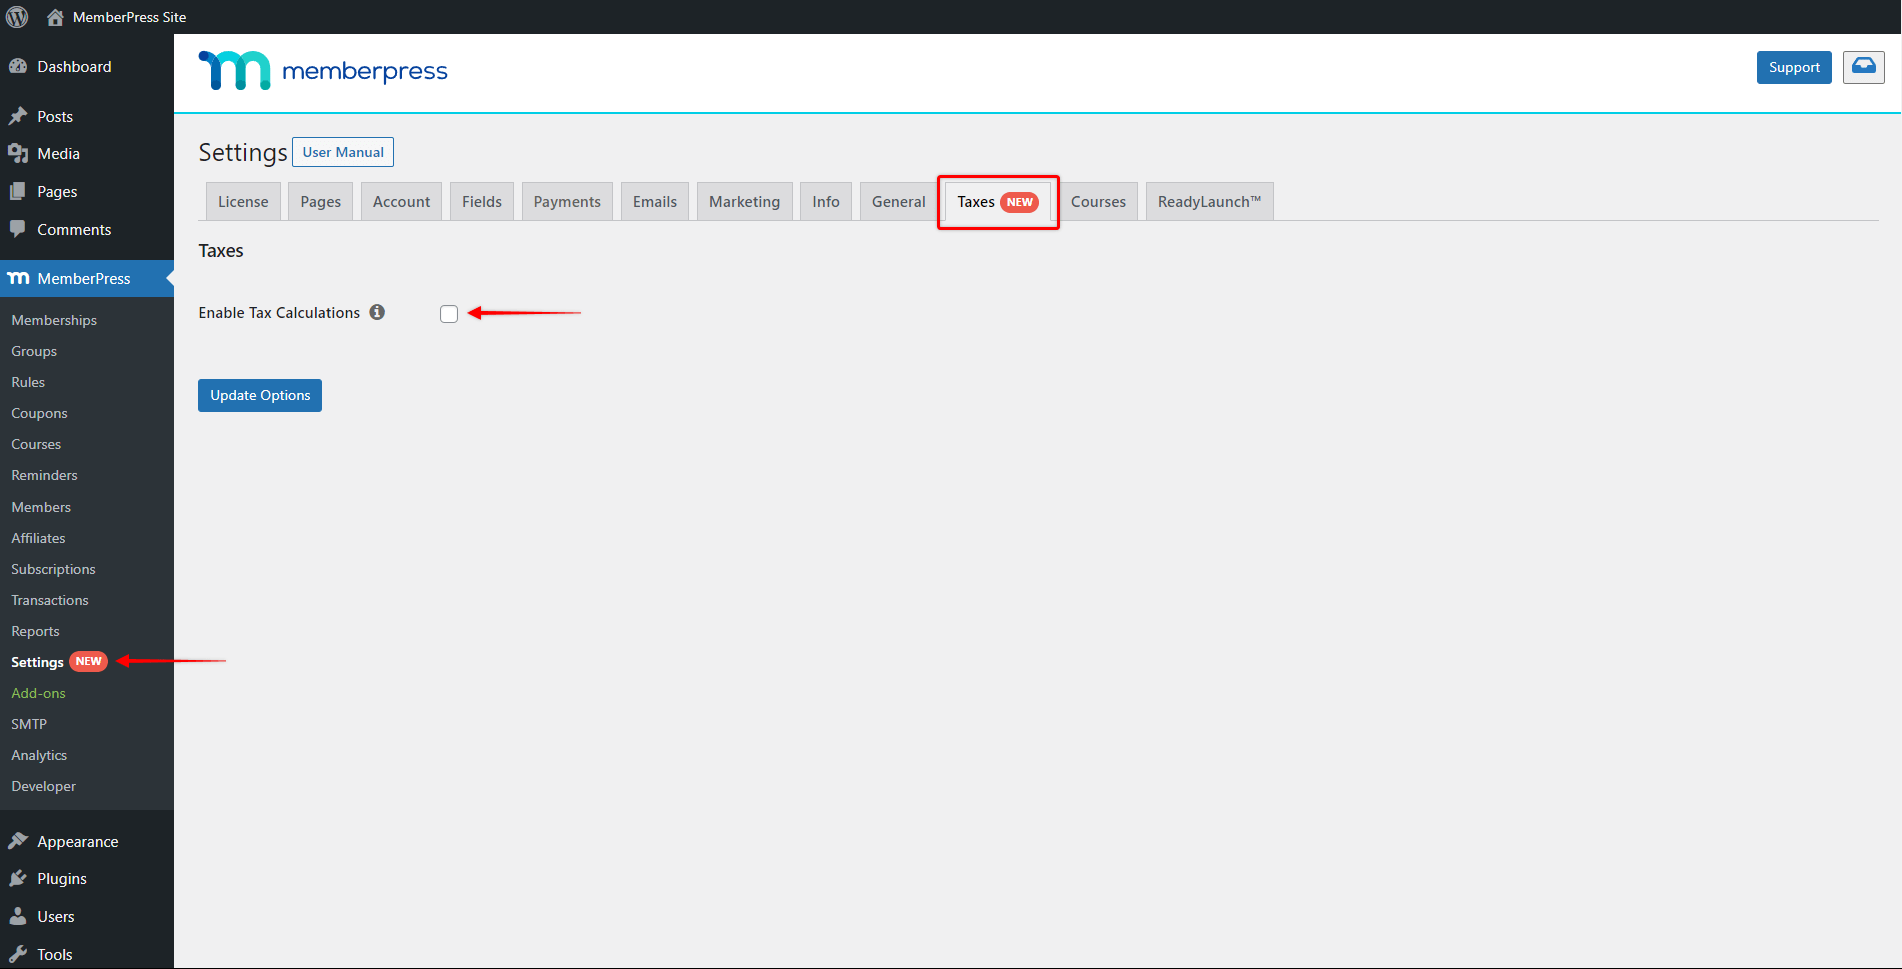
To start collecting taxes with MemberPress, you need to enable taxes on your memberships. To do this, navigate to Dashboard > MemberPress > Settings > Taxes tab, and click on the “Enable Tax Calculations” checkbox.
Here, you will find three settings sections:
All settings under the “Taxes” tab will be applied globally, which means they will be applied to all of your memberships equally.
Tax Options
Settings under the “Tax Options” will define how taxes are to be calculated on your memberships.
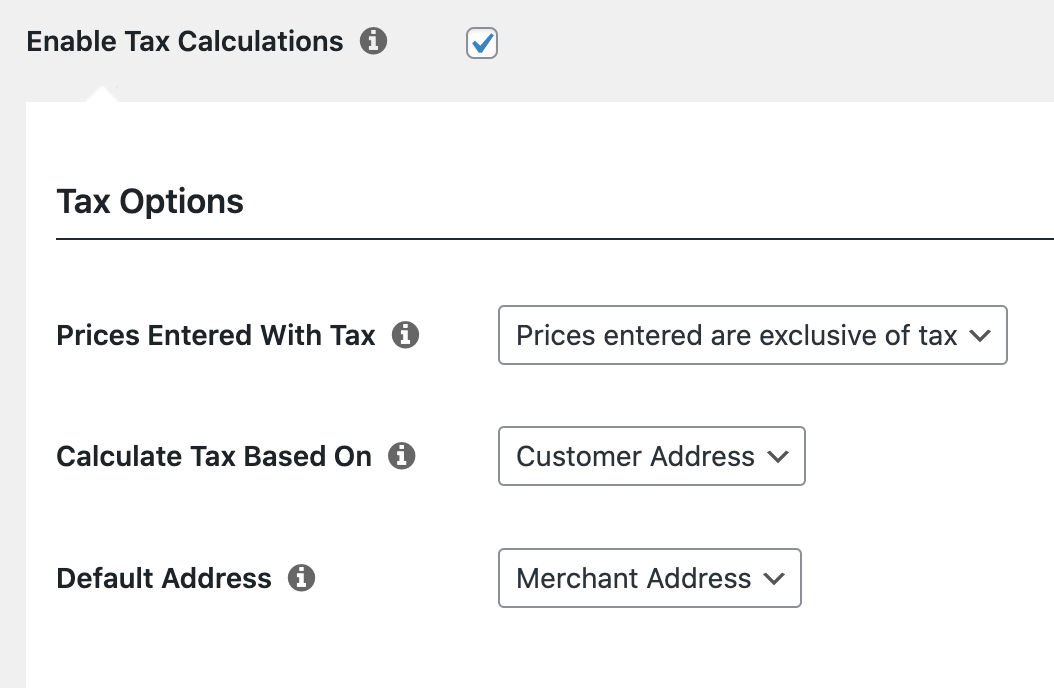
Prices Entered With Tax
This option will determine how MemberPress is going to calculate your membership price and taxes. You have two available options:
- Prices entered are exclusive of tax
- Prices entered are inclusive of tax
Based on your selection, MemberPress will determine whether the prices you specify for your memberships are exclusive or inclusive of tax.
If you selected “Prices entered are exclusive of tax“, MemberPress will add taxes onto the membership price (set under the “Membership terms”) when charging your members. In this case, the membership price is the sub-total amount (before taxes).
To illustrate, let's say you have a $10 Membership “exclusive” of tax, and the tax rate the customer should be charged is 5%. Here, a member would pay $10.50 in total for the Membership ($10 base membership + $0.50 tax).
On the other hand, if you selected “Prices entered are inclusive of tax“, your members will pay the membership price you set in your “Membership terms”, as in this case, the membership price is the total amount.
Let's use the same $10 Membership with a 5% tax rate, only in this case set the price as “inclusive” of tax. The customer would then pay $10 in total for their Membership ($9.52 base membership + $0.48 tax).
Calculate Tax Based On
This option will determine whether tax should be calculated based on the address that the customer enters, or (your) merchant address set at Dashboard> MemberPress > Settings > Info tab.
Default Address
This option will enable you to specify a default customer address that can be used as the taxable address.
If there is no address set for the customer, MemberPress can either use the merchant address to calculate the tax or use no address at all, which would result in no tax being applied to the sale.
Tax Rates
MemberPress comes with several built-in integrations to automatically calculate tax rates given your location or that of the customer. Also, here you can enable the support for handling VAT.
Enable Stripe Tax
Stripe Tax is a feature provided by Stripe that allows automated tax calculations on your site.
The Stripe Tax built-in integration comes with all MemberPress plans. To use Stripe Tax you must first connect the Stripe account to your MemberPress plugin. Once the Stripe is connected, enable Stripe Tax and choose the Stripe payment gateway you wish to use.
Also, please keep in mind that the Stripe Tax is available in a limited number of countries.
Enable TaxJar
TaxJar is a cloud-based platform for automated sales tax handling available in the United States.
If your business is US-based and you have the MemberPress Pro plugin installed on your site, you can set up the TaxJar integration, and use their real-time sales tax calculation engine at checkout.
VAT Tax
MemberPress offers full VAT tax support, including the new rules that went into effect in January 2015, and changes introduced by some EU countries as of January 2020.
Once you enable and configure the VAT settings, MemberPress will calculate and collect VAT taxes on your sales coming in from any of the EU countries.
Custom Tax Rates
MemberPress also allows you to upload and fully manage your own custom tax rates. Please note that when VAT taxes are enabled, any custom tax rates you define in this table for EU countries will be ignored, and the proper VAT rates will be used instead.

Each custom tax rate has the following attributes:
- Country Code – 2 digit country code for the rate. Use ISO 3166-1 alpha-2 codes. Leave blank (*) to apply to all countries.
- State Code – 2 digit state code for the rate. See the state files located in
i18n/states/for supported states. For the US, use a 2 digit abbreviation (e.g. AL for Alabama). Leave blank (*) to apply to all states. - ZIP/Postcode – Enter postcodes for the rate – you may separate multiple values with a semi-colon (;), use wildcards to match several postcodes (e.g. PE* would match all postcodes starting with PE), and you may use numeric ranges (e.g. 2000-3000). Leave blank (*) to apply to all postcodes.
- City – Semi-colon separated list of cities for the rate. Leave blank (*) to apply to all cities.
- Rate % – Enter the tax rate, for example, 20.000 for a tax rate of 20%.
- Tax Name – Name your tax, e.g. US State Tax.
- Priority – This field is currently not used in MemberPress. If you need to have multiple taxes, they should be combined together.
Once your tax rates are uploaded, you can export your tax rates to a CSV file, delete individual tax rates, and clear all the tax rates. You can always upload additional tax rates from other, properly formatted CSV files.
Importing and Exporting Custom Rates
There is an export button within the table that you can use to export a CSV of your input rates.
There is also an import function that you can use to import a CSV. The CSV requires 6 columns:
country code, state code, postcodes, city, rate, tax name
And optionally an additional column:
priority
If omitted or blank, priority will default to 1.
Here's an example of a CSV file for California state taxes (Note: the rates in this file aren't guaranteed to be accurate):
If you're looking for accurate, up-to-date tax rate CSV files, you can find them at taxrates.com. You'll need to modify files downloaded from taxrates.com, but they're easily modified for importing into MemberPress.
It's easy to delete a single custom tax rate by clicking the “x” next to each tax rate and to clear all tax rates by clicking the “Clear Tax Rates” button underneath the tax rates table.
Viewing Tax Reports
You can now access reports and CSV downloads in MemberPress > Reports which will clearly inform you how much tax has been collected.

You can view or download your tax collected per day, month, and year overall or by the product. In addition, you can download your VAT tax collected by transactions or separated by country.

Showing taxes on the registration page
If you would like to have the tax amount shown on the registration page, you can enable the “Enable Single Page Checkout Invoice” setting in the MemberPress > Settings > Account tab. You will need to be running MemberPress version 1.8.7 or newer for this option to appear.
Video: How to Make a Membership Tax Exempt
In this video, you'll see how to not charge taxes on individual memberships. You can do this per membership by going to MemberPress > Memberships and clicking to edit a membership. Then under Membership Options > Registration tab, enable “This Membership is Tax Exempt.”


