If you haven't heard of Zapier, it's a great service for connecting various online services together. Once you have the MemberPress Developer Tools installed you can connect MemberPress to hundreds of different services through Zapier.
Some of the things you could potentially do with this type of integration would be:
- Send an email through your auto-responder when a credit card expires
- Add a row to a Google Spreadsheet when a member cancels
- Create a new member when someone fills out an online form
- Send a text message to you when a new member subscribes
- … And hundreds of other possibilities
You can set up Zapier to receive notifications from or to send data to MemberPress.
Sending Data from MemberPress using Zapier
Here's an example of how you can add a row to a Google Spreadsheet when a member cancels.
1. Login to Zapier (create an account if you don't already have one) and click the “Make a Zap!” Button.
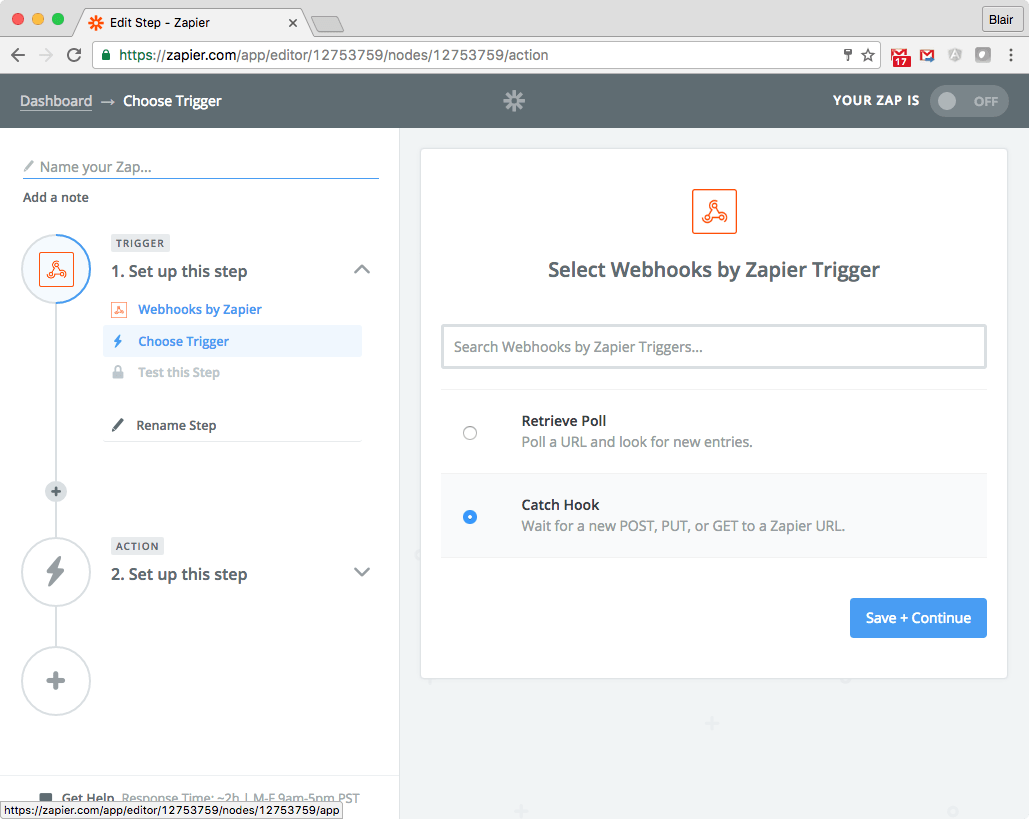
2. Select “Webhooks” as a trigger and then “Catch Hook.”

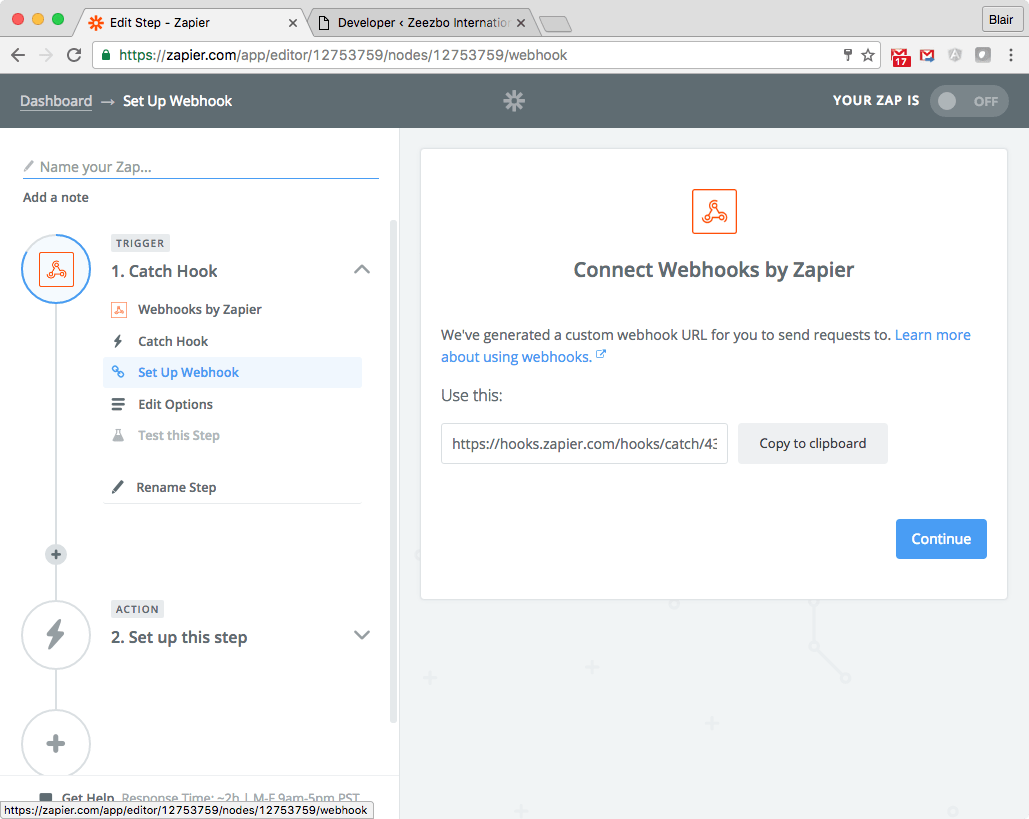
3. On the “Set Up Webhook” screen, copy the webhook URL for this zap.

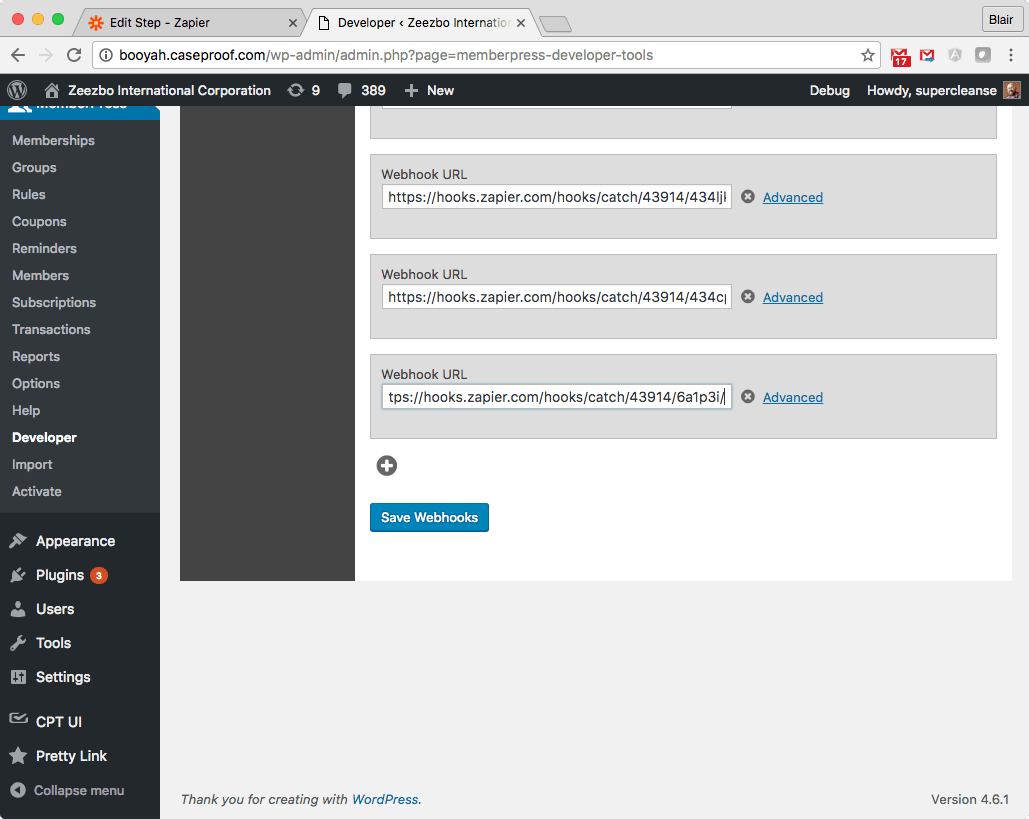
4. Go to MemberPress > Developer > Webhooks and click the “+” to add a new Webhook Url.
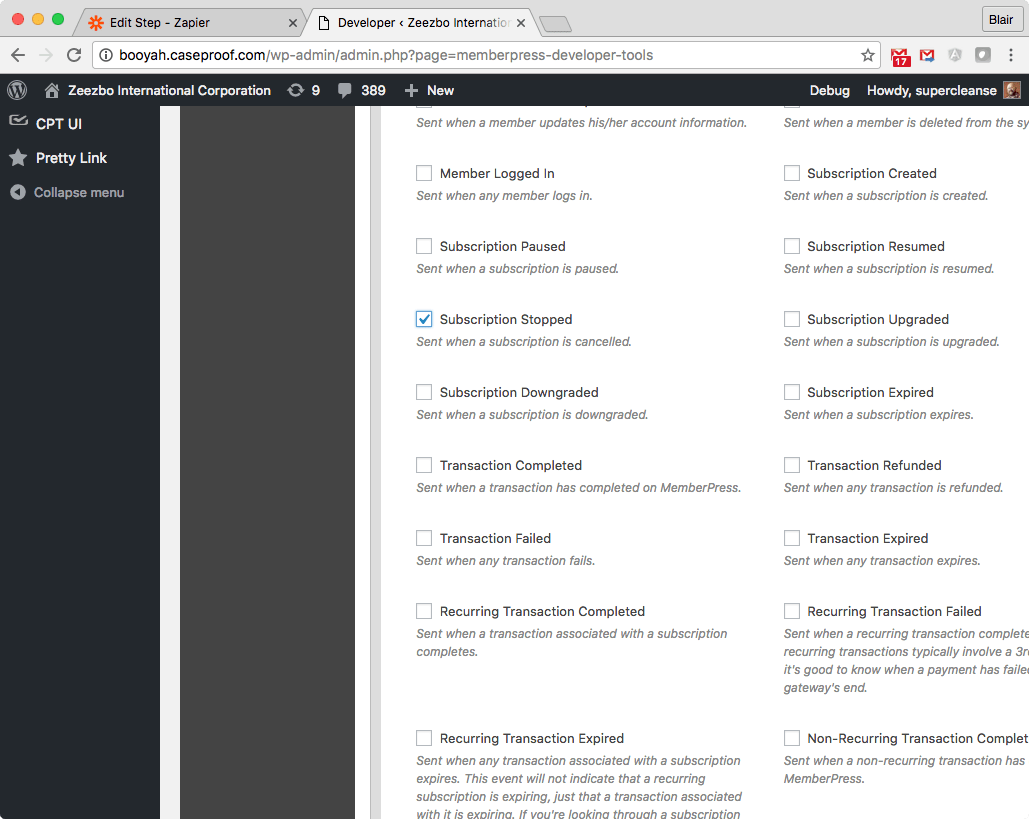
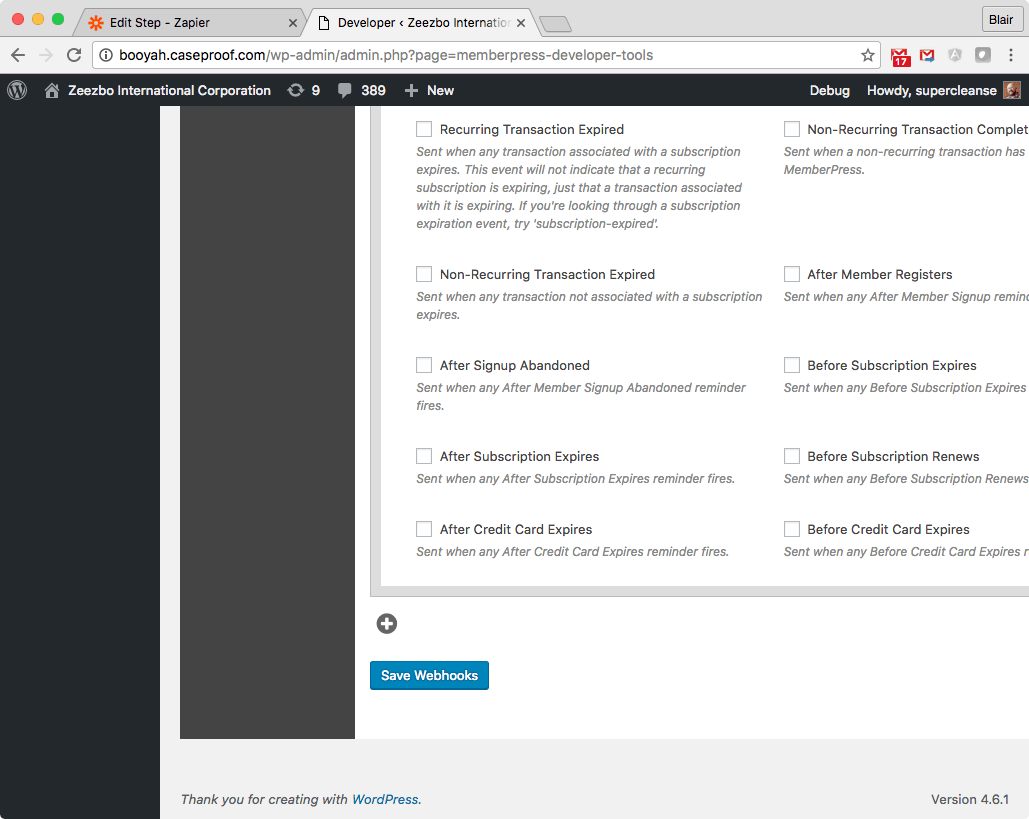
5. Paste the Zap's Webhook URL into the text field, click “Advanced”, select “Subscription Stopped,” then click “Save Webhooks.”


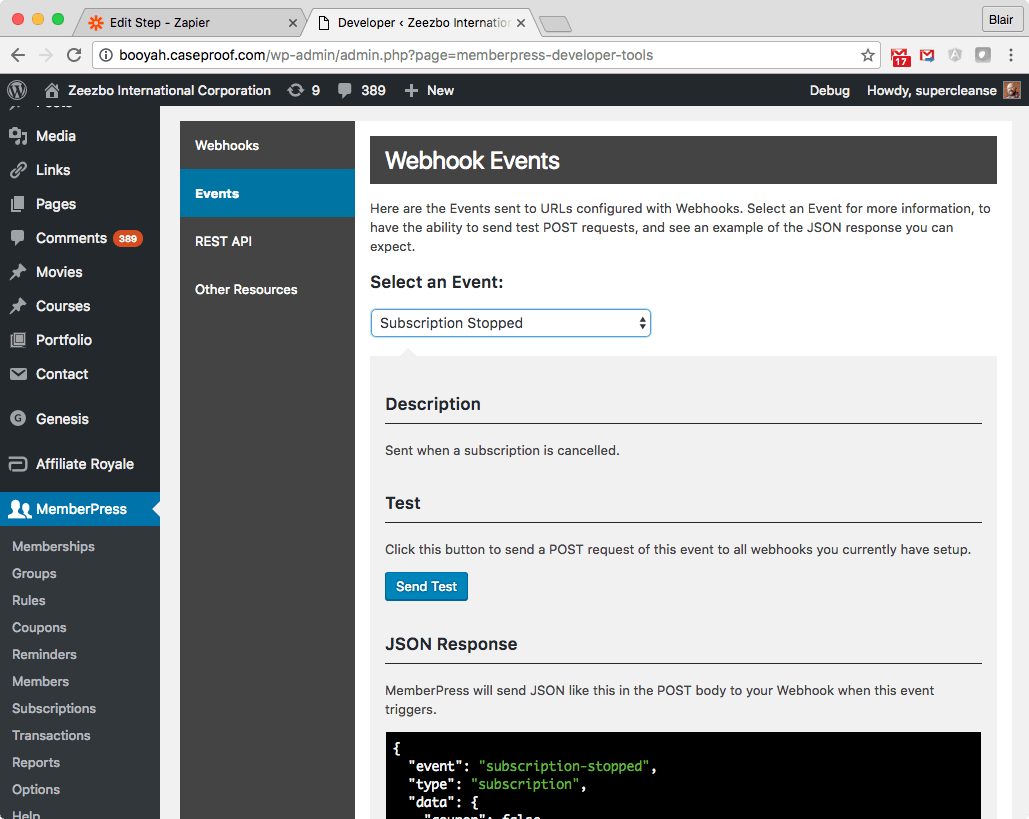
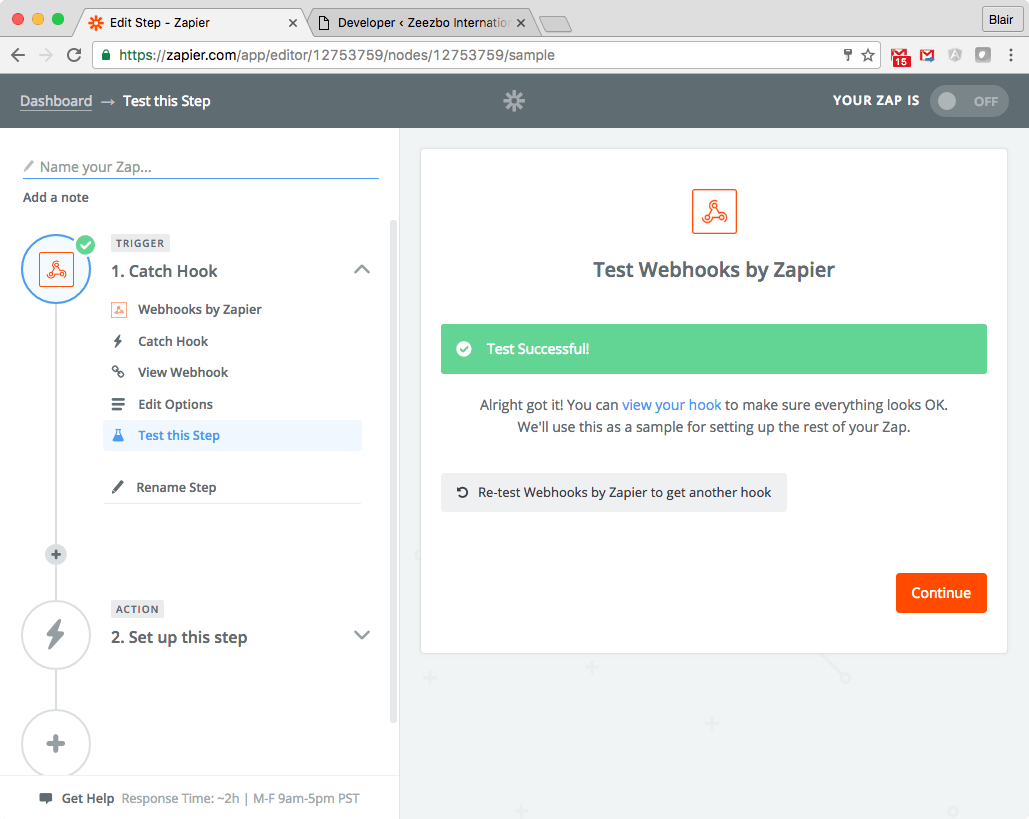
6. Go to MemberPress > Developer > Events, select “Subscription Stopped” and click “Send Test.”

7. Click “OK, I did this” on the “Test this Step” in Zapier.

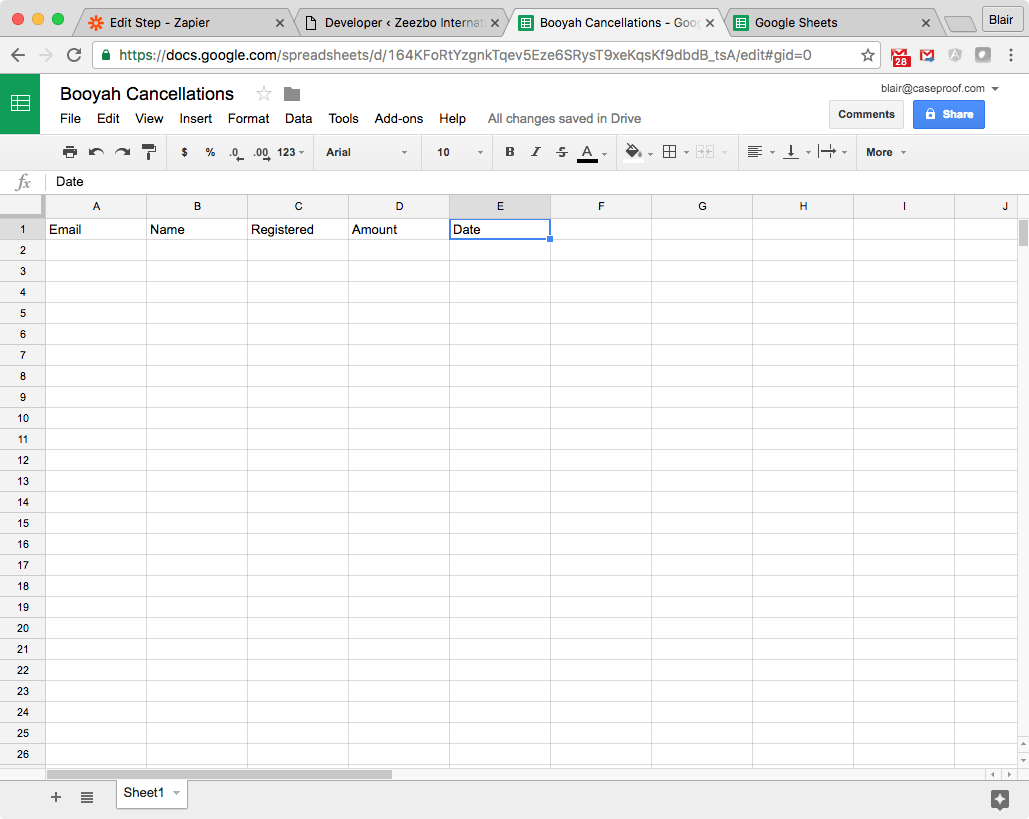
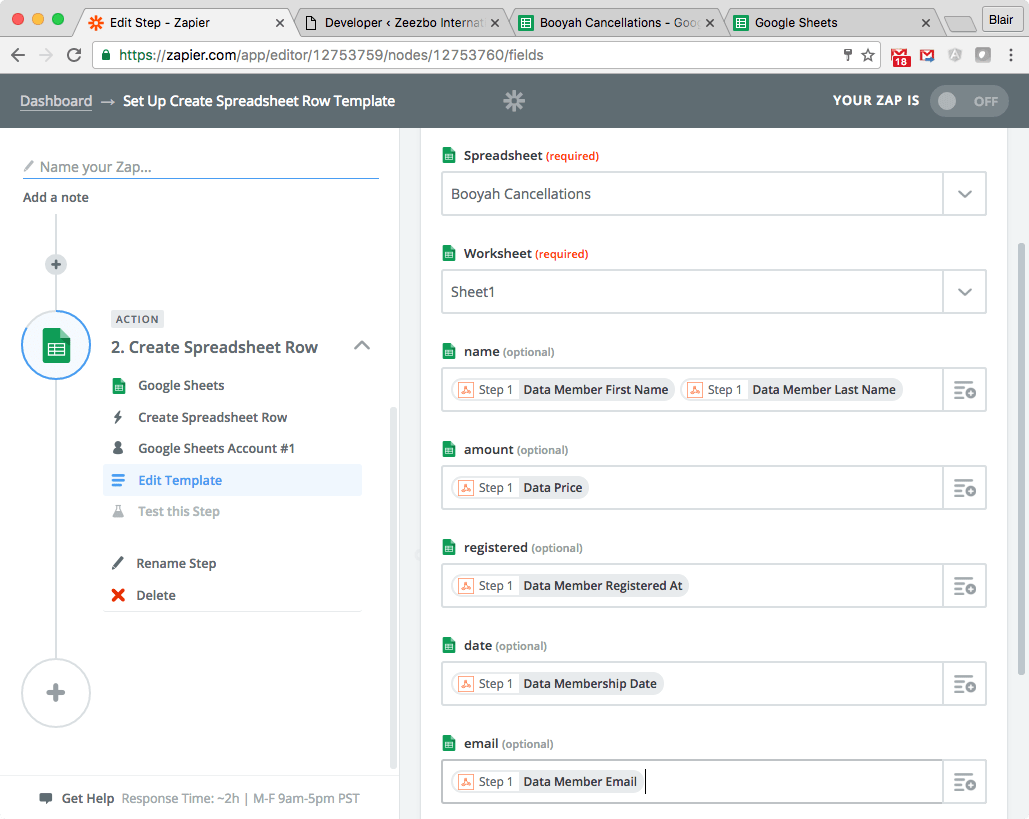
8. Create a new Spreadsheet in your Google account with a header row for each field you want to capture.

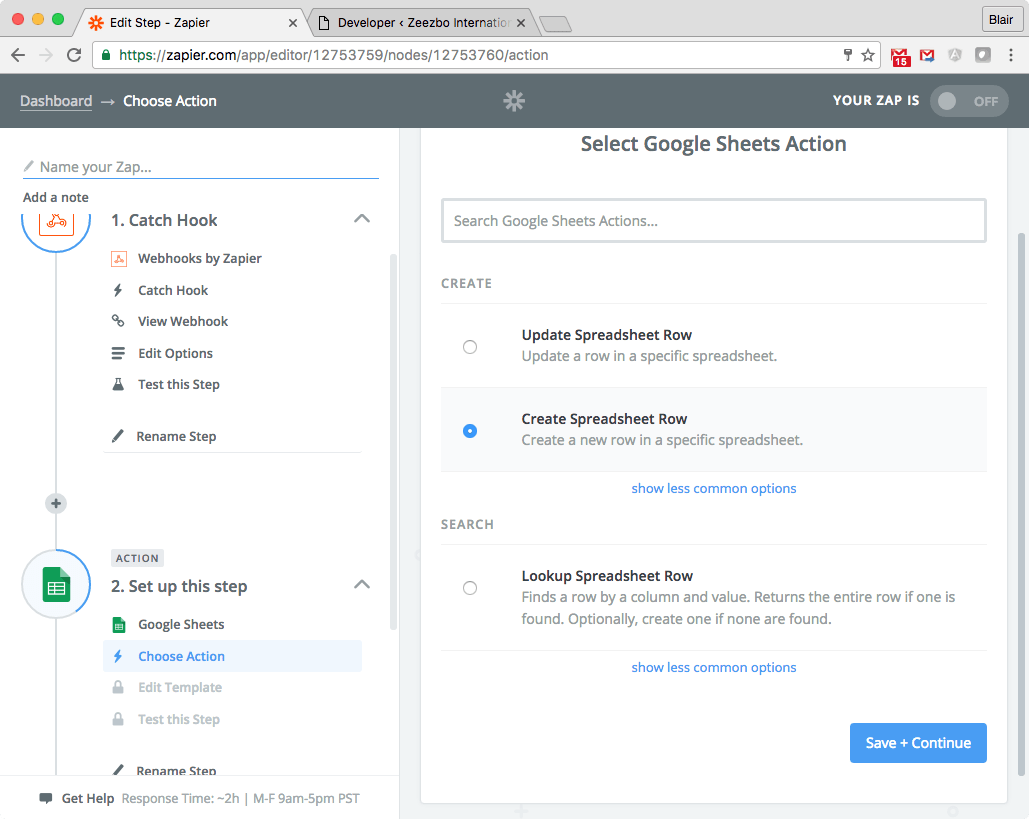
9. Setup an action in your Zap with the “Google Sheets App” and select “Create Spreadsheet Row.”

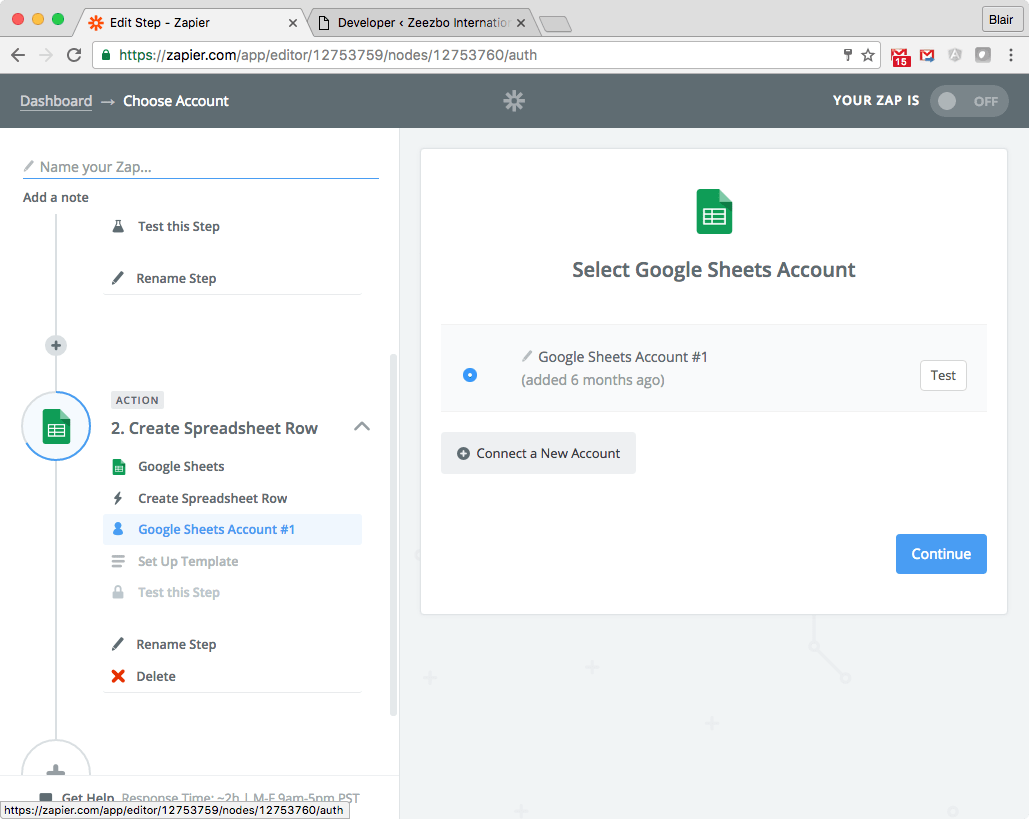
10. Connect your Google account to your zap.

11. Match the fields from your spreadsheet to the data captured by the webhook.

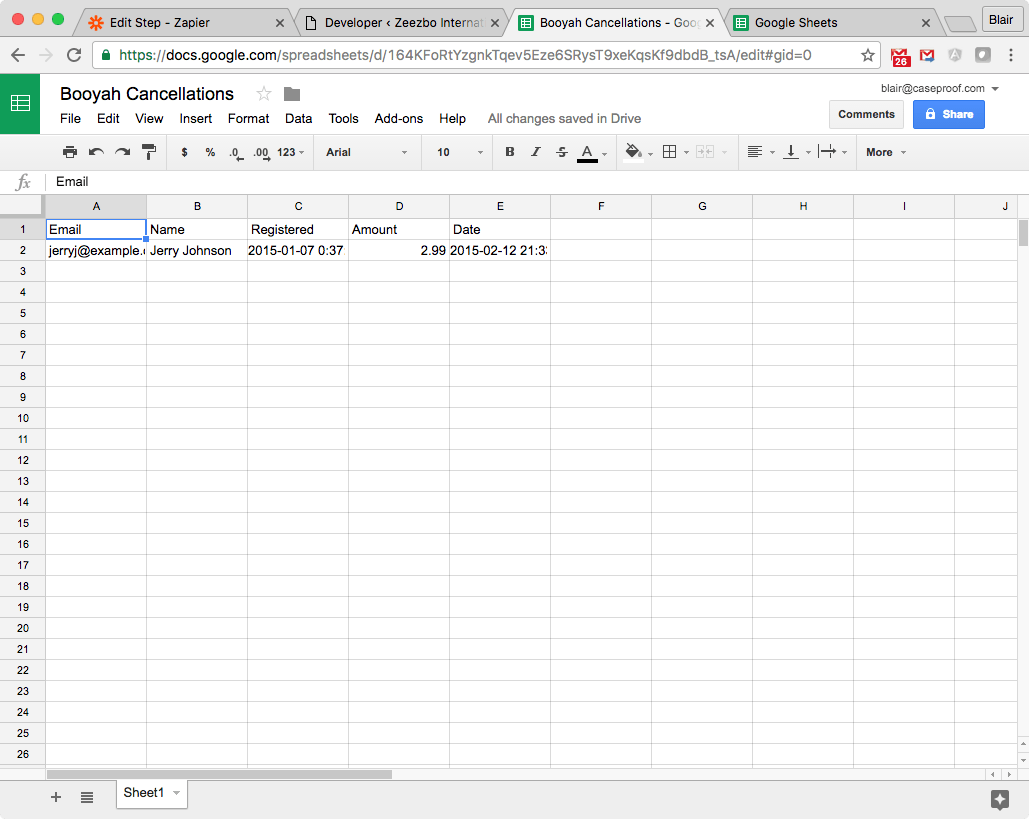
12. Test the Zap and make sure data was recorded in your Google spreadsheet.

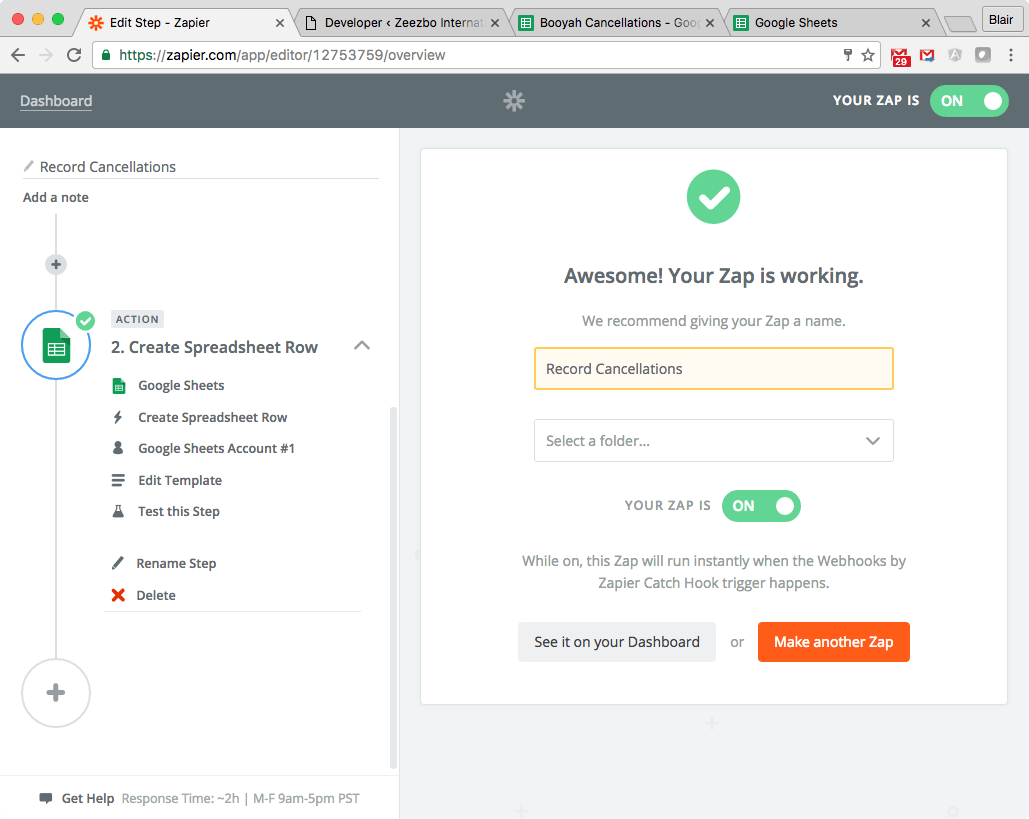
13. Name and activate your zap.

Using this technique you'll be able to set up Zapier to do just about anything when any event from MemberPress occurs.
Send Data to MemberPress to Create a Transaction
Here's an example of how you could create a MemberPress transaction by adding a note to Evernote:
NOTE: The Application Passwords plugin is no longer required if you use the MEMBERPRESS-API-KEY header in your Zapier Webhook Zaps. If you want to use Application Passwords instead, then follow the instructions below. Otherwise, just use the API Key for a much simpler connection.
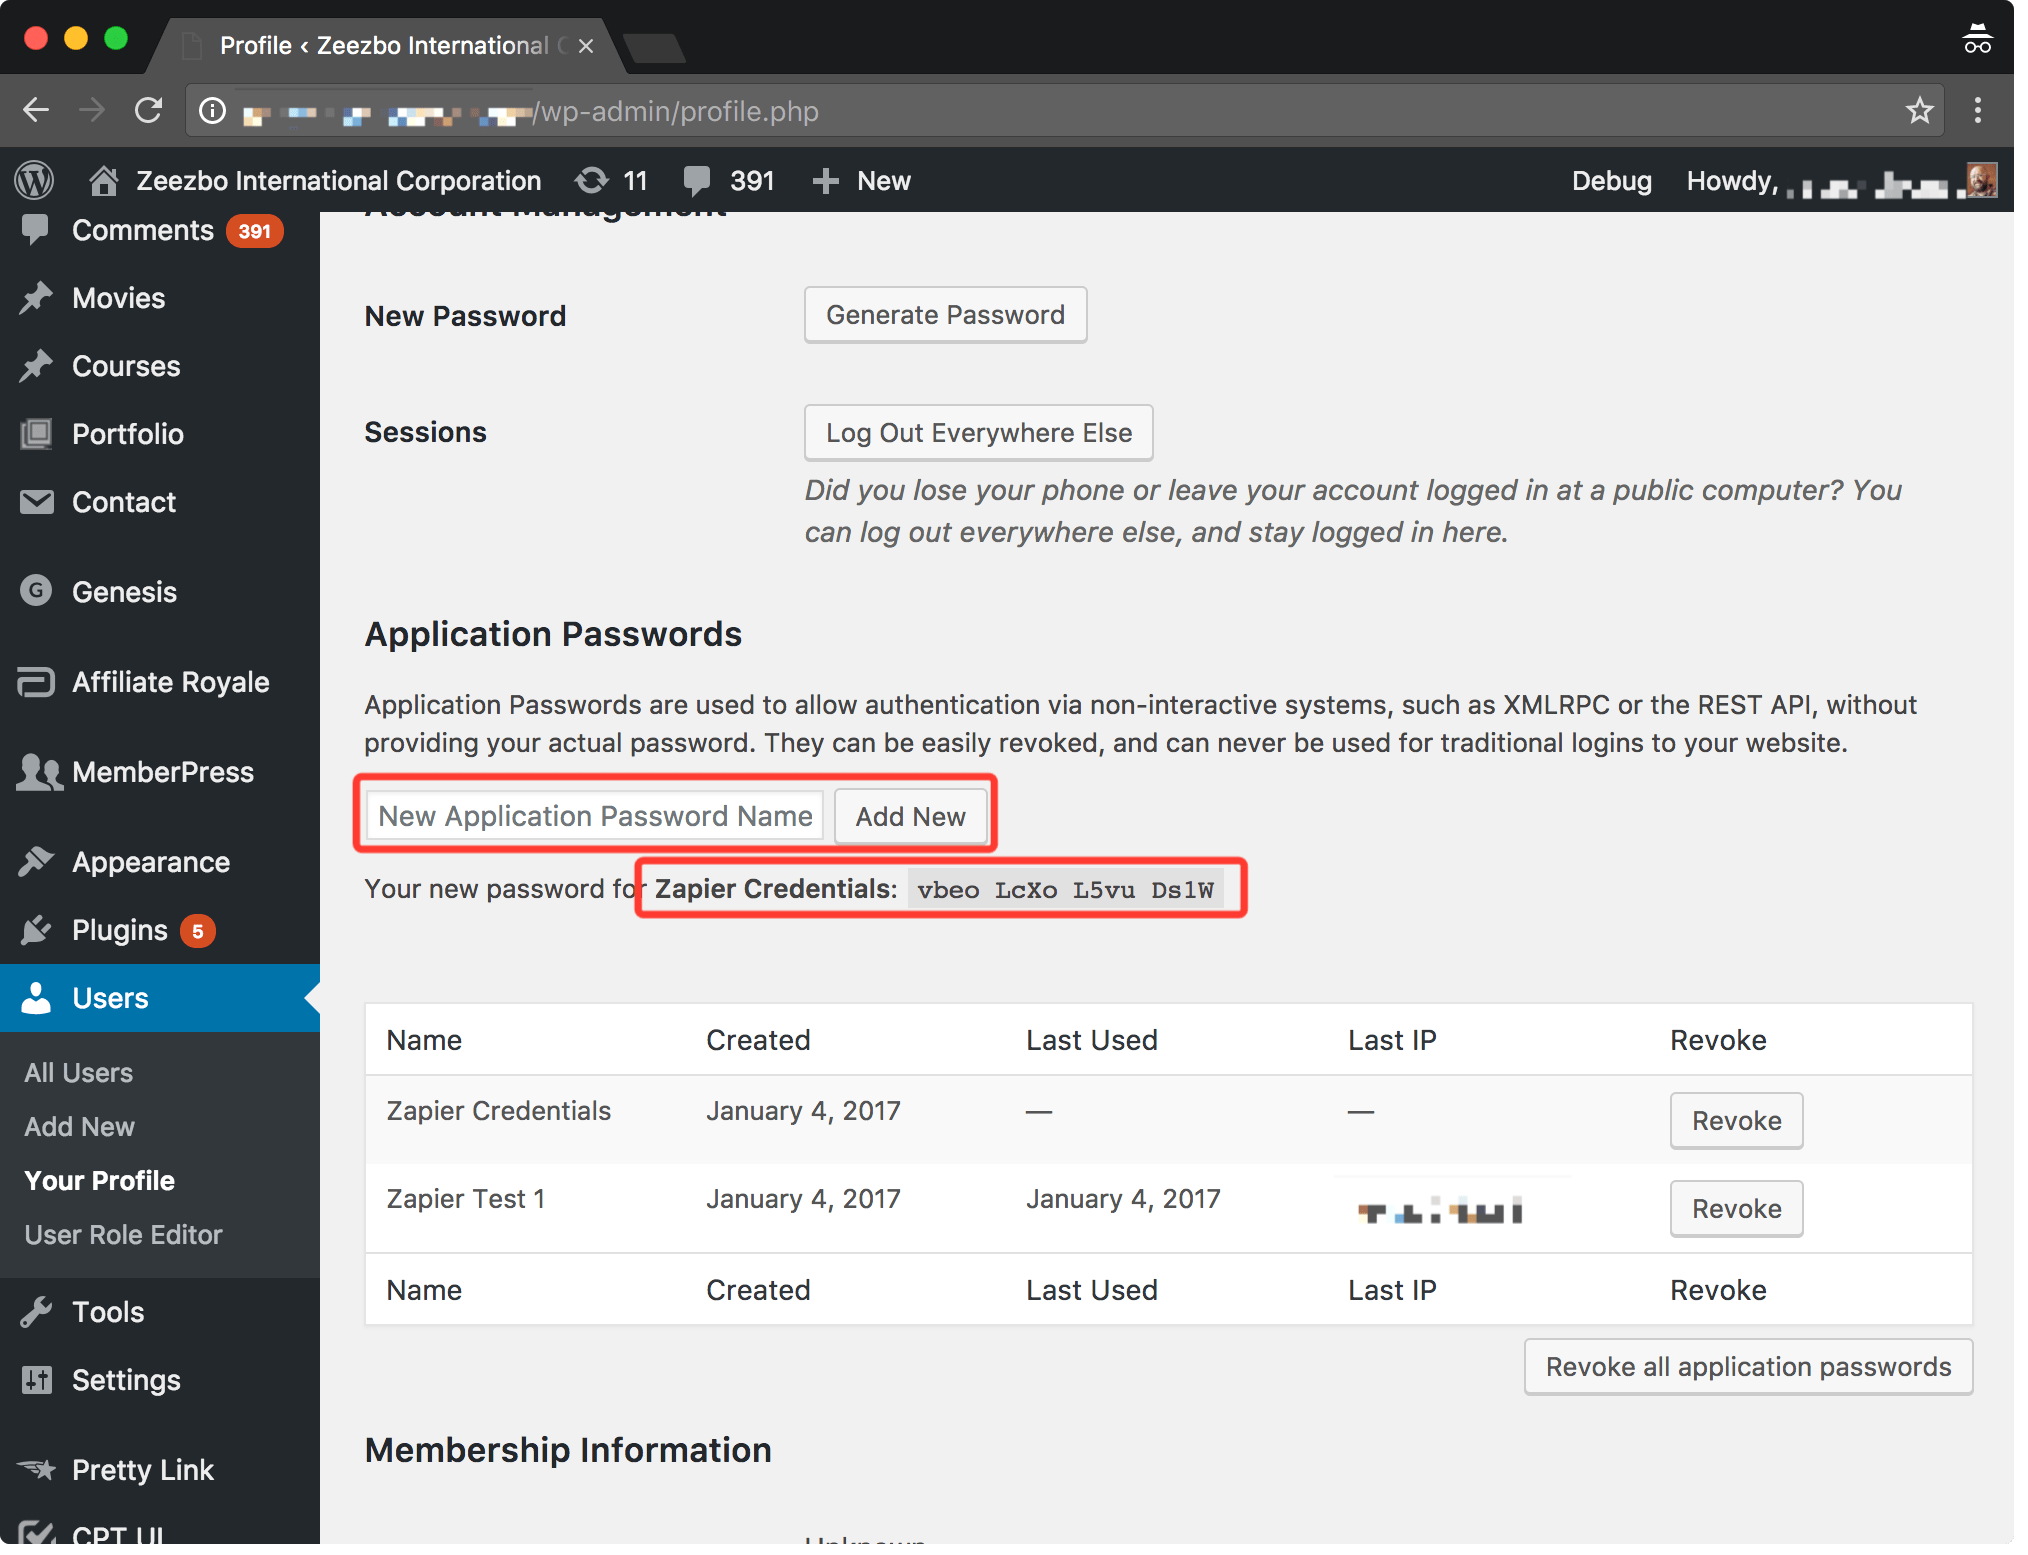
1. Install the ” Application Passwords” plugin along with the MemberPress Developer Tools. Application passwords are just one way to authenticate your WordPress installation but probably the easiest way when working with Zapier. Note: in order for Application Passwords to be secure your WordPress website (in particular your API urls) must be accessible via SSL (TLS / HTTPS).
2. Generate an Application password for your Admin user by logging into your WordPress Admin and visiting “Users” -> “Your Profile” -> “Application Passwords” then entering a password name and clicking “Add New.” Once you do this you'll have a password you'll be able to use to authenticate with Zapier. Save this password … you'll need it in a few steps.

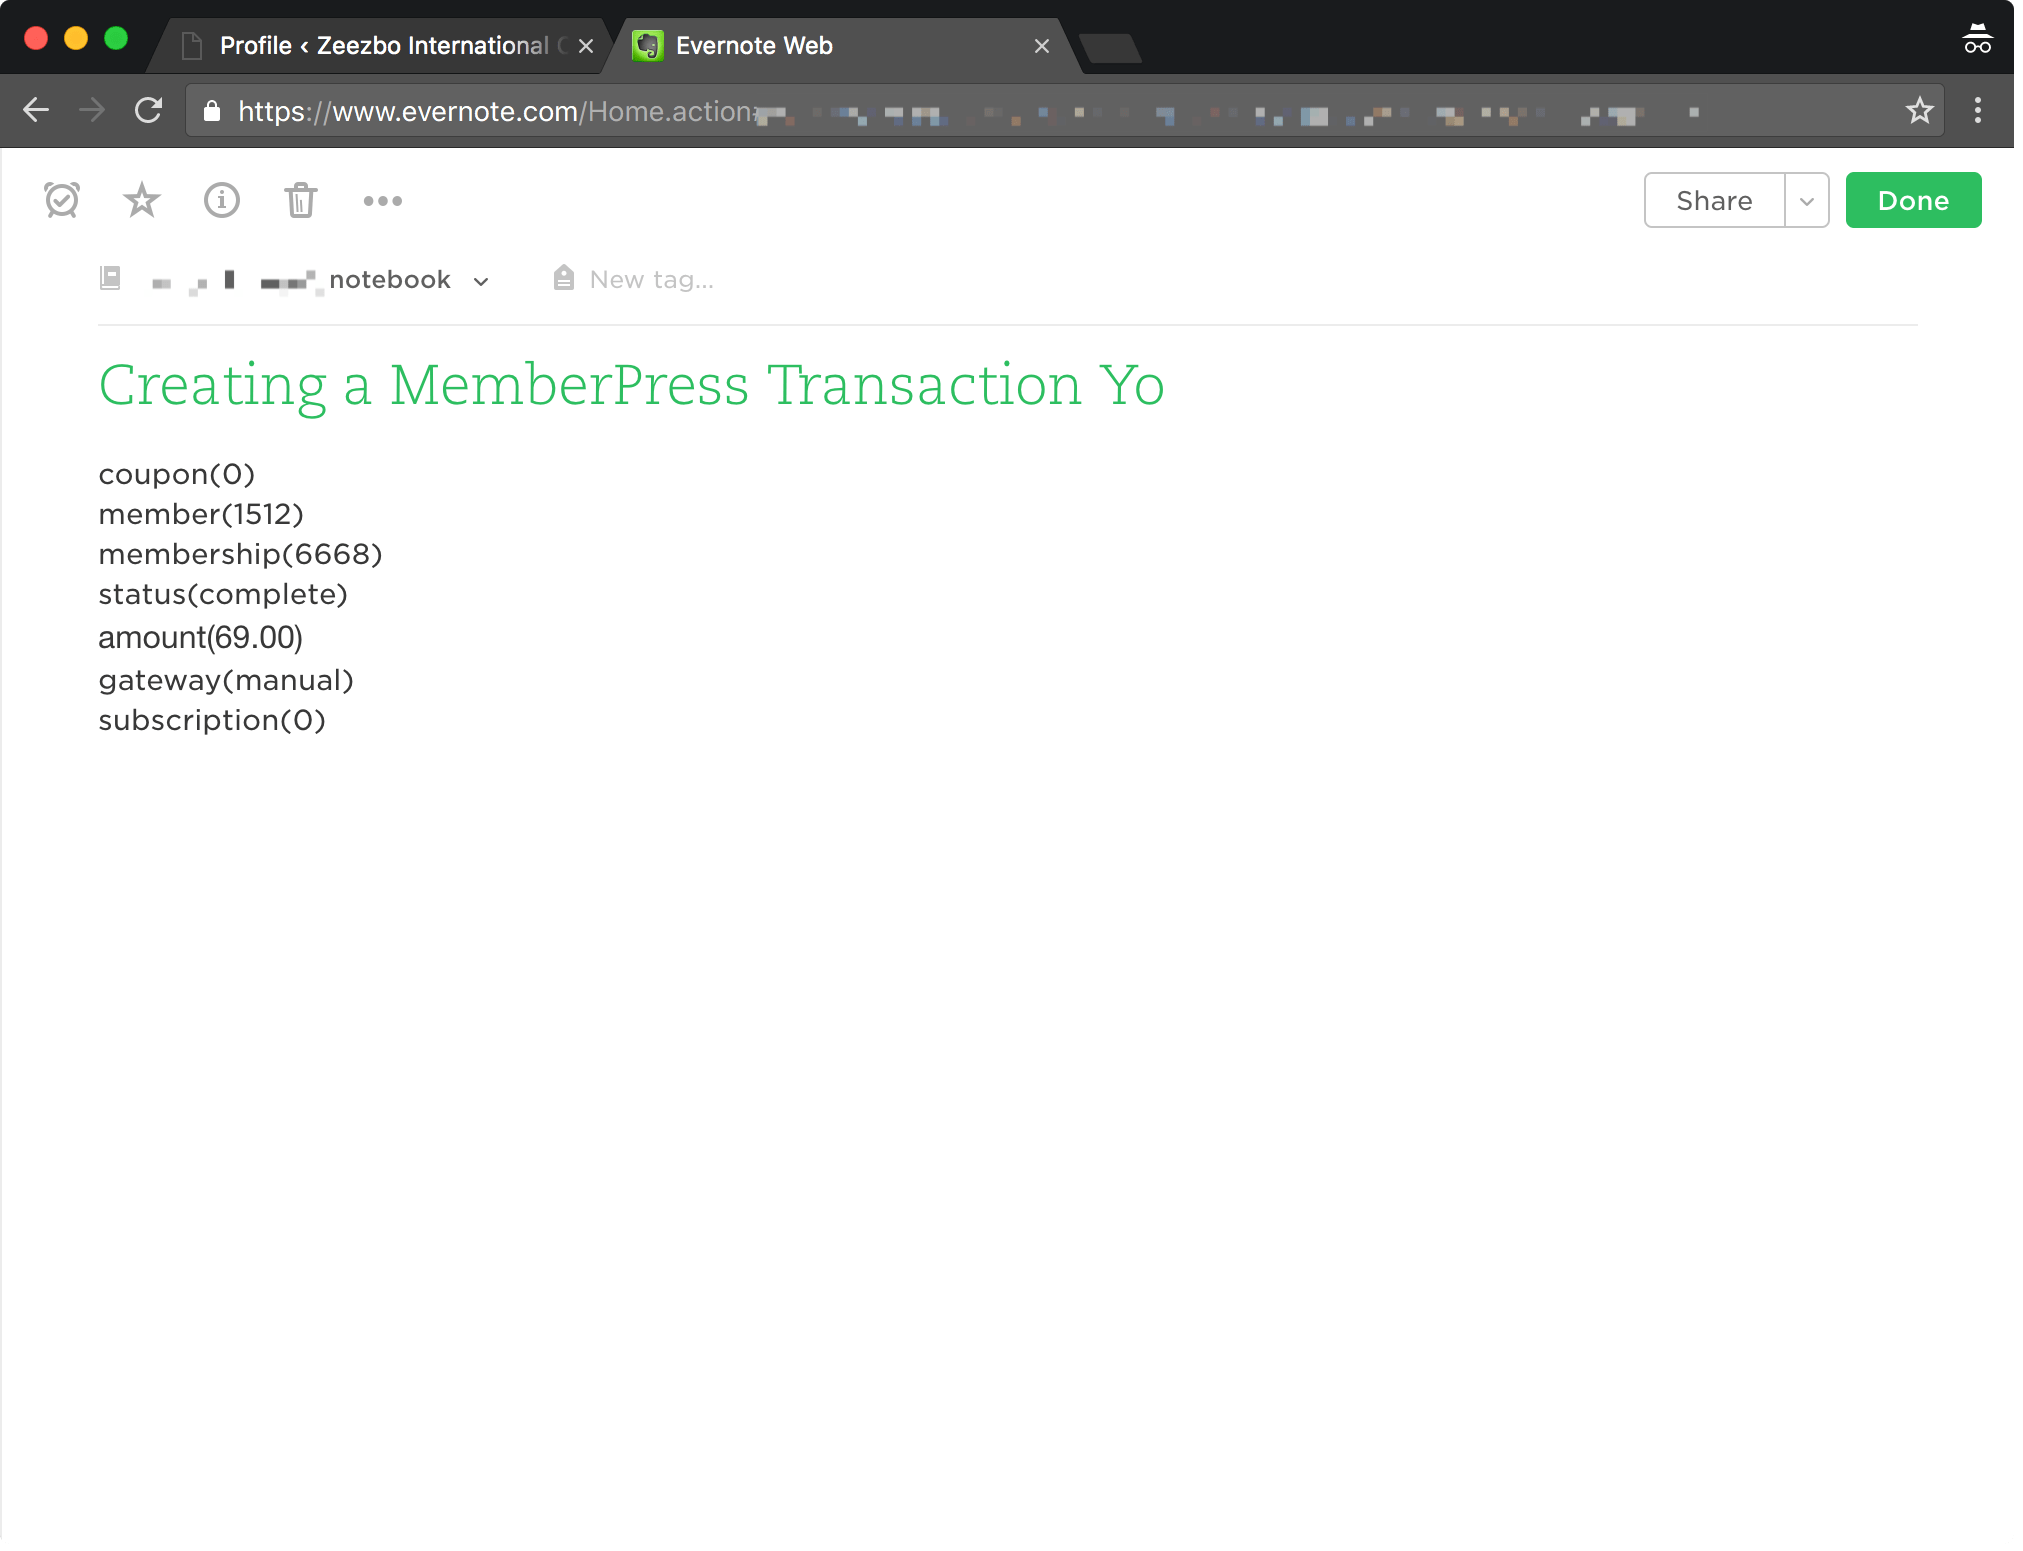
3. Create a new note in Evernote which utilizes Zapier Named Variables. Make sure you use a valid and already existing id for member, membership, gateway, subscription and coupon.

4. Log into Zapier and create a new Zap by clicking “Make a Zap!”
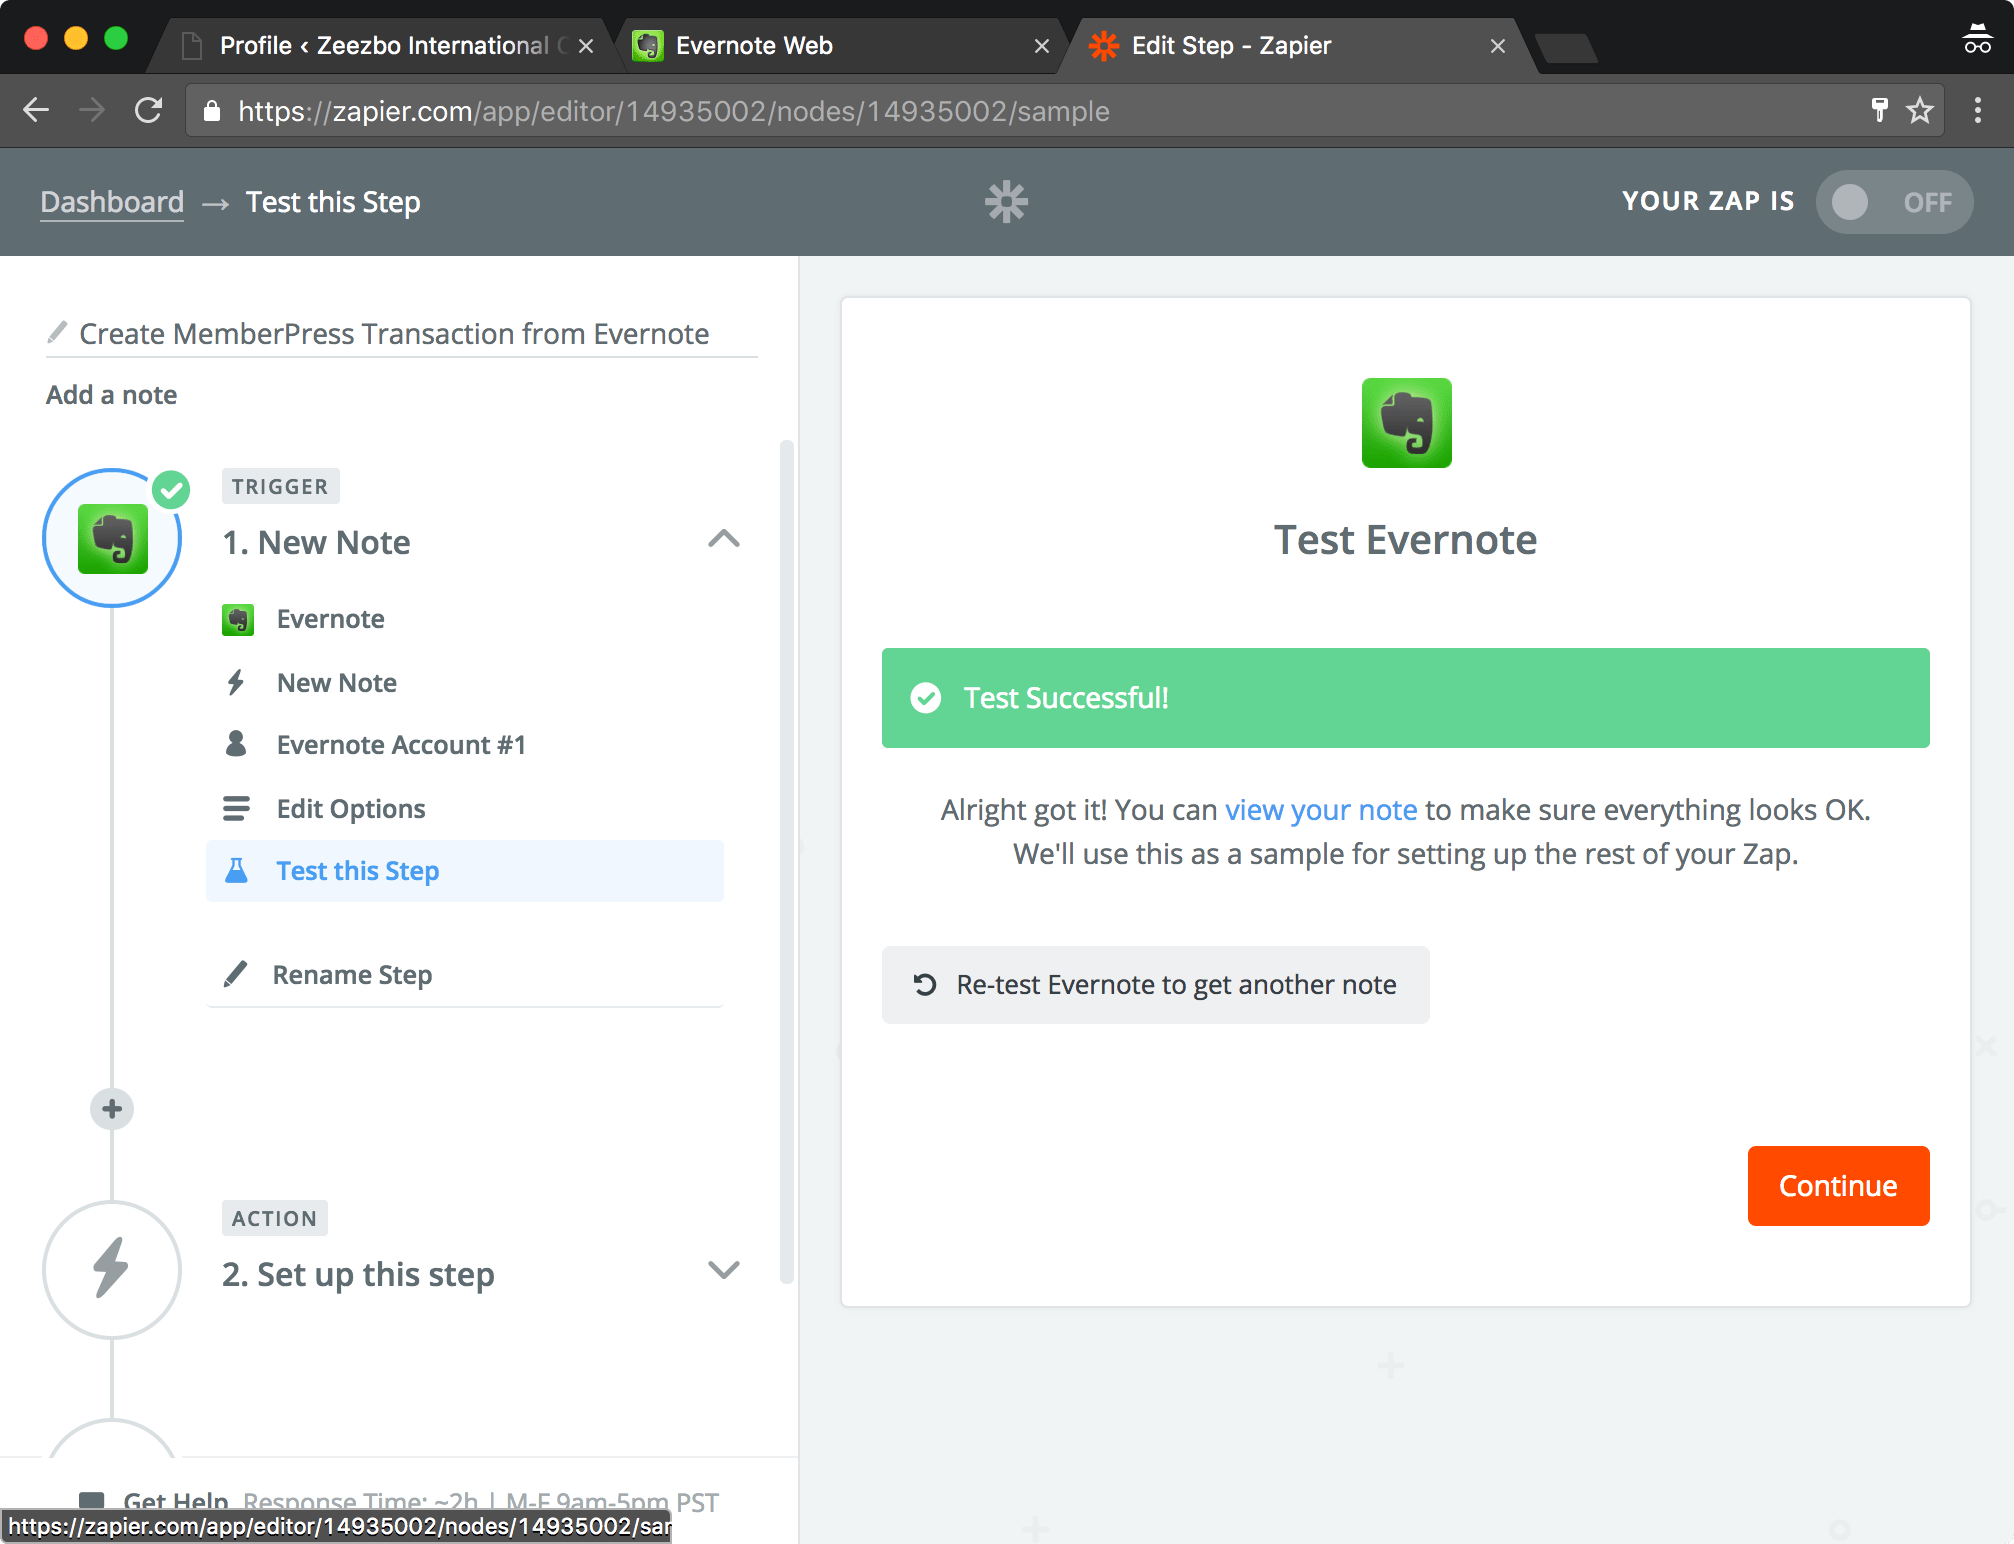
5. Select the Evernote as your Trigger app then select the “New Note” action, authenticate your Evernote account (if it hasn't been already), specify the notebook your note from step 3 was created in then hit continue.

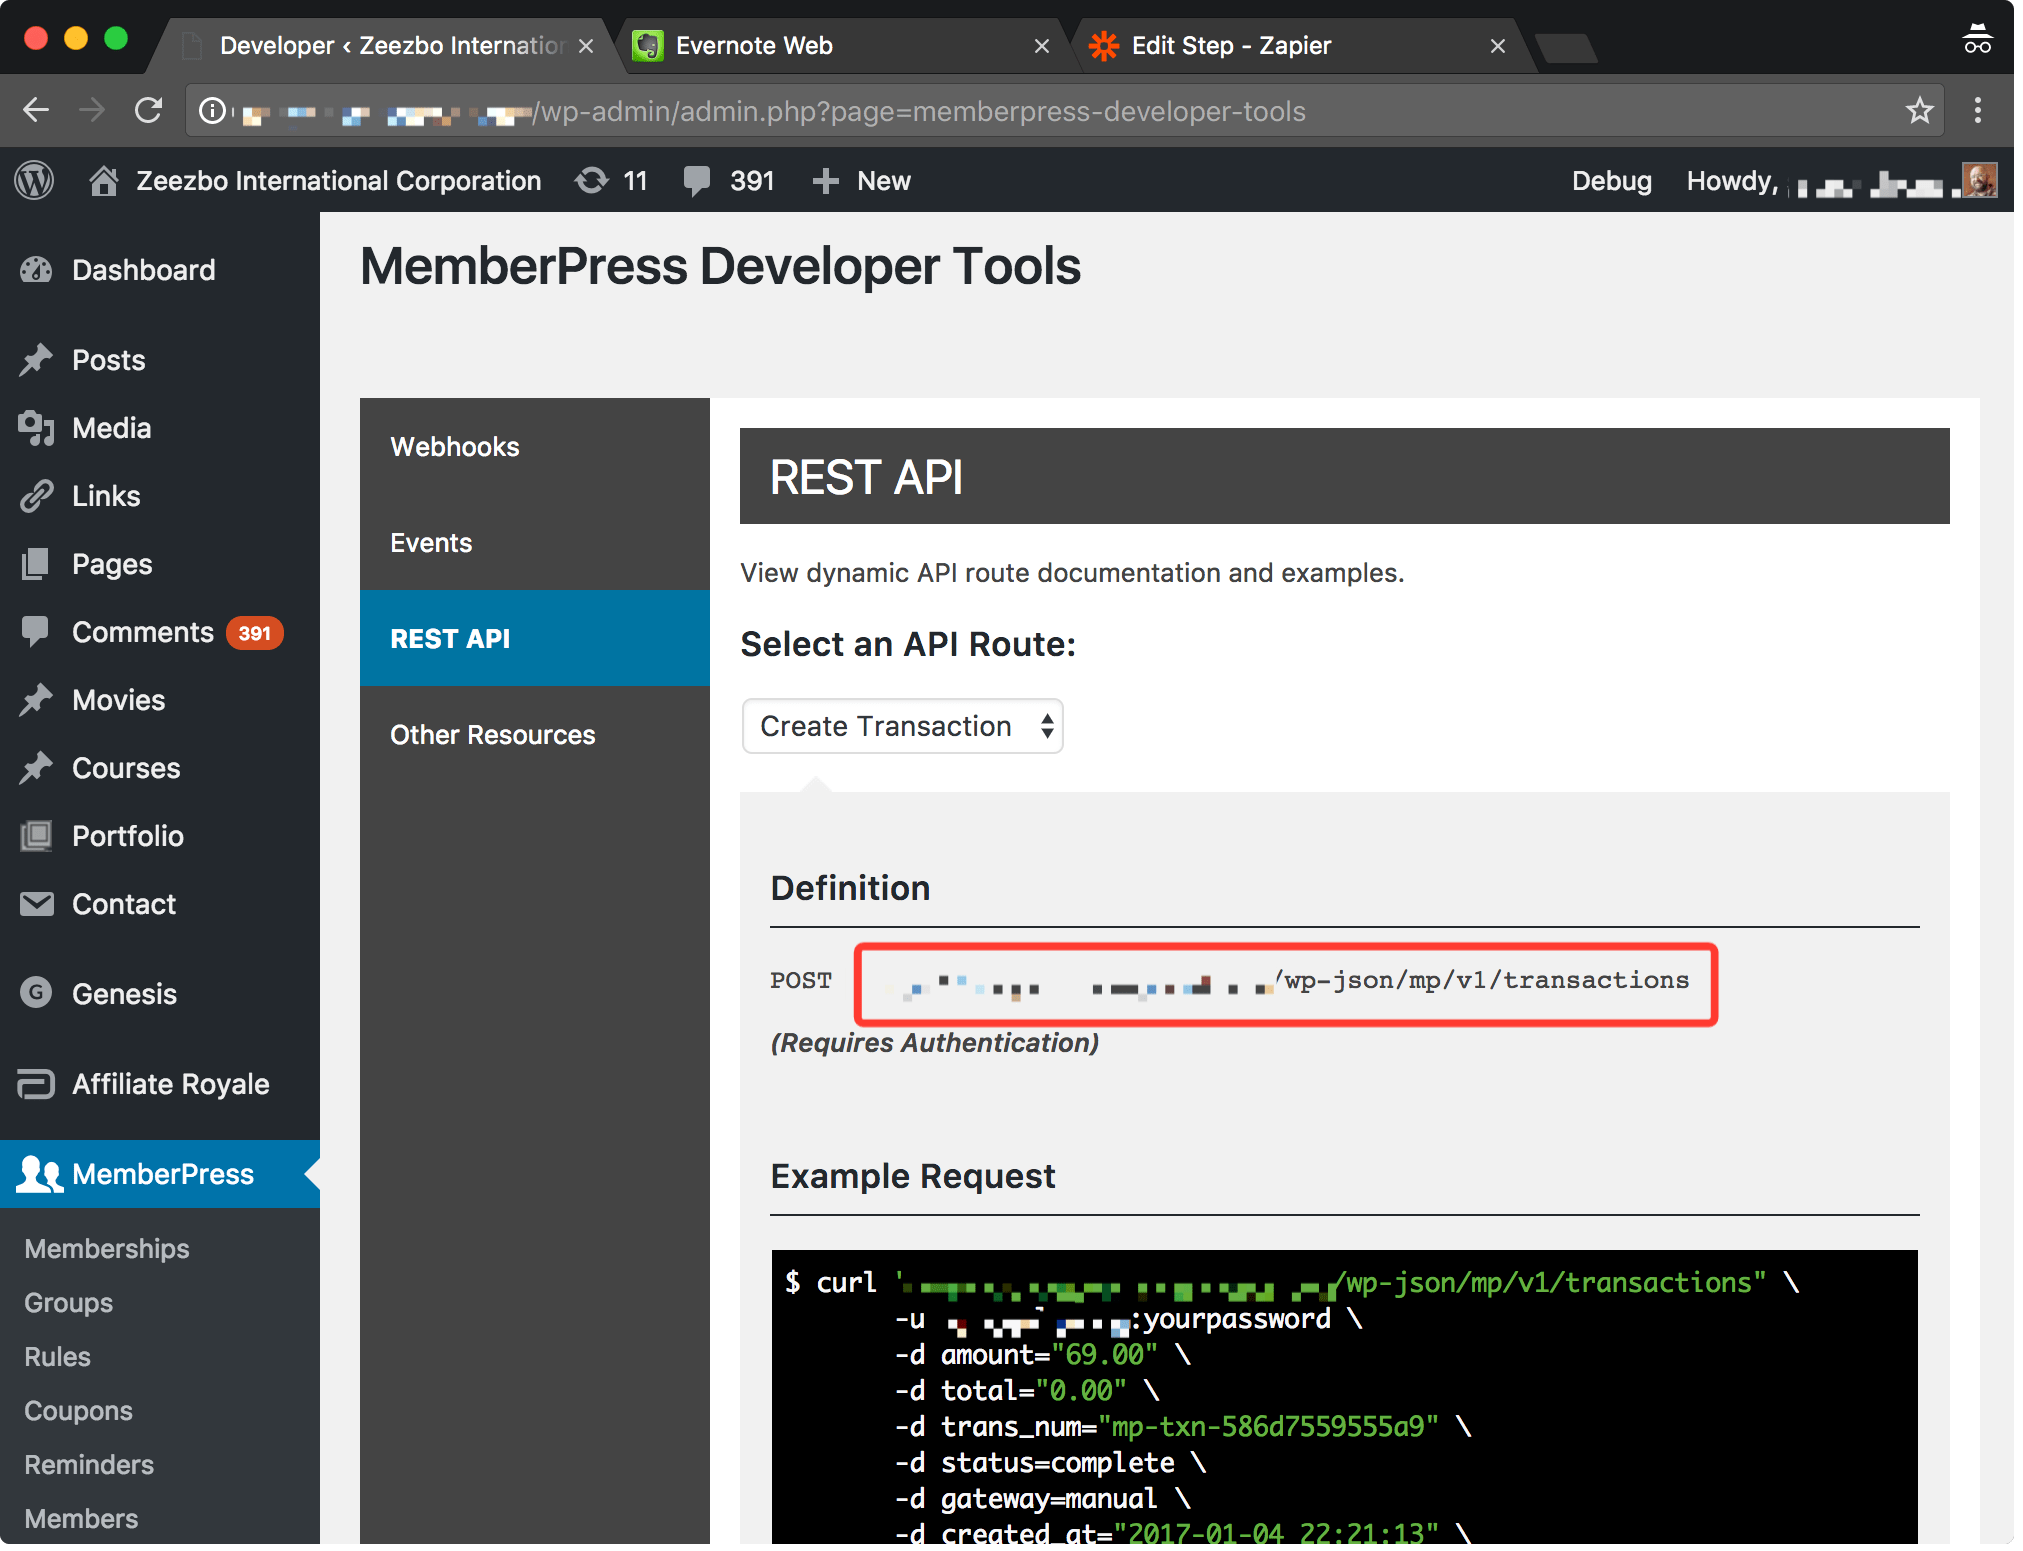
6. In your WordPress Admin visit “MemberPress” -> “Developer” -> “REST API” -> “Create Transaction” and copy the URL associated with it … you'll use it later in your Zap. Note: You can see all the required attributes on this page so if you're trying to do some other action with the MemberPress API you should be able to modify the instructions here to work with another API route.

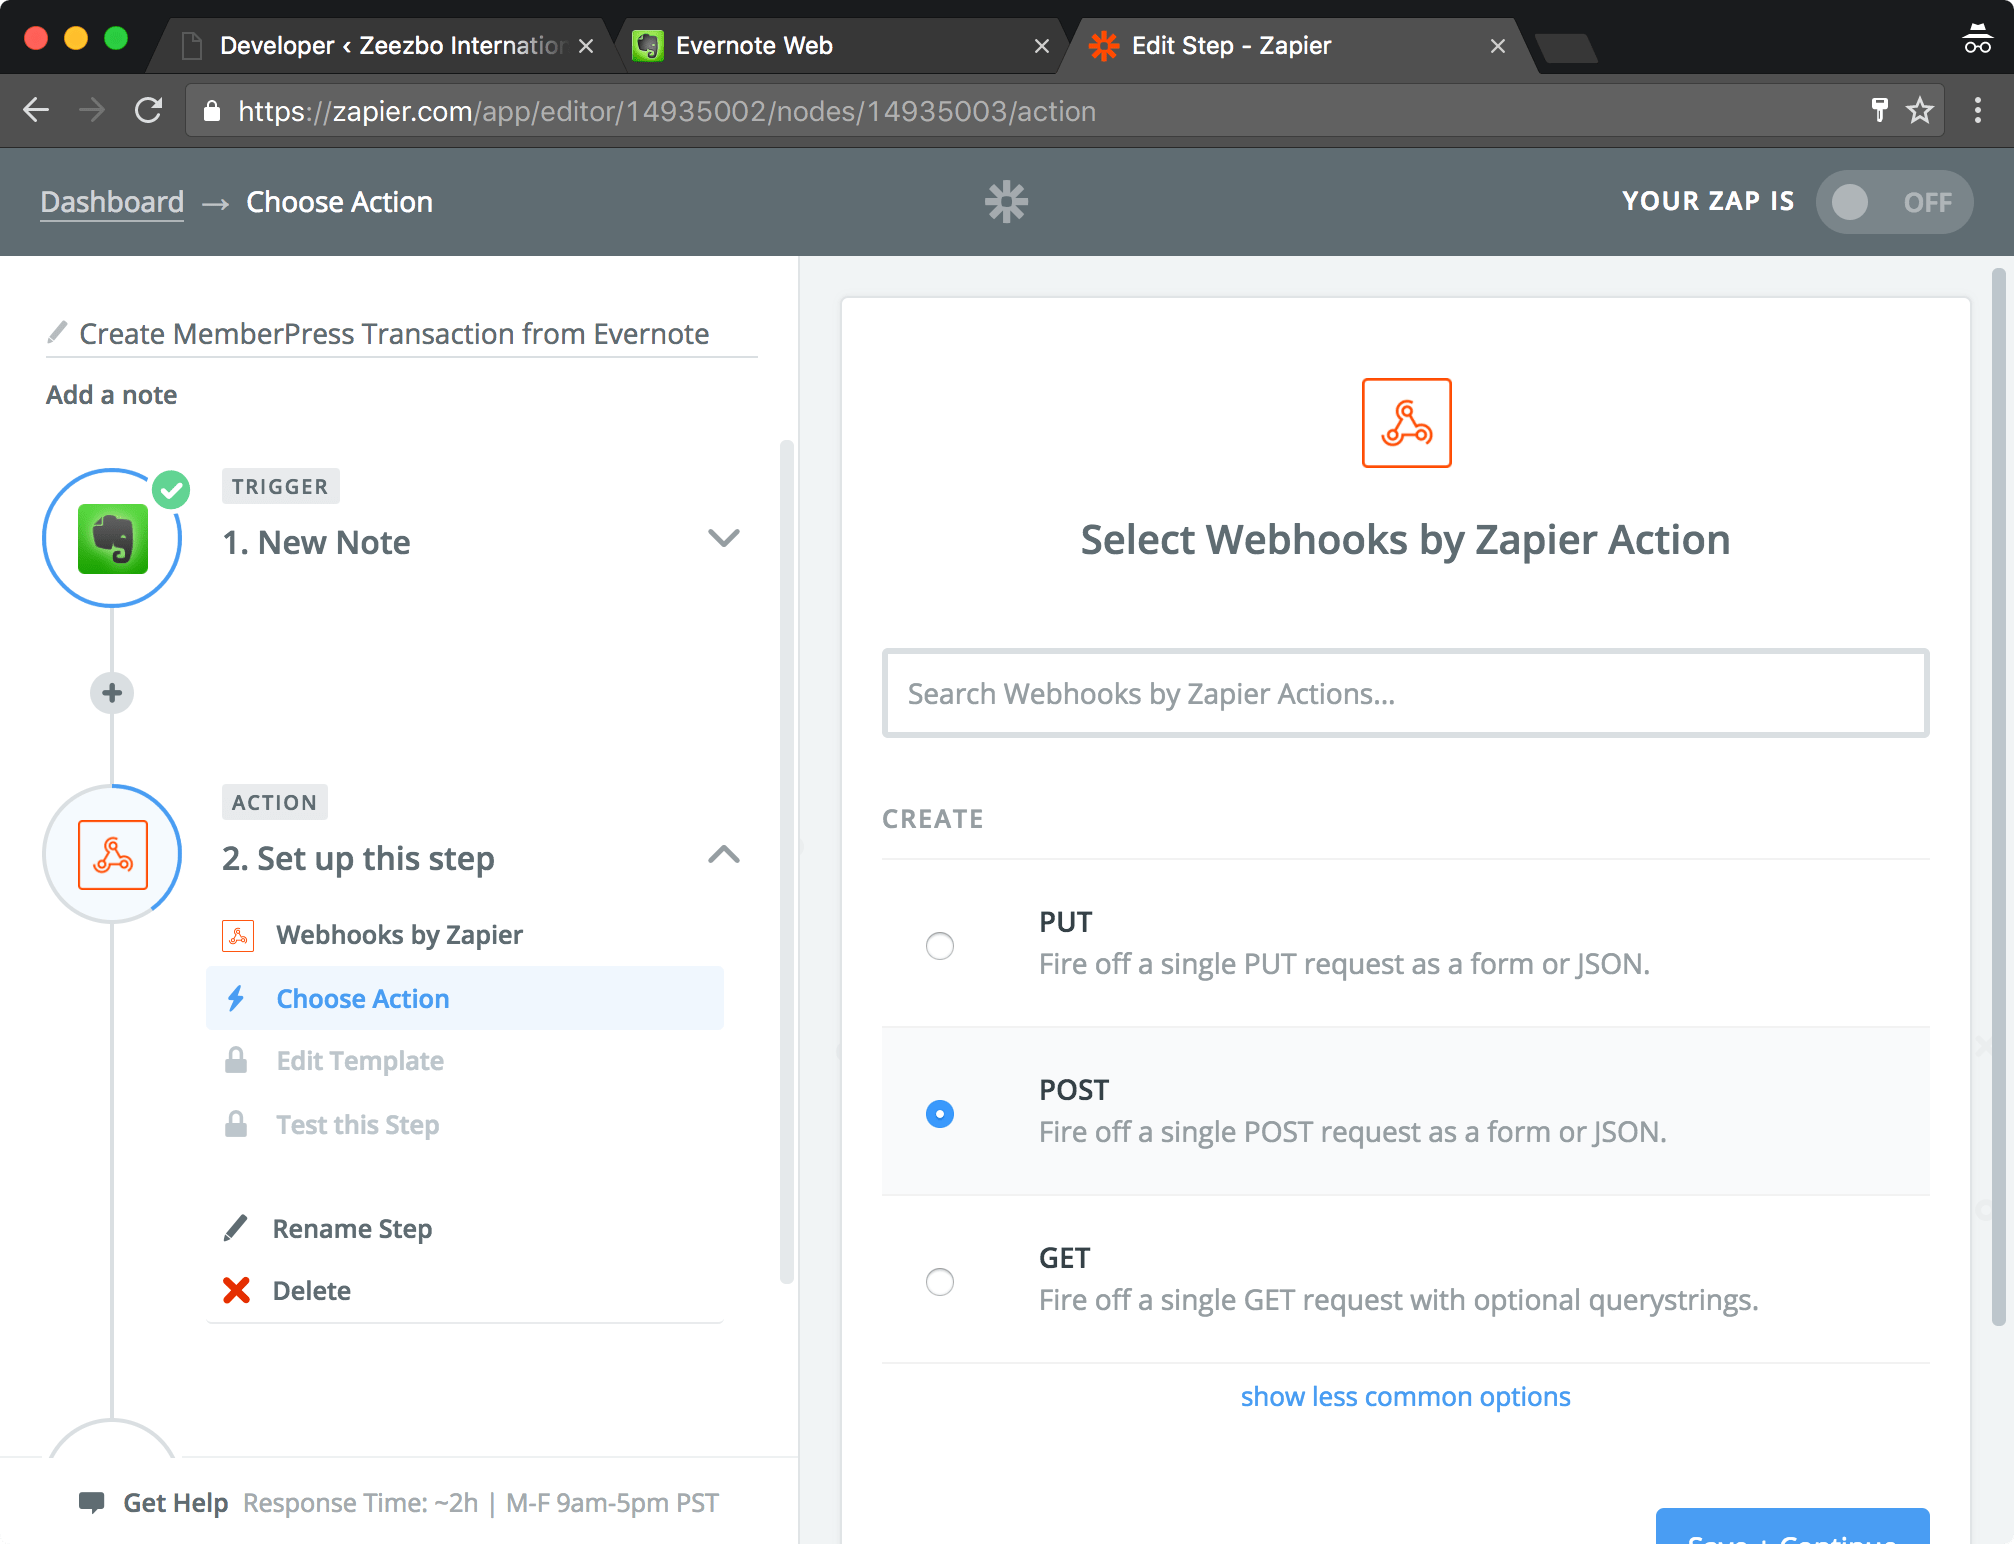
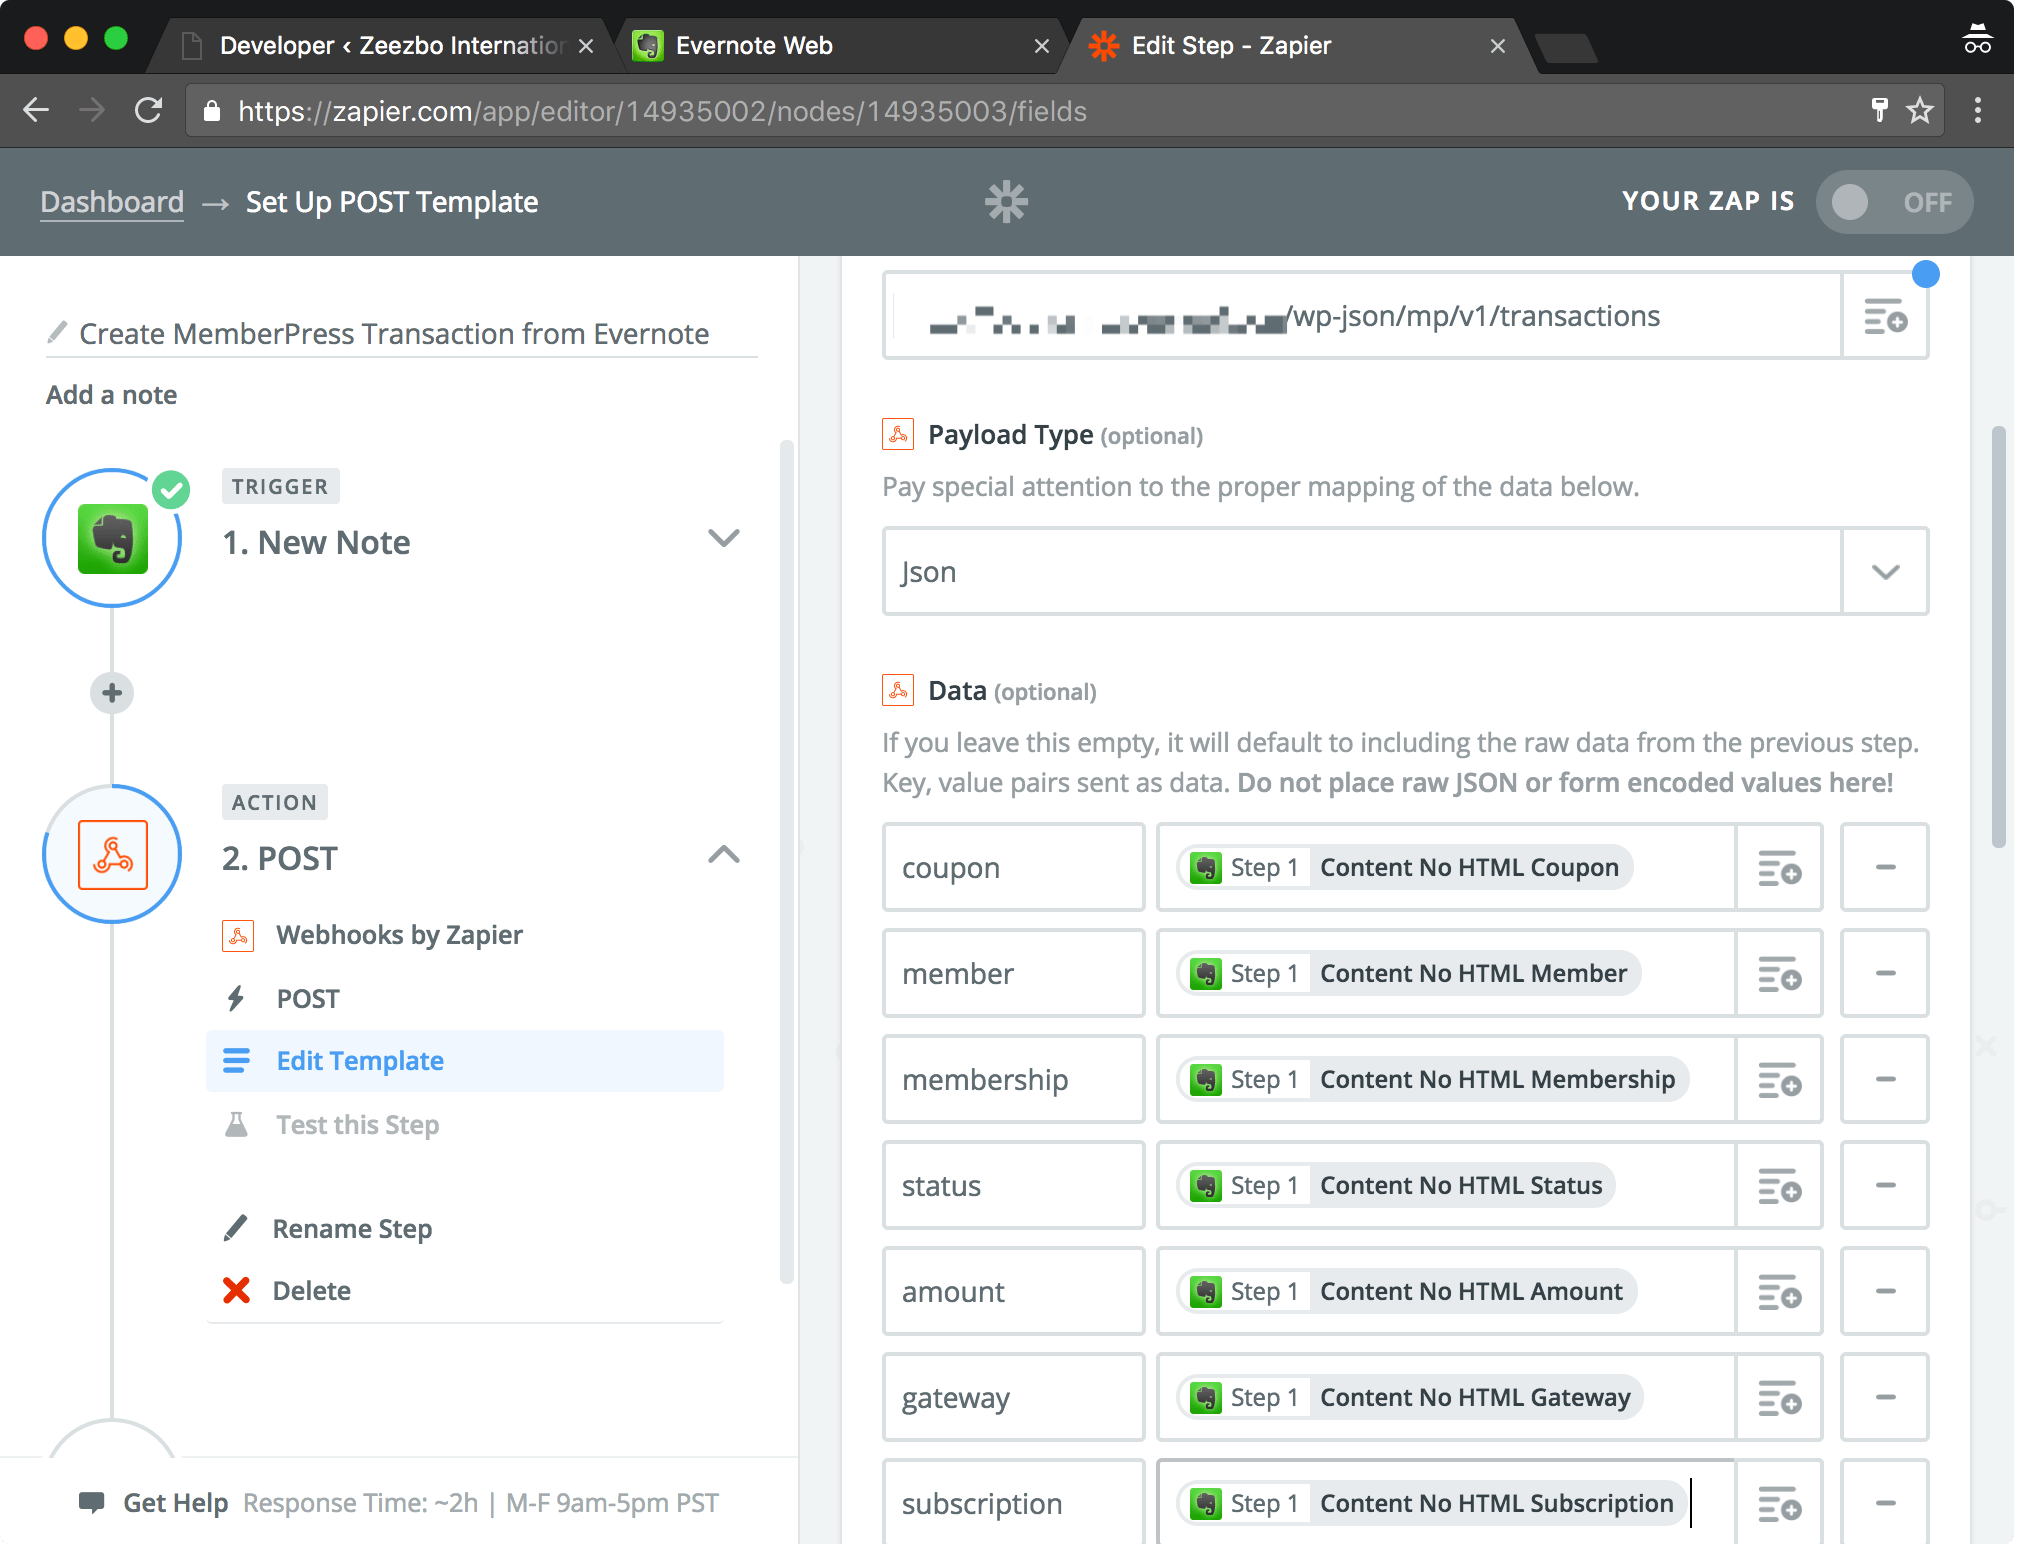
7. Now back at Zapier, select “Webhooks by Zapier” as your Action App. Because this is a POST route (which you could see in the Definition section on the page in step #6), you'll start by selecting “POST” then you'll set up the webhook with the following information:
- URL: This will be the URL that you copied in step #6
- Payload Type: ‘JSON'
- Data: You'll map the required fields for this API route to data pulled from Evernote here, see the second image below
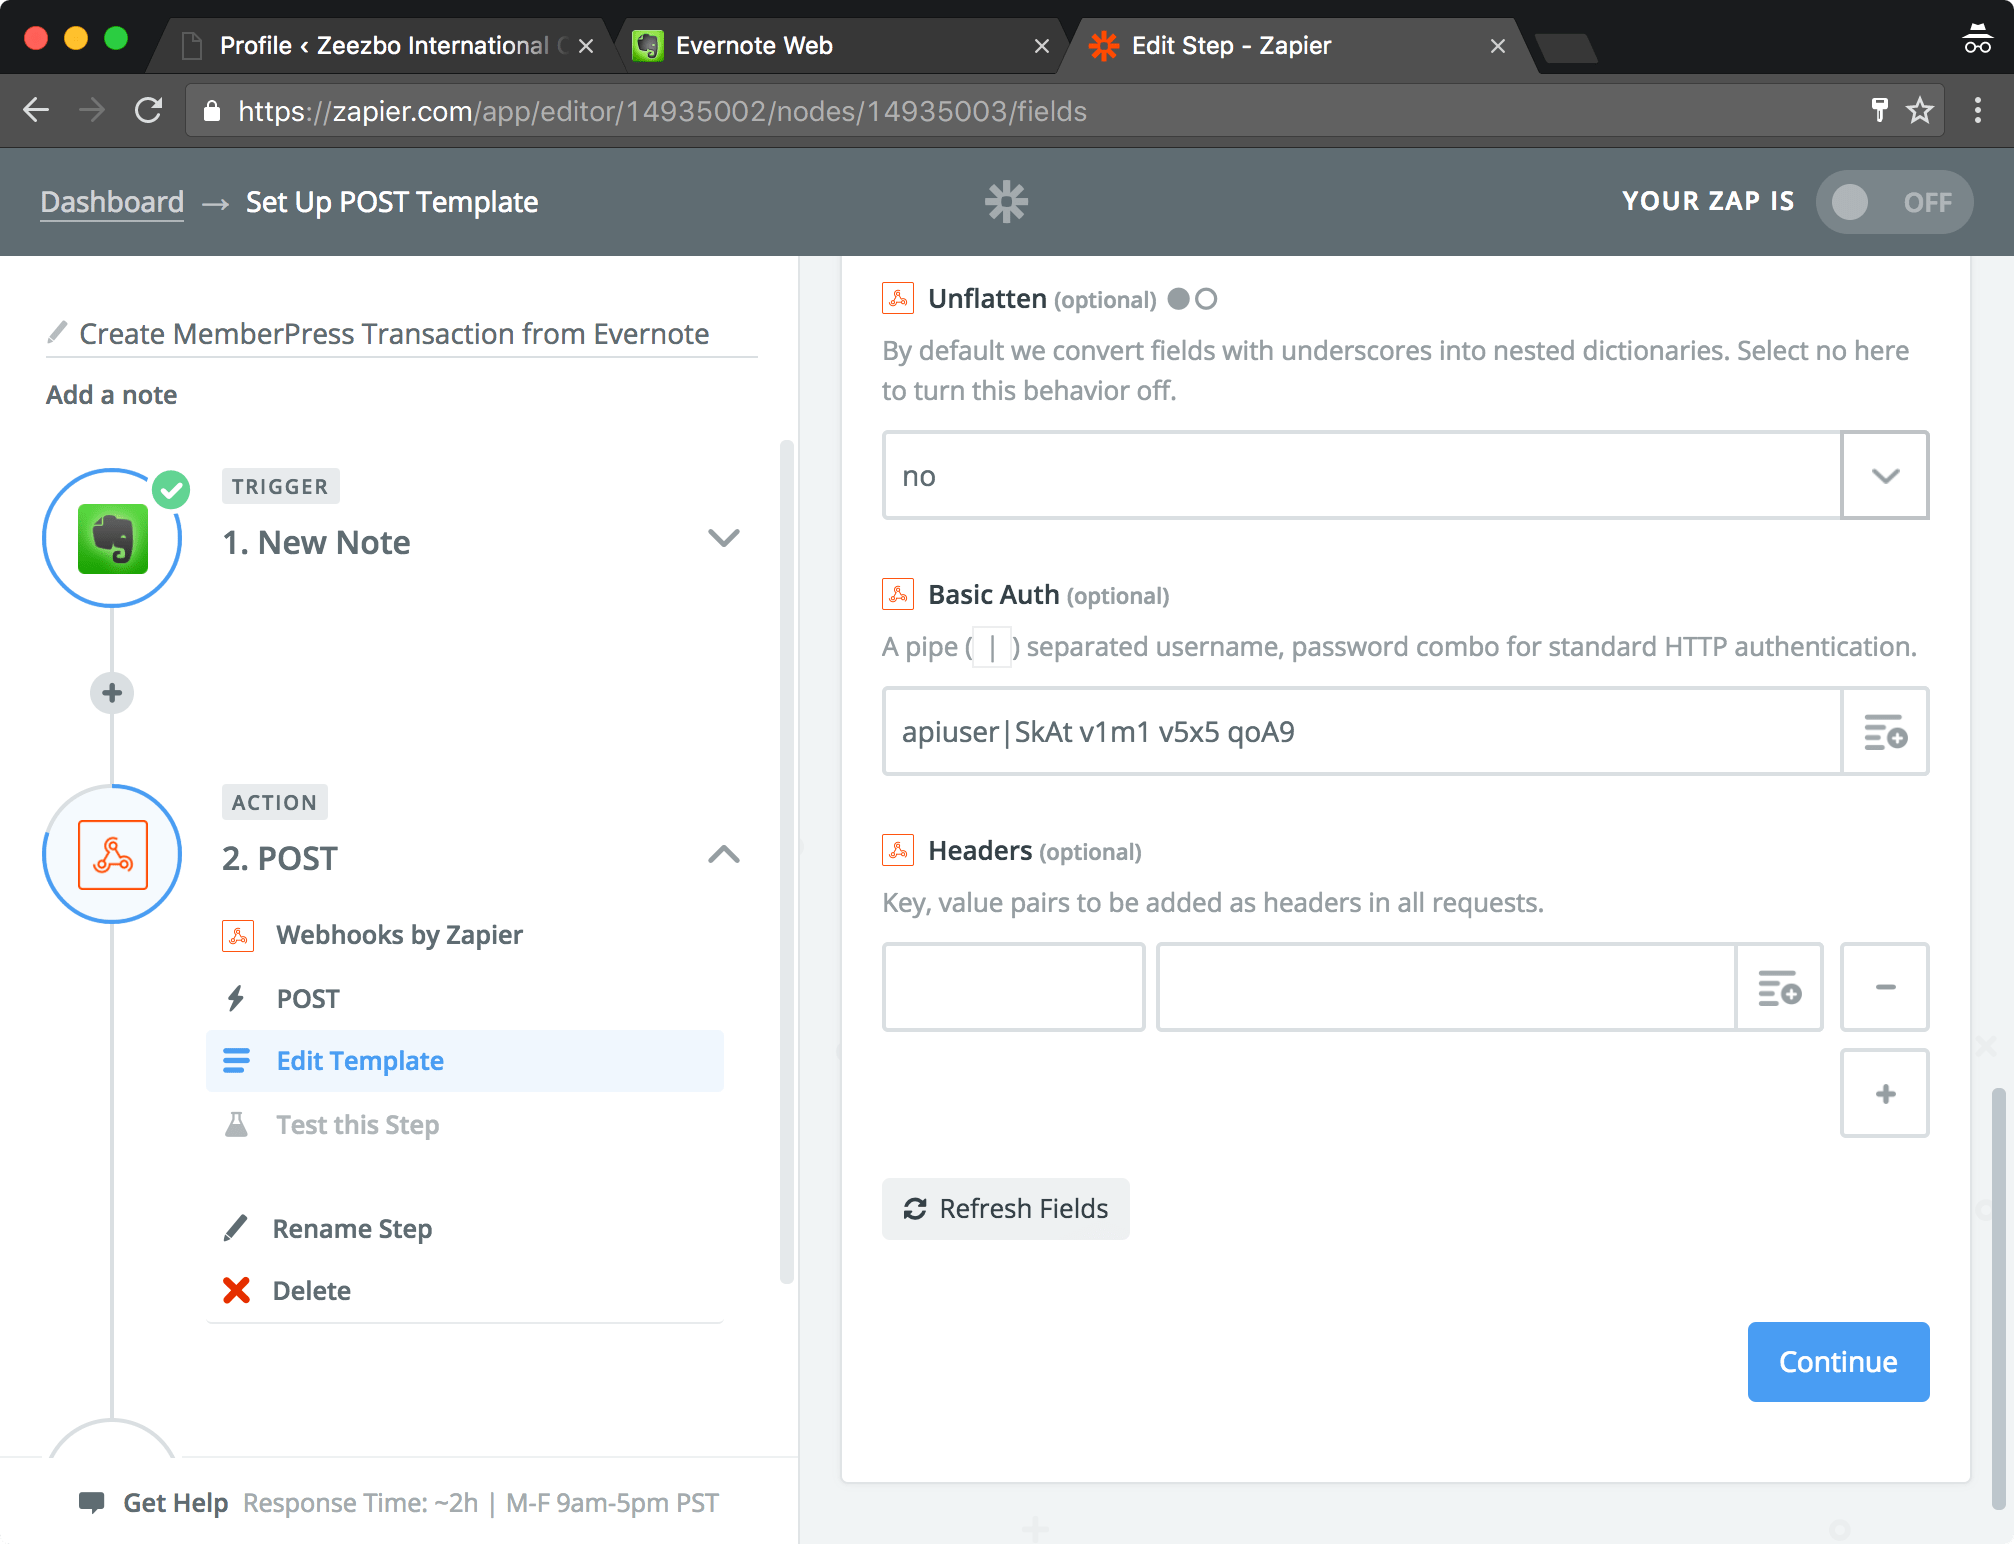
- Wrap Request In Array: ‘no'
- File: No need to add a file here
- Unflatten: ‘yes'
- Basic Auth: This is your username and the application password you generated in step 2 separated by a ‘|' character
- Headers: Nothing needs to be added here


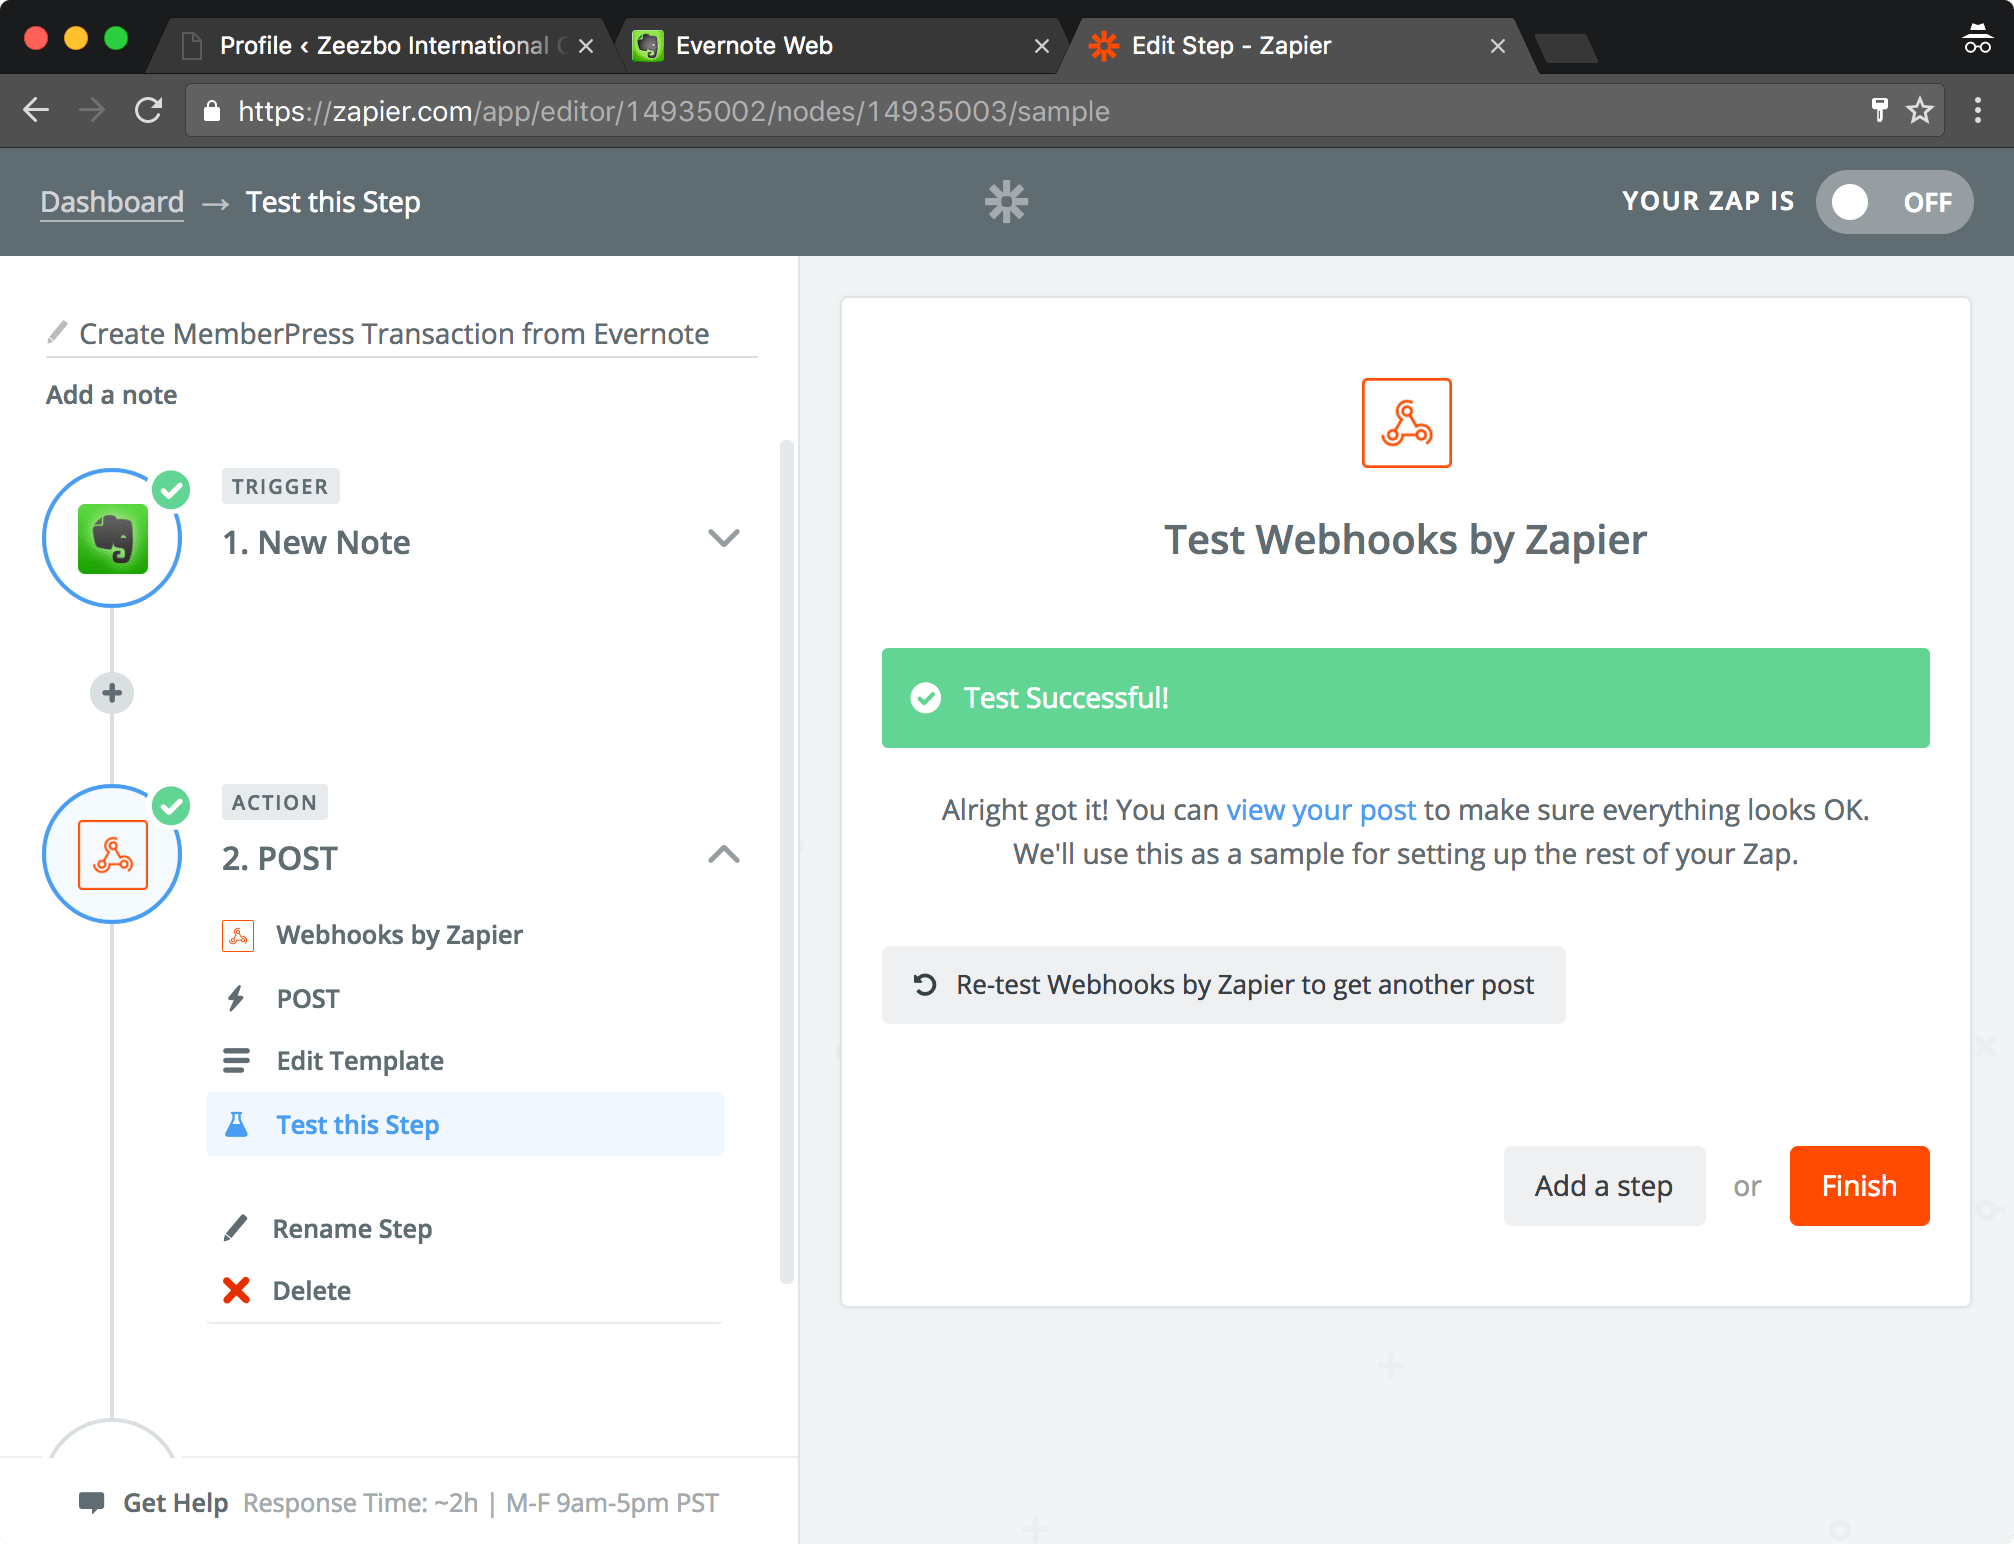
8. Now test this Zap by clicking “Create & Continue” … you should see that the test was successful in Zapier … and you should have a new transaction in MemberPress for your test.


And that is it. Once your Zap is active a new transaction will be created in MemberPress each time you create an Evernote note in the format from above.
Note:
If you are working with one of our endpoints that require data formatted as an array (such as the valid_memberships field in the Create Coupon endpoint) you'll need to modify your Zapier Webhooks Action's type to “Custom Request” like so:
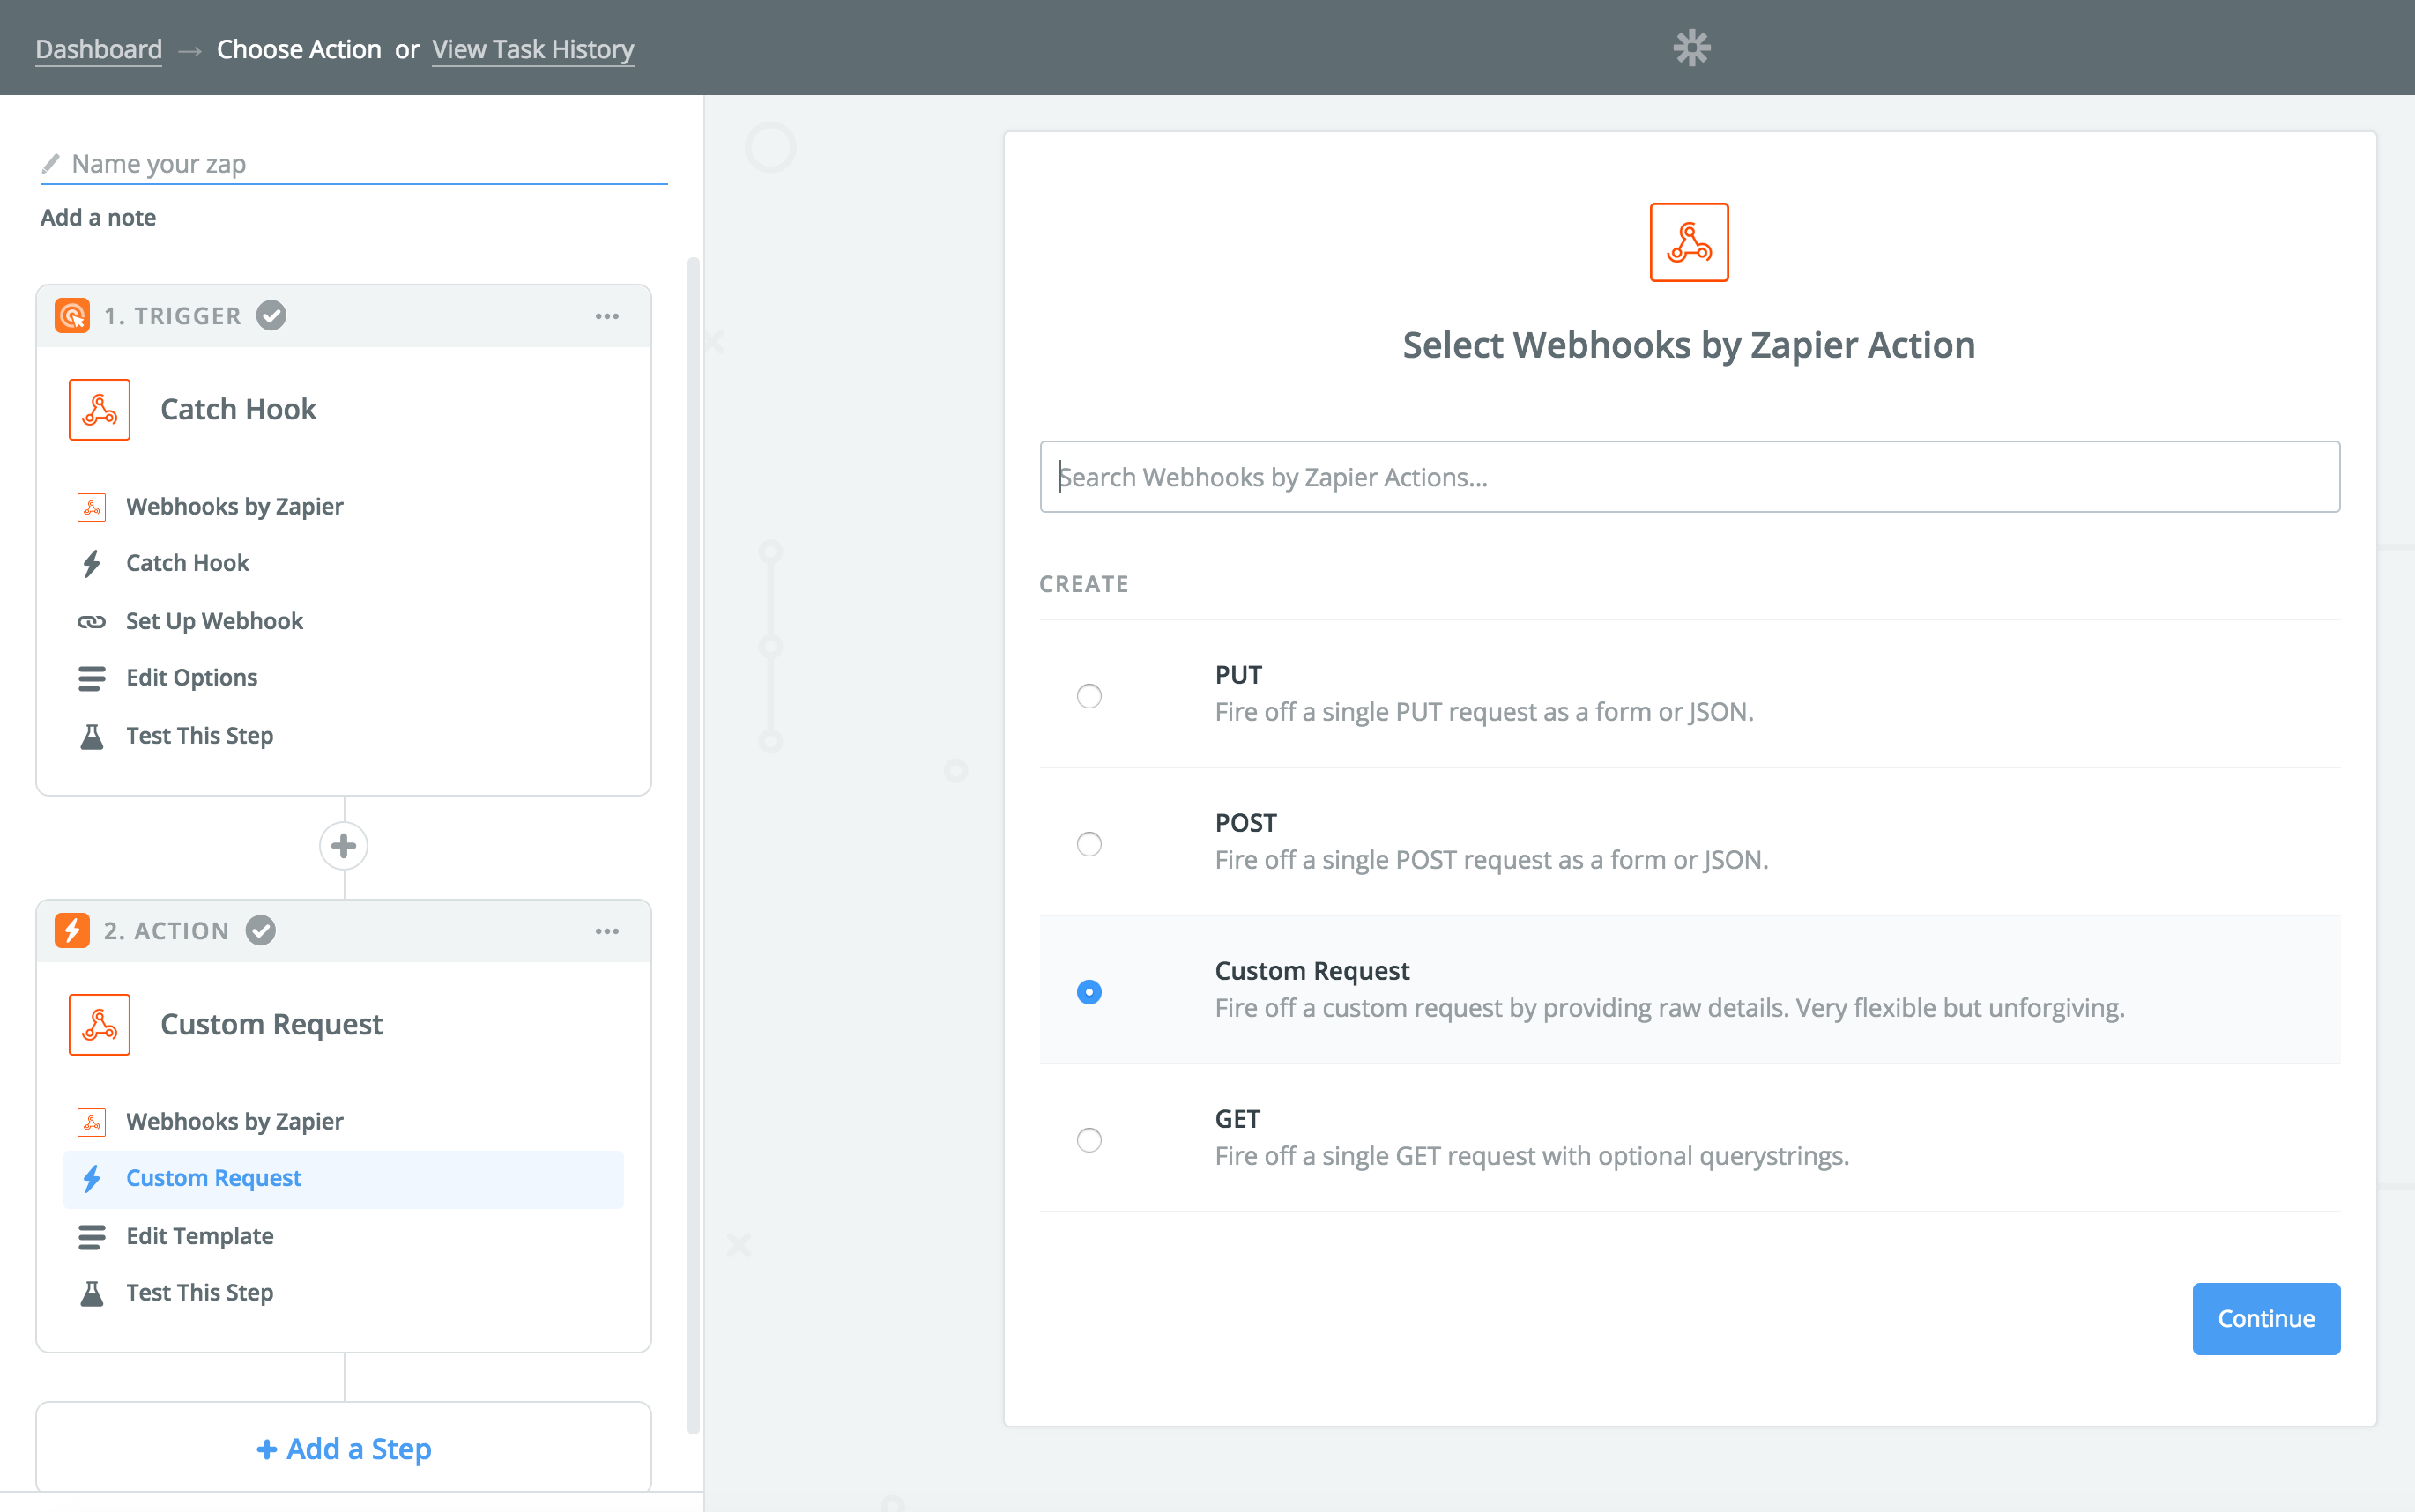
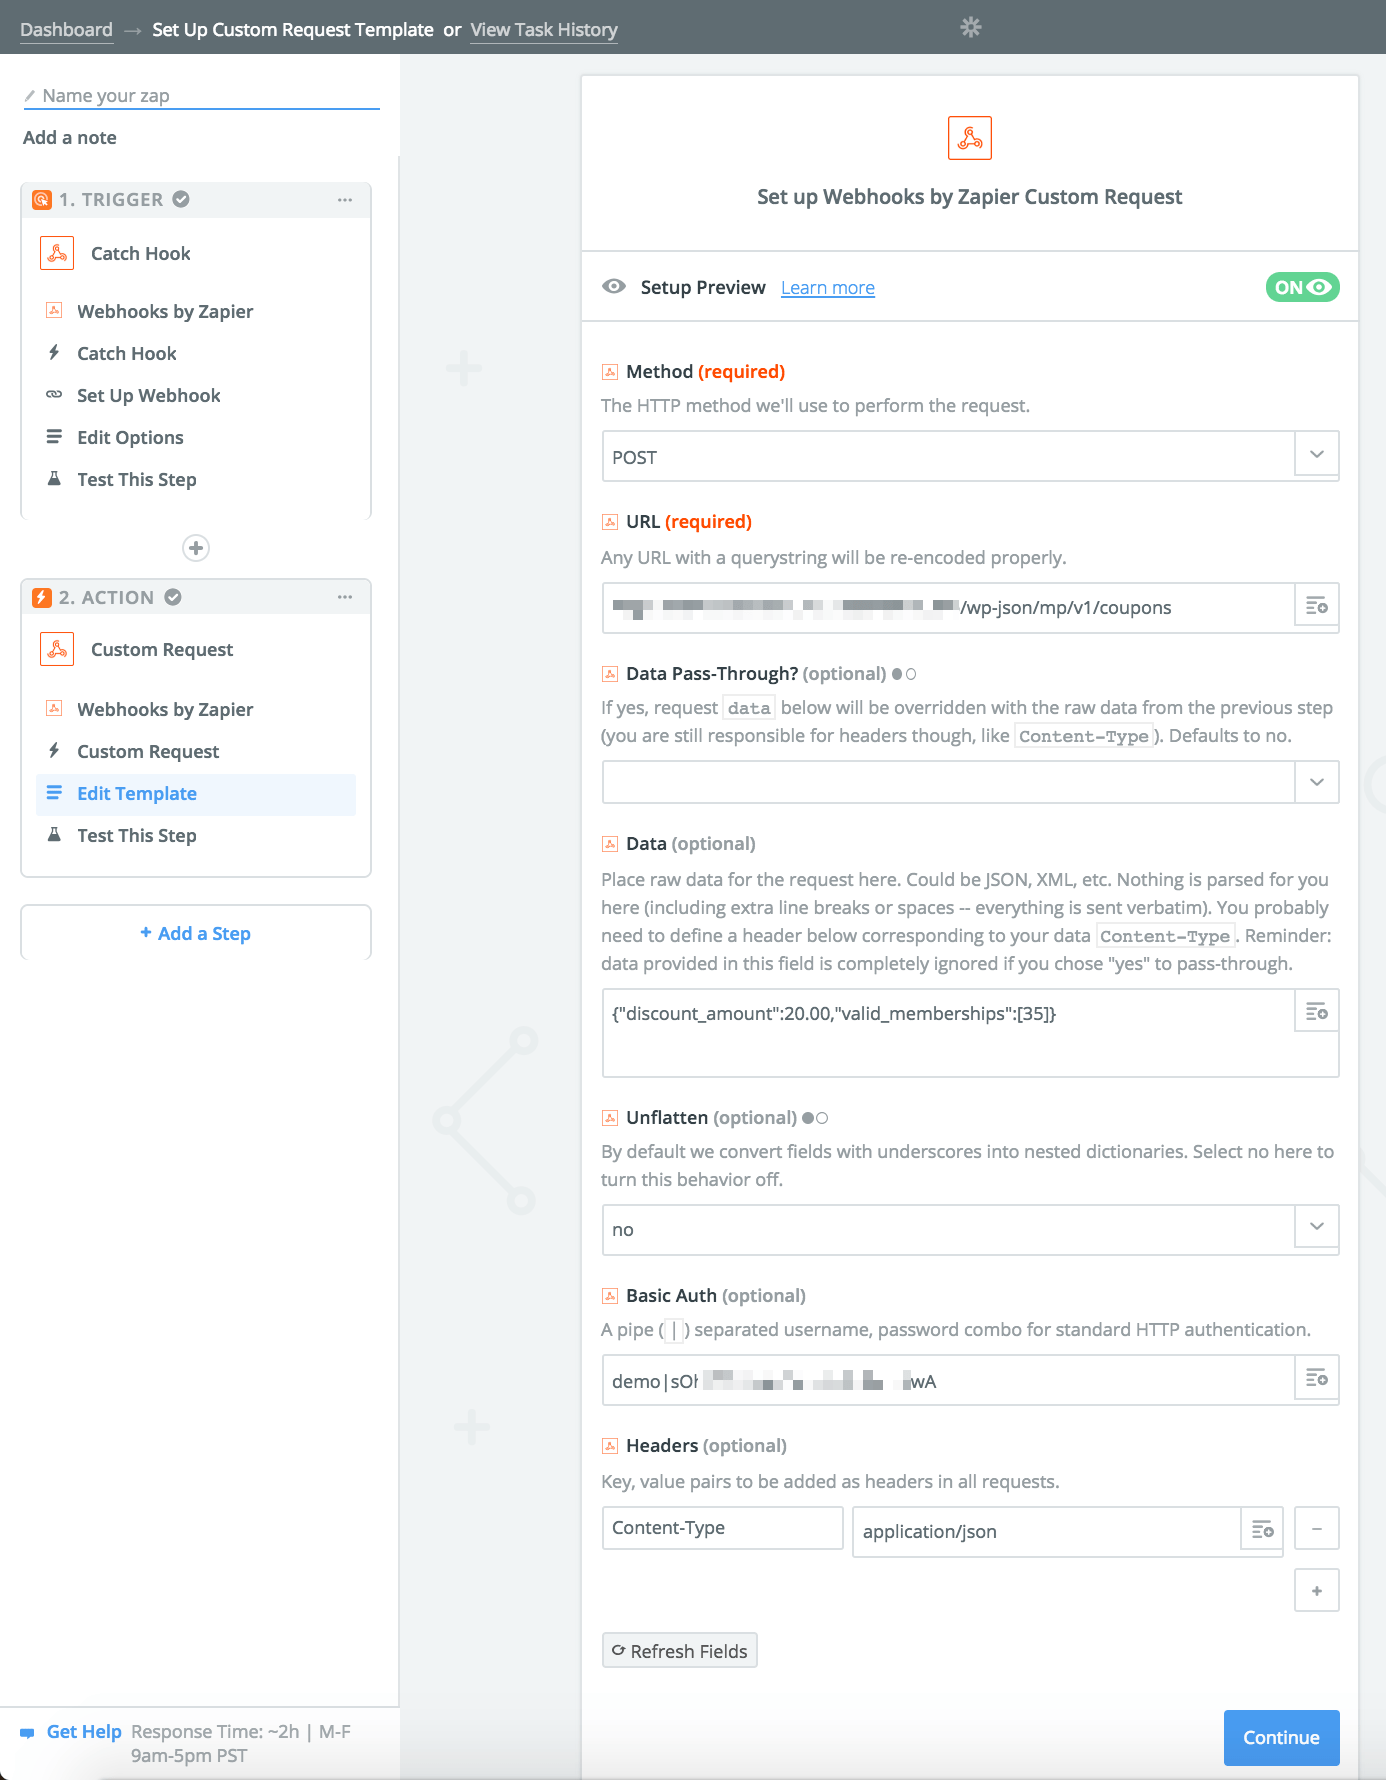
Then once you're using the Custom Request Webhooks Action you'll want to make sure you set the Content-Type header to application/json and you'll need to format the data as JSON. Here's an example of a Webhooks Action that Creates a Coupon:


