« Configuring the Marketing Tab
This add-on is included with your purchase of the Plus or Pro edition of MemberPress.
Step 1 – Install the ActiveCampaign Add-on
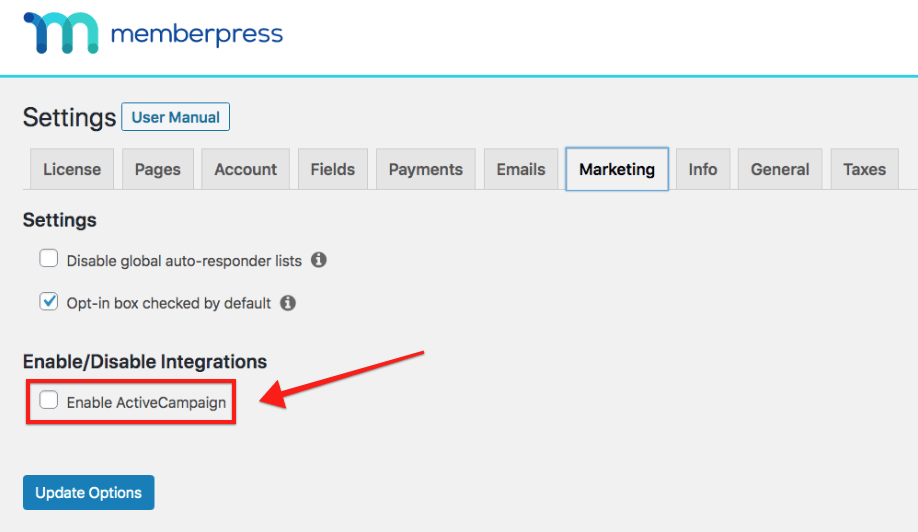
In your WordPress dashboard, head to MemberPress -> Add-ons, and click to install the ActiveCampaign (Lists Version) add-on. Once it's installed, it will be automatically activated. You'll then see the ActiveCampaign integration available in the “Marketing” tab of the MemberPress Settings page.
Step 2 – Get the ActiveCampaign Account ID
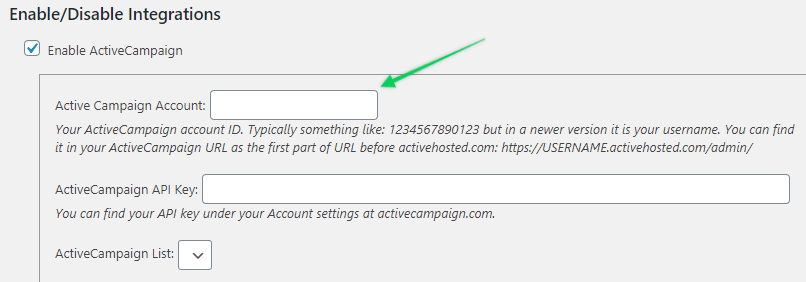
Login to ActiveCampaign.com to get your Account ID (it will look something like1234567890123). Then paste it into the ActiveCampaign Account field shown in the image below.

Enter the “Account name” value into the ActiveCampaign Account field.
Step 3 – Get the ActiveCampaign API Key
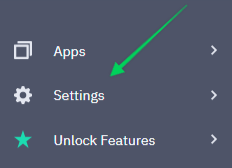
Login to ActiveCampaign.com, click on your profile to expand the menu list and click on Settings.
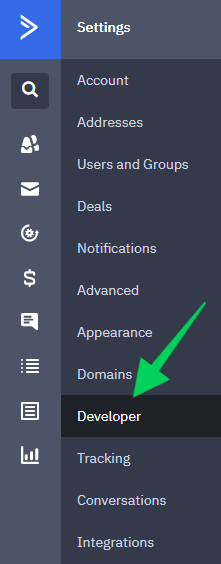
Then click on the Developer option to find your API Key.
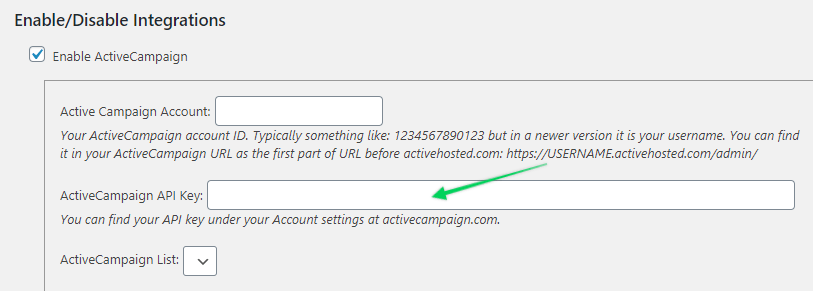
Step 4 – Paste the ActiveCampaign API Key in MemberPress
Copy The API Key from Step 2 into the ActiveCampaign API Key field, as shown below.
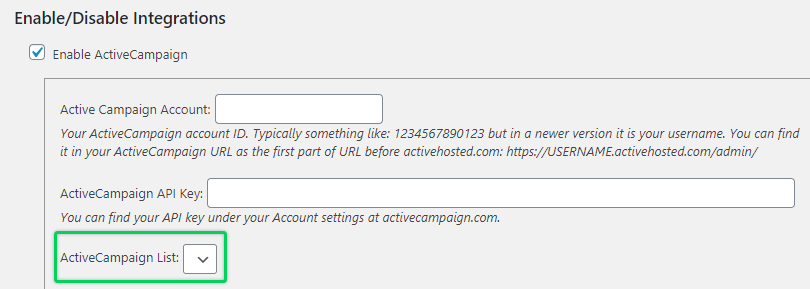
Step 5 – Select Your ActiveCampaign List
Once MemberPress has established a connection, select your ActiveCampaign List from the drop-down option. All users (paid or not) will be added to this list when they sign up.
Step 6 – Set Up Per-Membership Lists (Optional, but STRONGLY recommended)
The Per-Membership lists allow you to automatically segment your members into different lists for marketing purposes.
Once ActiveCampaign is enabled, a new option will appear under the “Advanced” tab of the Membership Options on the membership edit pages. This option allows you to specify a list to which only members who purchase that specific membership will be added. Members will be automatically added to or removed from this list depending on their current subscription status for that membership. This list must be different from the Global list you have specified in the Options AND should be different from other Per-Membership lists.
To enable and set up your Per-Membership lists:
- Go to MemberPress -> Membership tab -> and click edit on your membership
- Go to Membership Options -> Advanced tab -> and click the checkbox for the “Active Campaign list for this Product” option. With that checked, you will be able to select a list from a drop-down of lists in your ActiveCampaign account.
And you're done!
Now just configure MemberPress to use the correct campaign(s) as described on our Marketing page, and you're all set!
How to Send Custom Fields to ActiveCampaign
By default, MemberPress sends a user's email, first and last name, and updates global merge, and per-membership tags to ActiveCampaign. If you'd like to also send custom fields that you create in the MemberPress → Settings → Fields tab, you'll need to follow these steps:
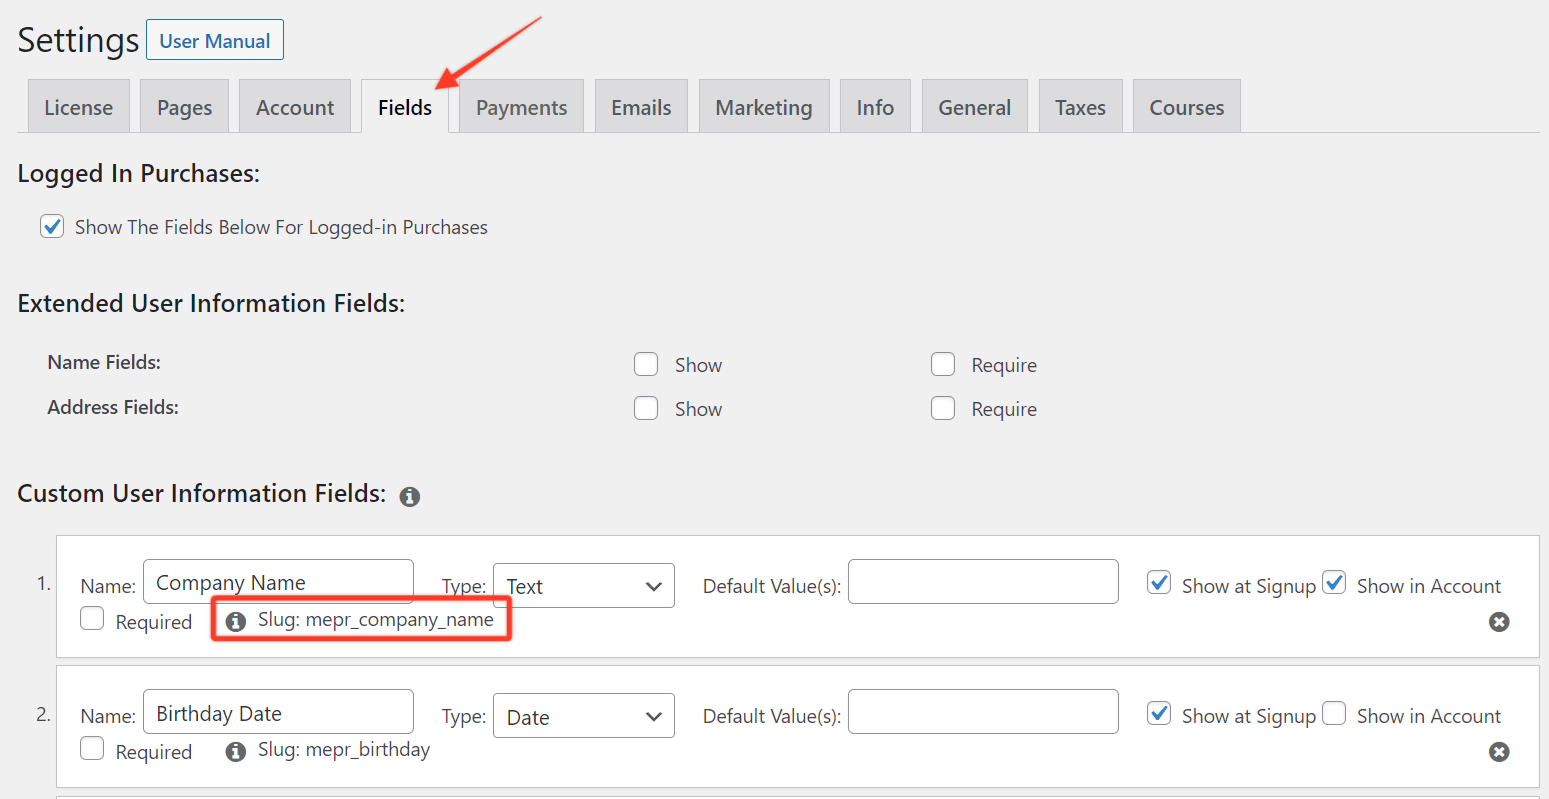
- Go to WordPress Dashboard → MemberPress → Settings → Fields tab and create a custom field as explained in the Creating Custom Fields section of this article (or just copy the slug of a custom field). In the example below, the slug is mepr_company_name.
Log into your ActiveCampaign account and click the Lists icon on the left → Manage Fields → Contacts tab.
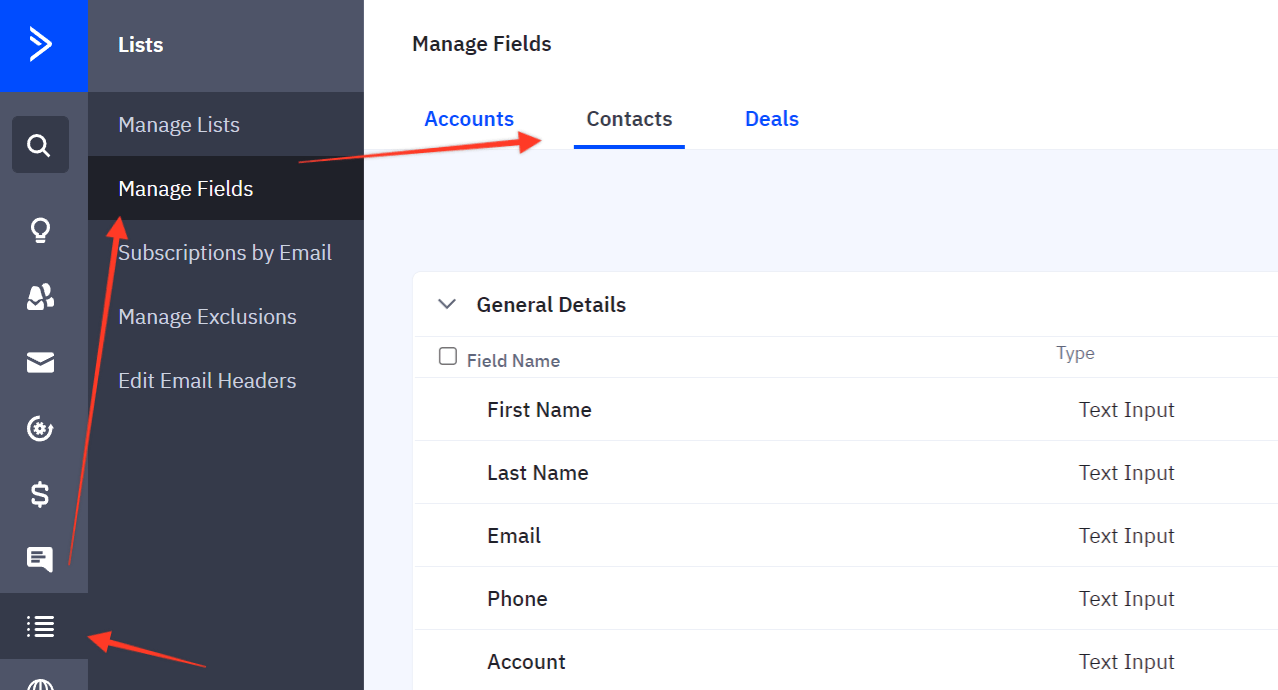
- Click the Add Field button at the top, and you should see the modal window where you can add your custom field to the ActiveCampaign list. In this example, we've inserted the Company field:
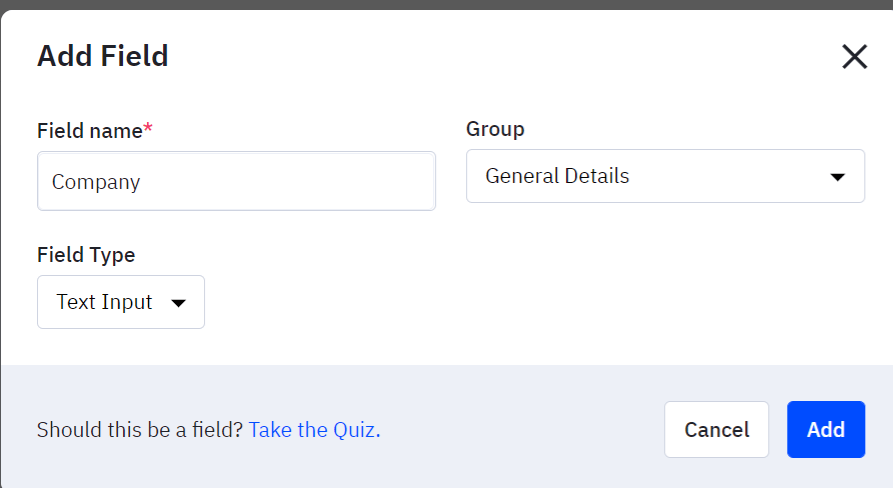
NOTE: Make sure that the Field Type of this field is “Text Input”.
Once the field is added, you'll need to copy the value in the Personalization Tag column:

Go back to your WordPress Dashboard, and insert the code below at the end of your theme's functions.php file. Alternatively, you can install the WPCode plugin and add the code there (please check this article for details: How to add custom code snippets in WPCode).
add_filter('mepr-activecampaign-add-subscriber-args', function($args, $contact) {
   if(isset($_POST['mepr_company_name'])) {
     $args['field[%COMPANY%,0]'] = sanitize_text_field($_POST['mepr_company_name']);
   }
   return $args;
}, 10, 2);
As you can see above, we've copied the personalized tag: %COMPANY% from ActiveCampaign and inserted it in the code.
When a user signs up for a membership, MemberPress will capture the value entered into the custom field and send it to ActiveCampaign. You'll see this value next to the new contact in the Contacts table of your ActiveCampaign account.

That's it. You can create as many custom fields as you'd like. Just duplicate lines 2-4 in the code above, replace the slug from MemberPress: mepr_company_name, and personalize the tag: %COMPANY%.
Sending a Phone Number
If you'd like to send a phone number to ActiveCampaign, just use the default phone field provided by ActiveCampaign. Create a custom field in MemberPress, and insert the code below (you do not need to create a custom field on the ActiveCampaign side):
add_filter('mepr-activecampaign-add-subscriber-args', function($args, $contact) {
  if(isset($_POST['mepr_phone'])) {
    $args['phone'] = sanitize_text_field($_POST['mepr_phone']);
  }
  return $args;
}, 10, 2);
I'm Confused. Help!
Shoot us an email from our support page if you need any further assistance with this integration.


