Can You Feel the Power?
Every major internet browser that you use has what is called a set of Developer Tools. This includes Google Chrome, Safari, Firefox and Internet Explorer. So, with all of those options it makes it really easy to utilize a set of Developer Tools to accomplish some pretty cool things! On this page I'll be using the Developer Tools of Google Chrome that is accessed by right clicking > Inspect (for a brief overview of the Chrome DevTools click here). Below are some basic points as to what you can accomplish with your browser's developer tools and when they may become useful to you.
Check console errors to find out why something may not be working right on your site.
If you're finding that content on your page isn't loading right or something seems ‘off', then having the ability to check any local errors that may be happening when loading a page is essential. To start, you'll want to open the Developer Tools in your browser and navigate to the Console tab. Once there, enable the option to “Preserve log” near the top under the main tabs and hit refresh if no information is showing.
After you've done that, any error messages will appear. If you are unsure as to what an error message might mean or how to address it then it will be worth your time to read this article here. If you're still unsure how to proceed, then please send us a screen shot of what you're seeing with a brief explanation of what's not working in a support ticket.
Adjust or edit your CSS styling and see how it'll affect your site before saving the edits in your theme or plugin.
If you don't like how your theme or MemberPress is displaying its CSS Styling, or if it isn't showing up right, then WordPress makes it pretty easy to edit that with a third party plugin. We recommend that you use the Simple Custom CSS Plugin, but there are other options out there as well if you just do a simple search for custom css WordPress plugins. The idea with these types of plugins is that you can create any custom CSS, paste it into the plugin and it will be applied. If you can narrow the CSS down to your theme, then most themes have a place where you can add custom CSS, so ask your theme developer about that if you're unsure where to find it.
For this example, let's say that I would like the titles for the fields on my MemberPress registration form to be a little bigger than what they are here:
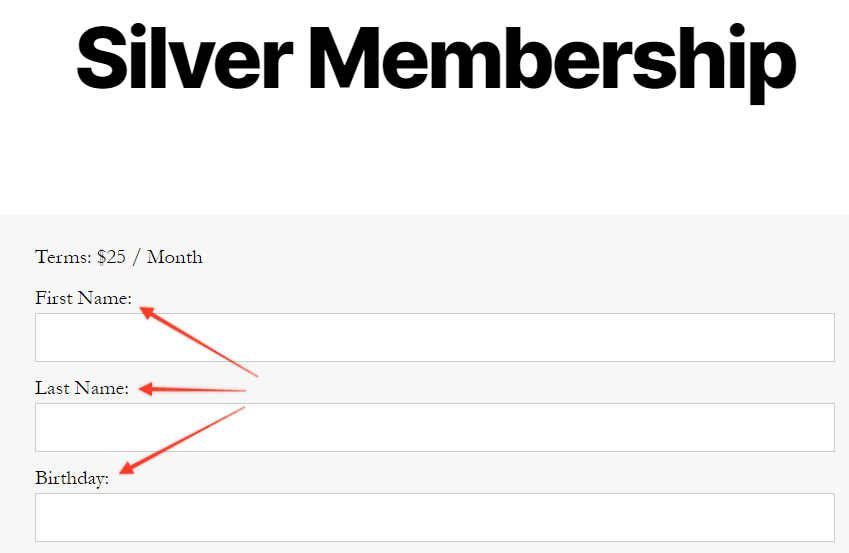
The easiest way to approach this is to right click directly on the thing you are wanting to edit. So if I right click on one of those titles and then click inspect element it will look like this:

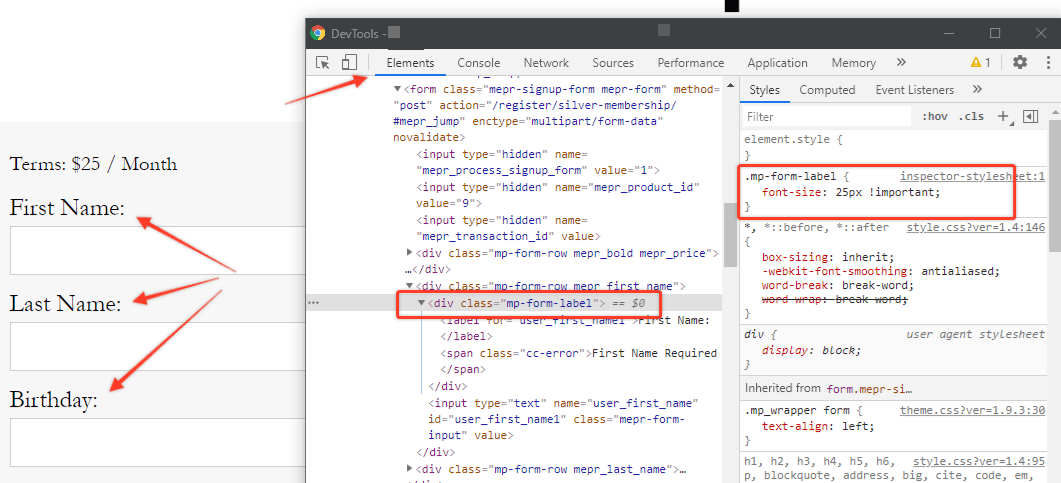
You'll notice that when I did that, the grey highlighted section in the developer tools is what is directly related to that form label. Here we are looking for the div class, which will tell us what the CSS class is that is being called and used to display the text. When I hover over the div class it will highlight in blue the particular item that it is affecting, so this is a good way to verify that you're getting the right class. The class for this is mp-form-label and while in this article we won't discuss too much the details of how CSS works (but if you would like to learn more about CSS, here is a good place to start), just know that for this example to make the text bigger I would need to enter this into the CSS Custom Manager Plugin:

A couple a key things to note here are that you need to make sure to start each class with a “.” (dot), wrap the styling with “{}” (braces), and it's always good practice to include an !important variable. The reason why you may need to include the !important variable is because more often than not when adding custom CSS you'll be overriding existing CSS, and that should ensure that your custom CSS is displayed instead. Here is what that edit would look like:
Check what server your content is being loaded over when it's not loading correctly.
Sometimes you'll find that one particular part of your site isn't loading correctly, like files that are being protected with custom URI rules. This is generally caused when the content is being loaded by a server other than Apache, like NGINX which is a common problem causer. To verify this, what you'll need to do is open the Developer Tools and then go to the Network tab. If you see nothing, then you may need to refresh the page, but otherwise you'll see a list of all the file locations that were used to load the page. Scroll down until you find the file location that is pulling the content that isn't loading correctly (you'll usually know which one it is because it will have some type of error code on the status) and click on the link. This will pull up various information including the status code, but here you'll want to look under the heading “Response Headers” like what you can see here:
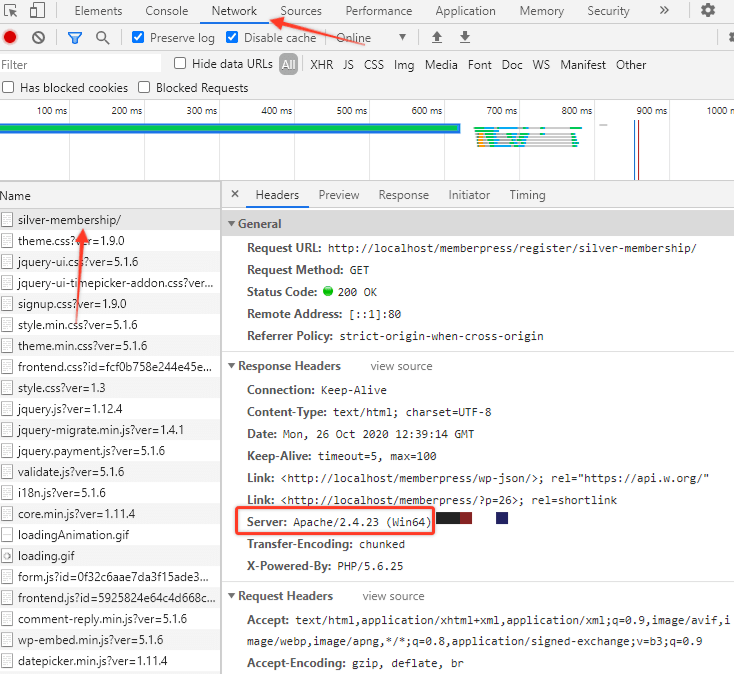
Here you will notice that the content was loaded over Apache, but again, if it's something else and you're having an issue, you'll need to make a change. Specifically, you need to contact your host server and see if they can pass requests for those file types on to Apache for handling instead of NGINX.


